
Installation Guide
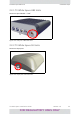
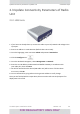
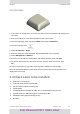
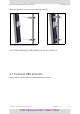
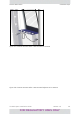
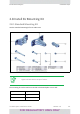


Table Of Contents
- Installation Guide
- Table of Contents
- Chapter 1: Introduction
- Chapter 2: Installation Steps
- 2.1 Prepare Laptop
- 2.2 Connect Laptop to Radio Unit
- 2.3 Update Connectivity Parameters of Radio Unit
- 2.4 Check items to be installed
- 2.5 Prepare Tools
- 2.6 Mount the HBS
- 2.7 Connect HBS antenna
- 2.8 Install SU Mounting Kit
- 2.9 Mounting the SU
- 2.10 Ground Radio Unit
- 2.11 Mounting the Lightning Protection Units
- 2.12 Waterproofing
- 2.13 Connect Radio (External Connections)
- 2.14 Check Connectivity to Radio
- 2.15 Request (and receive) permitted frequencies
- 2.16 Activate HBS
- 2.17 Align SU Unit
- Chapter 3: Safety Practices and Provisions
- Appendix A: Wiring Specifications
- Appendix B: About Antennas
- Appendix C: Terminology
- Appendix D: Certified Antennas
- RADWIN Worldwide Offices

TVWhiteSpaceInstallationGuide Release1.0 2‐5
SUUnits InstallationSteps
2.3.2SUUnits
1. Ifyouhavenotalreadydoneso,connecttheradiotoyourPC/networkandvoltageviaits
inputport.
2. EnteritsIPaddressinawebbrowser(defaultvalue:10.0.0.120).
3. Fromtheloginpage,enterusernameadminandpasswordnetwireless.
4. ClicktheConfigureicon
5. SelectAirInterface‐>Radio
6. EntertheSectorID,andifapplicable,ChannelBandwidth,thenclickSave.
7. SelectManagement‐>Network
8. EnterthenewIPAddress,SubnetMask,andDefaultGateway,thenclickSave.
9. Youwillbewarnedthatthedevicewillbereset.Ifallthevaluesarecorrect,click
OK.
10.Fromacommandline,pingradiounitusingnewIPa
ddresstoverifychange.
Onceyouarefinishedwiththestepsabove,disconnecttheradiounitandprepareitfor
deploymentinthefield.
2.4Checkitemstobeinstalled
• Radiounit+mountingkit
• 2LPUsforeachradio(recommended)
• PoE(ifoutdoor,requiresmountingkit)
• CAT‐5ecables
• Groundingcables(10AWG)forradiounit,LPUsandoutdoorPoE(ifused)
• Externalantenna+HBSmountingkit(ifinstallinganHBS)
• Standardmountingkit(ifinstallinganSU)
• RFcables
FOR REGULATORY USES ONLY