
User manual
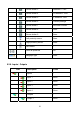
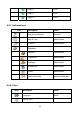

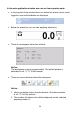
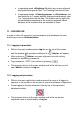

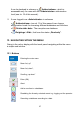

Table Of Contents
- 1. INTENDED USE
- 2. PRECAUTIONARY MEASURES
- 3. WARRANTY CONDITIONS
- 4. UNPACKING AND MOUNTING
- 5. CONSTRUCTION
- 6. GETTING STARTED
- 7. KEYPAD OVERLAY
- 8. FUNCTIONS OF KEYS
- 9. PROGRAM STRUCTURE
- 10. INDICATING WINDOW
- 11. LOGGING ON
- 12. NAVIGATING WITHIN THE MENU
- 13. WEIGHING
- 14. SCALE PARAMETERS
- 15. COMMUNICATION
- 16. DEVICES
- 17. DISPLAY
- 18. INPUTS / OUTPUTS
- 19. AUTHORIZATION
- 20. OTHER PARAMETERS
- 21. CUSTOMER CALIBRATION
- 22. SPECIAL FUNCTIONS OF WORKING MODES
- 23. WORK MODE - WEIGHING
- 24. WORKING MODES – COUNTING PIECES
- 25. WORKING MODES – DEVIATIONS
- 26. WORKING MODES – COMPARATOR
- 27. DATABASES
- 28. COMMUNICATION PROTOCOL
- 28.1. General information
- 28.2. Inventory of RS commands
- 28.3. Respond message format
- 28.4. Command’s description
- 28.4.1. Zeroing
- 28.4.2. Tarring
- 28.4.3. Get tare value
- 28.4.4. Set tare value
- 28.4.5. Send the stable result in basic unit
- 28.4.6. Send the result immediately in basic unit
- 28.4.7. Send the stable result in current unit
- 28.4.8. Send the result immediately in current unit
- 28.4.9. Switch on continuous transmission in basic unit
- 28.4.10. Switch off continuous transmission in basic unit
- 28.4.11. Switch on continuous transmission in current unit
- 28.4.12. Switch off continuous transmission in current unit
- 28.4.13. Set lower threshold
- 28.4.14. Set upper threshold
- 28.4.15. Read lower threshold
- 28.4.16. Read upper threshold
- 28.4.17. Send all implemented commands
- 28.5. Manual printouts / automatic printouts
- 29. CONNECTING EXTERNAL DEVICES
- 30. DIAGRAMS OF CONNECTION CABLES
- 31. TECHNICAL PARAMETERS
- 32. ERROR MESSAGES
- 33. ADDITIONAL EQUIPMENT
- 34. APPENDIX A – Variables for printouts
- 35. APPENDIX B – Functions of programmable buttons
- 36. APPENDIX C – Label pattern
- 37. APPENDIX D - CITIZEN printer setting
- 38. APPENDIX E - ZEBRA printer setting
- 39. APPENDIX F - Communication with barcode scanners
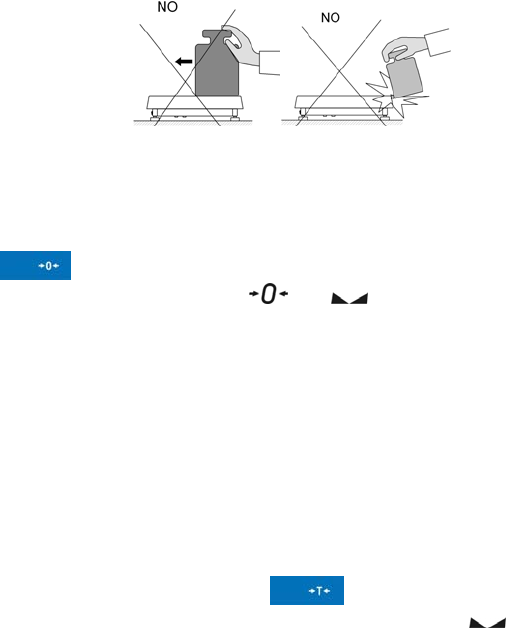
• Avoid side loads, particularly side strokes:
13.2. Zeroing
In order to zero the indication choose a platform on the touch panel and
press
. After zeroing is performed the indication is equal zero and
following symbols usually appear:
and .
Zeroing is possible only when the indication is stable.
Notice:
Zeroing is possible only within ±2% of full range around zero. If the
zeroed value is beyond the interval of ±2%, Err2 is displayed.
13.3. Tarring
In order to tare the scale choose a platform on the touch panel if necessary,
put a package on the pan and press
. You will see the indication
equal zero and following symbols usually appear:: Net and
.
After placing a load on the weight pan net mass will be shown. Tarring is
possible within the whole range of the scale. After unloading the pan the
display shows the tarred value with minus sign.
You can also inscribe tare values to the assortment database. Every product
has a field “Tare”. In that case tare is automatically set to this value after
selecting the product.
Notice:
Tarring cannot be performer when a negative or zero value is being
displayed. In such case Err3 appears on the display.
30