
Installation guide
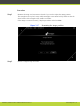
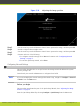
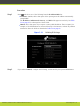

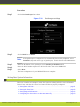
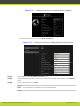
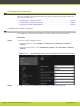

Figure 5-18 Adjusting the image position
Step 3
Use the arrow keys on the XT Remote Control Unit to position the image, and then press OK.
Step 4
Press 2 to align the bottom right corner.
Step 5
Use the arrow keys on the XT Remote Control Unit to position the image, and then press OK.
Step 6
Continue with one of the following:
•
To configure network settings, select Next and continue with “Configuring Network
Settings” on page 57.
•
To exit the quick setup wizard, select Close.
Configuring Network Settings
This procedure describes how to set up the network settings and the IP address the system
uses for placing a call.
Consult with your network administrator to configure these fields.
Note
If you are modifying the network settings after initial setup, navigate to Configure > Network
> GLAN 1 from the Main menu.
Before you begin
This procedure is performed as part of the Quick Setup Wizard, after “Adjusting the Image
Position” on page 55.
Start the Quick Setup Wizard by selecting Configure > Quick Setup from the Main menu.
RADVISION | Installation Guide for SCOPIA XT5000 Series Version 3.1 Initial Configuration | 57