
Installation guide

Step 2
Locate the option key in the letter. Locate the serial number on the XT Codec Unit or the
user code you received with the purchase.
You can also retrieve the user code and serial number by selecting Configure > About from
the Main menu.
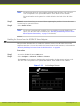
Step 3
On a computer, open a browser and navigate to http://www.radvision.com/XT5000.
Step 4
Complete the online registration form and enter the serial number or the user code and the
option key. The Web registration form returns a license key.
Step 5
Write down the license key and keep it in a safe place for future use.
Step 6
Use the license key to enable the software or the option you bought. For details, see:
•
“Remotely Enabling the License from the Web Interface” on page 49
•
“Enabling the License from the SCOPIA XT Series Endpoint” on page 51
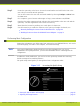
Performing Basic Configuration
During this configuration you define some basic settings for your SCOPIA XT Series, such as the
system's language, the name of this endpoint, and network settings.
Note
Your system administrator might already have set these parameters for you. If your
administrator set up PIN protection, you need the PIN number before continuing with the
configuration.
In addition to fresh installations, you need to use the quick setup wizard after restoring
default settings and re-installing software.
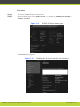
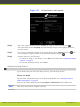
The quick setup wizard guides you through these basic configuration tasks:
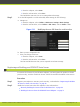
Figure 5-15 Accessing the Quick Setup
•
Setting the System Name and Language................................................. page 54
•
Adjusting the Image Position.............................................................. page 55
RADVISION | Installation Guide for SCOPIA XT5000 Series Version 3.1 Initial Configuration | 53