
Installation guide


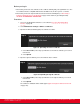
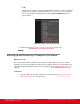
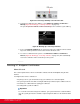
Table Of Contents
- Installation Guide for Scopia XT5000 Endpoint with Embedded Server for IP Office Version 3.2
- Table of Contents
- Chapter 1: About the Scopia XT Endpoint for IP Office
- Chapter 2: Installation Workflow for Scopia XT Endpoint for IP Office
- Chapter 3: Planning the Topology of the Scopia XT Endpoint for IP Office Deployment
- About the Scopia XT Endpoint for IP Office Embedded MCU
- Planning the Topology of Scopia XT Endpoint for IP Office with Scopia XT Desktop
- Planning NAT and Firewall Traversal with Scopia XT Endpoint for IP Office
- Supporting ISDN Connectivity
- Implementing External API Control
- Implementing Port Security for the Scopia XT Endpoint for IP Office
- Chapter 4: Prerequisites for Setting up the System
- Chapter 5: Setting up the Scopia XT Endpoint for IP Office
- Mounting the XT Codec Unit
- Connecting Scopia XT Endpoint for IP Office to Your Network
- Connecting a Computer to the Scopia XT Endpoint for IP Office
- Selecting the Computer Display Resolution
- Connecting Audio Equipment to the Scopia XT Endpoint for IP Office
- Connecting the Video Equipment to the Scopia XT Endpoint for IP Office
- Connecting the Primary XT Premium Camera
- Connecting the Optional USB Camera
- Connecting the Optional XT Premium Camera
- Connecting Cameras for Controlling the Optional XT Premium Camera with the XT Remote Control Unit
- Connecting the Optional Scopia XT Camera Switch
- Connecting a DVD or Blu-ray Player
- Connecting Analog Video Equipment
- Installing the Batteries of the XT Remote Control Unit
- Chapter 6: Initial Configuration
- How to Control the XT Endpoint
- Registering and Enabling your Scopia XT Endpoint for IP Office license
- Performing Basic Configuration
- Registering the XT Endpoint to IP Office
- Setting Basic System Information
- Configuring Video Connections
- Configuring Audio Connections
- Configuring Network Settings
- Chapter 7: Securing your Scopia XT Endpoint for IP Office
- Chapter 8: Troubleshooting the Scopia XT Endpoint for IP Office
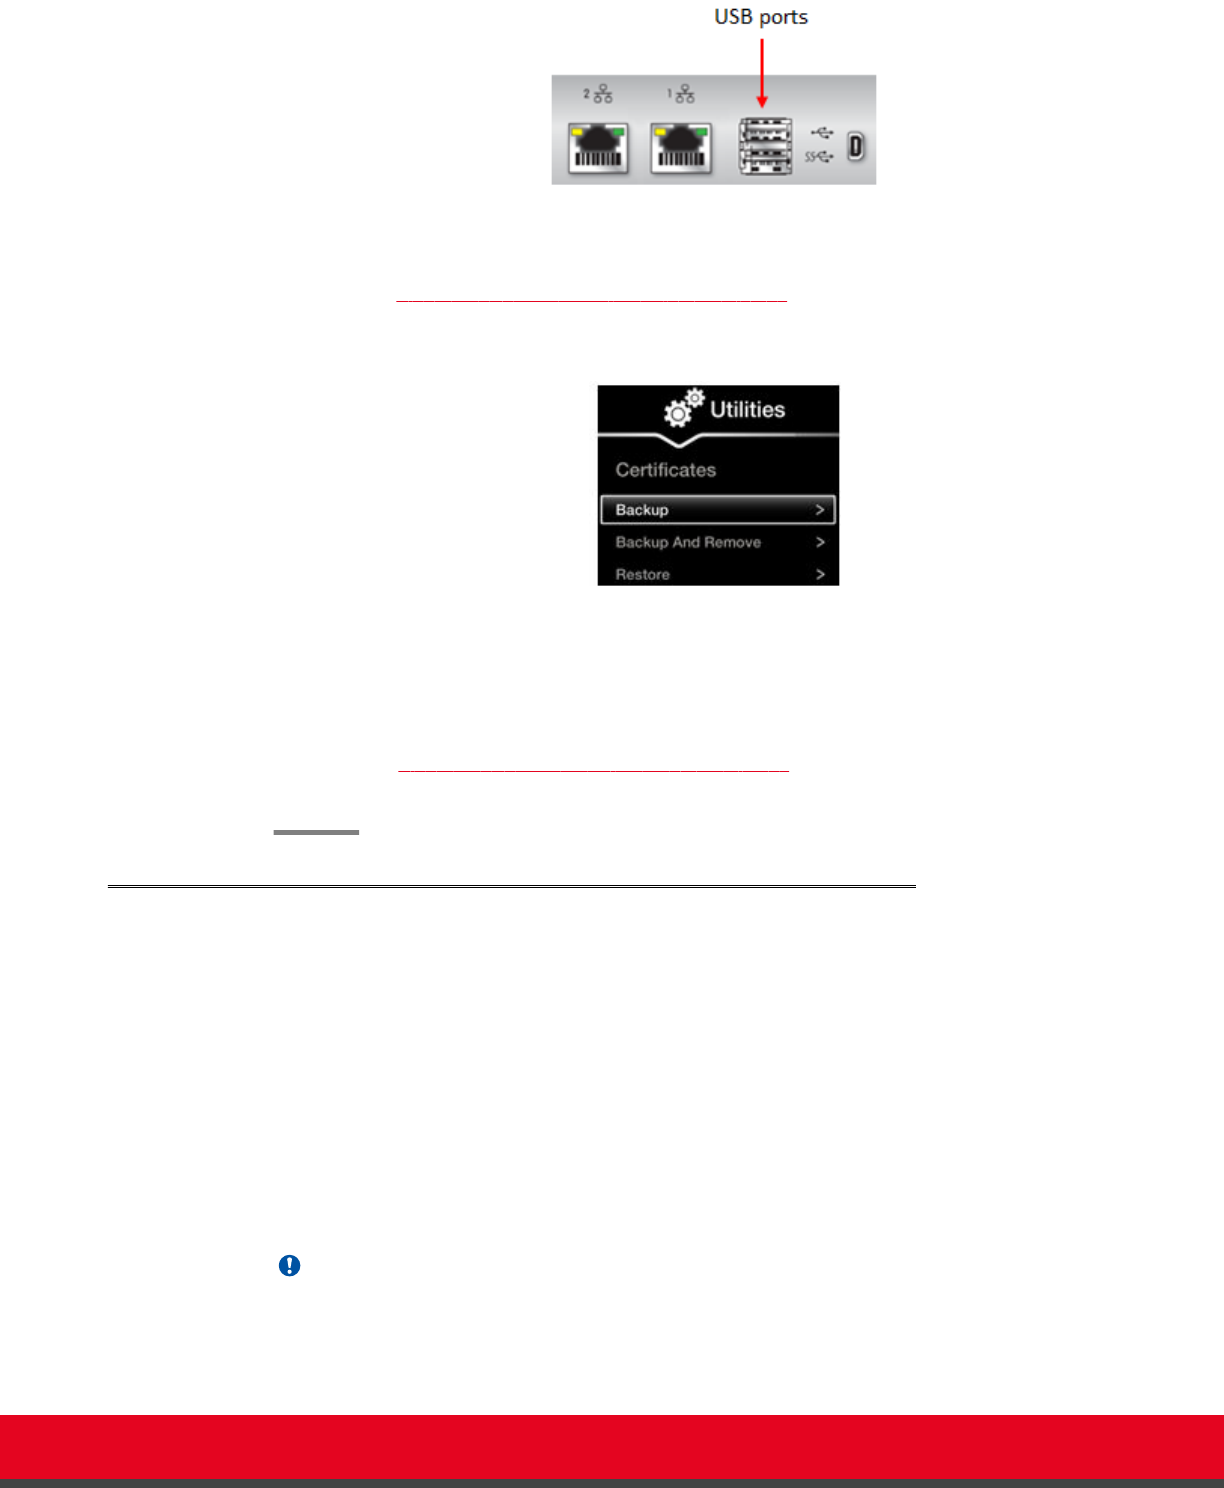
Figure 84: Connecting a USB Key to the XT Codec Unit
2. To back up a certificate to the USB key, select Advanced > Utilities > Certificates >
Backup (Figure 85: Backing up or restoring certificates on page 137).
The system copies the certificates and associated keys to the root folder of your USB key.
Figure 85: Backing up or restoring certificates
3. If you select Backup and Remove, the system first copies the certificates and associated
keys to the USB key and then removes them from the XT Codec Unit.
4. To restore a certificate into the system, select Advanced > Utilities > Certificates >
Restore (Figure 85: Backing up or restoring certificates on page 137). This automatically
restores the certificates and associated keys to the system.
Deleting XT Endpoint Certificates
About this task
This section explains how to remove or uninstall a certificate from the XT Endpoint using the web
interface.
You might need to remove certificates if:
•
For privacy reasons, you do not want to keep your certificates on a shared endpoint.
•
The system generated errors while creating the CSR and you want to replace it with a new one.
•
You want to use a different CA for signing your certificates.
•
You changed the system's IP address.
Important:
To secure SIP connections using TLS certificates, your system must have a static IP address,
since the system generates the certificate request using its IP address as the Common Name
(CN).
Installation Guide for Scopia XT5000 Endpoint with Embedded
Server for IP Office Version 3.2
Securing your Scopia XT Endpoint for IP Office | 137