
Installation guide


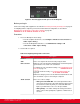
Table Of Contents
- Installation Guide for Scopia XT5000 Endpoint with Embedded Server for IP Office Version 3.2
- Table of Contents
- Chapter 1: About the Scopia XT Endpoint for IP Office
- Chapter 2: Installation Workflow for Scopia XT Endpoint for IP Office
- Chapter 3: Planning the Topology of the Scopia XT Endpoint for IP Office Deployment
- About the Scopia XT Endpoint for IP Office Embedded MCU
- Planning the Topology of Scopia XT Endpoint for IP Office with Scopia XT Desktop
- Planning NAT and Firewall Traversal with Scopia XT Endpoint for IP Office
- Supporting ISDN Connectivity
- Implementing External API Control
- Implementing Port Security for the Scopia XT Endpoint for IP Office
- Chapter 4: Prerequisites for Setting up the System
- Chapter 5: Setting up the Scopia XT Endpoint for IP Office
- Mounting the XT Codec Unit
- Connecting Scopia XT Endpoint for IP Office to Your Network
- Connecting a Computer to the Scopia XT Endpoint for IP Office
- Selecting the Computer Display Resolution
- Connecting Audio Equipment to the Scopia XT Endpoint for IP Office
- Connecting the Video Equipment to the Scopia XT Endpoint for IP Office
- Connecting the Primary XT Premium Camera
- Connecting the Optional USB Camera
- Connecting the Optional XT Premium Camera
- Connecting Cameras for Controlling the Optional XT Premium Camera with the XT Remote Control Unit
- Connecting the Optional Scopia XT Camera Switch
- Connecting a DVD or Blu-ray Player
- Connecting Analog Video Equipment
- Installing the Batteries of the XT Remote Control Unit
- Chapter 6: Initial Configuration
- How to Control the XT Endpoint
- Registering and Enabling your Scopia XT Endpoint for IP Office license
- Performing Basic Configuration
- Registering the XT Endpoint to IP Office
- Setting Basic System Information
- Configuring Video Connections
- Configuring Audio Connections
- Configuring Network Settings
- Chapter 7: Securing your Scopia XT Endpoint for IP Office
- Chapter 8: Troubleshooting the Scopia XT Endpoint for IP Office
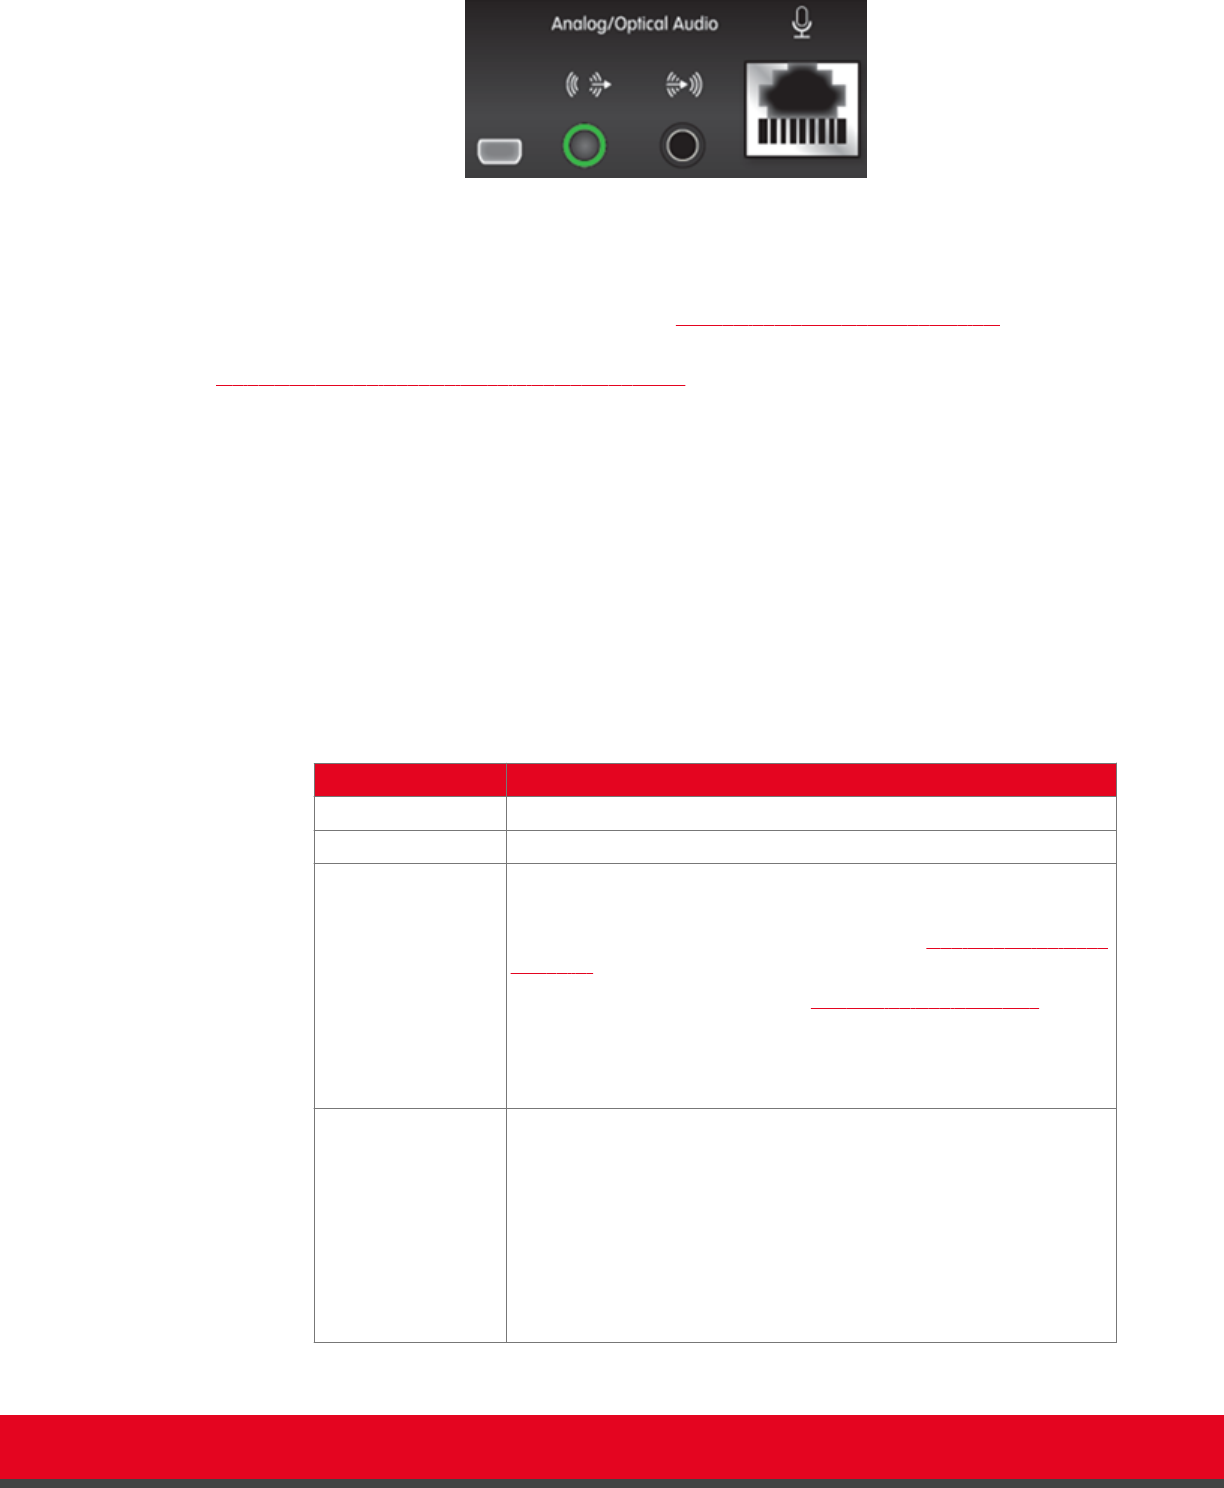
Figure 63: The analog/optical audio port on the XT Endpoint
Before you begin
Connect the analog audio equipment as described in Connecting an Analog Sound System on page 38.
If configuring from the endpoint, you must first enable advanced configuration, as described in
Maintaining the XT Endpoint Locally from the Endpoint on page 66.
Procedure
1. Access the Microphone Pod settings:
•
From the endpoint's main menu, select Configure > Advanced > I/O connections >
Audio - Input > Analog.
•
From the XT Endpoint web interface, select Administrator settings > I/O
connections > Audio - Input > Analog.
2. Set the fields as required.
Table 24: Configuring analog audio connections
Field Name Description
Enabled Enables/disables this audio input.
Gain Set the voice signal to the desired level by using the slider.
Echo canceller Enable the echo canceller when working with an external microphone
system that does not contain echo cancellation.
To configure the echo cancellation settings, see Configuring the Echo
Canceller on page 111.
To hear the audio also locally, see Configuring Audio Outputs on
page 108.
Disable this setting if you have an external mixer that handles its own
echo cancellation or you are connecting to a computer.
Audio selection Choose one of these settings:
•
Analog associated with DVI - Select this option when a PC is
connected to the XT Codec Unit’s DVI-I Input port and you want
to hear the PC’s audio only when you selected the DVI video
input as your main video source or as the presentation.
•
Analog always - The audio coming from analog connection is
always sent to remote participants, regardless of which video is
selected.
Installation Guide for Scopia XT5000 Endpoint with Embedded
Server for IP Office Version 3.2
Initial Configuration | 107