SCOPIA XT4000 Series User Guide Version 3.0 For Solution 7.
© 2000-2012 RADVISION Ltd. All intellectual property rights in this publication are owned by RADVISION Ltd and are protected by United States copyright laws, other applicable copyright laws and international treaty provisions. RADVISION Ltd retains all rights not expressly granted. All product and company names herein may be trademarks of their registered owners. This publication is RADVISION confidential.
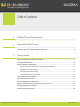
Table of Contents 1 SCOPIA XT Series Remote Control 2 About the SCOPIA XT Series About Securing Your Calls and Videoconferences................................................... 6 3 Getting Started System Installation and Product Activation.......................................................... 7 Accessing the Main Menu............................................................................... 8 Performing Basic Configuration.....................................................................
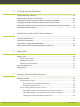
Tailoring Your User Experience Enabling Automatic Answering....................................................................... 19 Enabling Call Disconnection Confirmation.......................................................... 20 Configuring the SCOPIA XT Series to Block Incoming Calls by Default........................... 21 Configuring the SCOPIA XT Series to Block Its Video Input by Default...........................
Sharing Content .................................................................................. 40 Sharing Content in the Local Conference Room.........................................40 Sharing Content during a Call............................................................. 41 Blocking Video From the SCOPIA XT Series.................................................... 42 Managing the Audio....................................................................................
1 SCOPIA XT Series Remote Control This section explains function of the SCOPIA XT Series Remote Control keys. RADVISION | User Guide for SCOPIA XT4000 Series Version 3.
Figure 1-1 RADVISION | User Guide for SCOPIA XT4000 Series Version 3.
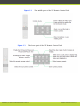
Figure 1-2 Figure 1-3 The middle part of the XT Remote Control Unit The lower part of the XT Remote Control Unit RADVISION | User Guide for SCOPIA XT4000 Series Version 3.
2 About the SCOPIA XT Series The SCOPIA XT Series incorporates the latest state-of-the-art video technology for room high definition (HD) conferencing, including support for dual stream HD video, high quality data sharing, high quality full band audio and a high capacity embedded MCU (selected models).
The SCOPIA XT4000 Series provides cost-effective true HD 720p videoconferencing at 60 fps with the impressive price performance. It is a new innovative small room series, incorporating dual 720p at 60 fps live video and content, high profile H.264 and scalable video coding technology (SVC). Furthermore, the SCOPIA XT4000 Series guarantees 20 kHz full band audio with 48 kHz sampling rate, ensuring high clarity audio transmission with no loss of quality.
Table 2-1 Differences in features for models in the SCOPIA XT Series Feature SCOPIA XT1000 Piccolo SCOPIA XT1000 SCOPIA XT and SCOPIA Telepresence XT1200 SCOPIA SCOPIA XT4000 Series XT5000 Series Maximum HD resolution 720p 1080p 720p 1080p Frames Per Second (fps) 30fps 30fps, 720p at 30fps, or 720p 60fps (incoming at 60fps only on XT1000) 60fps 60fps, both at 720p and 1080p No Hosting videoconferenc es (embedded MCU) Optional No No Optional (from the next version) Optical zoom 5x 10x
3 Getting Started Congratulations on your purchase of the SCOPIA XT Series. To get started with video calls and videoconferences, activate the product and use the quick setup wizard to configure the basic settings of the unit. • System Installation and Product Activation ............................................... page 7 • Accessing the Main Menu .................................................................... page 8 • Performing Basic Configuration ...............................................
Accessing the Main Menu You access the main functions through the Main menu: • Call—making audio and video calls • Contacts—access to the phonebook • Present—start sharing content • Control camera—adjust camera position • Configure—perform basic configuration and check the system status You navigate SCOPIA XT Series menus using arrow keys and pressing the OK key on the XT Remote Control Unit. Before you begin Verify that the power supply of the XT Codec Unit is connected.
Figure 3-1 Step 6 Main menu Select one of the options using the arrow keys of the XT Remote Control Unit. Performing Basic Configuration During this configuration you define some basic settings for your SCOPIA XT Series, like user interface language, the system name, and network settings. Notice that your system administrator might already have set these parameters for you.
Setting the System Name and Language-related Settings This page allows you to select the name of your XT Codec Unit. The name is displayed on the monitors participating in the videoconference call (for example: Hong-Kong, or 9th-FloorRoom, or NY-Office). You can also configure the fields required for setting up calls. You can also select the country in which the system is located and the language in which the system menus are displayed.
Step 3 If you want to change the language of the system menus, select the required language from the the Language list and press . The list of languages is displayed. Scroll to the preferred language and press . Step 4 Select Next to continue the basic configuration. Adjusting the Image Position If your monitor does not center the image correctly, perform this procedure.
Figure 3-4 Step 3 Step 4 Step 5 Step 6 Adjusting the image position Use the arrow keys on the XT Remote Control Unit to position the image, and then press OK. Press 2 to align the bottom right corner. Use the arrow keys on the XT Remote Control Unit to position the image, and then press OK. Select Next. Configuring Network Settings This page allows you to setup the GLAN1 settings and the IP address the system uses for placing a call. Consult with your network administrator to configure these fields.
Figure 3-5 Step 2 Step 3 Defining IP Settings Configure the IP addresses. Press Close to exit the quick setup wizard. Configuring Gatekeeper Settings If your SCOPIA XT Series works in conjunction with a gatekeeper, configure gatekeeper-related settings. Use this section to configure gatekeeper settings. This procedure completes the basic system configuration. Before you begin This procedure is performed as part of the basic configuration after “Configuring Network Settings” on page 12.
Figure 3-6 Step 2 Step 3 Step 4 Step 5 XT Codec Unit Set the Mode list to Manual. Enter the IP address of the gatekeeper in the IP address field. Enter the H.323 number required to dial the XT Codec Unit in the Number H.323 field. Select Done. The basic configuration of your SCOPIA XT Series is complete. Setting the Interface Language You may set the interface language in the Quick Setup Wizard or from the SCOPIA XT Series web interface.
Figure 3-7 Step 3 Step 4 User Preferences page Select the required language from the Language list. Select Save. Activating the Screen Saver The screen saver helps to protect your monitor from burn-in without switching it off. Your administrator may have configured the screen saver to start automatically when SCOPIA XT Series is not used for some time. You can activate the screen saver at any moment. Procedure Step 1 Press the On/Off key on the XT Remote Control Unit.
The default input method is abc1: you must press the alphanumeric button repeatedly before entering a digit. To enter text in the XT Series interface, scroll to the input field and enter the required characters. You can also select another input method that best suits the type of information you want to enter in the input field. while the cursor is in the input field. The input methods are displayed.
Figure 3-8 Step 3 Step 4 Step 5 Setting the XT Remote Control Unit Code Enter the code in the Remote control code field. Select Save. On the XT Remote Control Unit, press and simultaneously. The On/Off key on the XT Remote Control Unit turns red. Step 6 Using the keypad, type the number you just entered in the Remote control code field. Note You must always use two digits for a code. For example, to set the code to “1”, enter “01”.
Viewing System Information You can view the following system information if your system is not currently in a call: • software version • user code • IP addresses • serial number Note If you need the system serial number, you can also look on the label at the back of the XT Codec Unit. Procedure Step 1 From the Main Menu, select Configure using the XT Remote Control Unit. Figure 3-9 Step 2 The Main Menu Select System Status. The system information is displayed.
4 Tailoring Your User Experience This section explains how to configure your SCOPIA XT Series so that your user experience is optimal. All configurations in this section are optional; you can perform them in any order and at any time. • Enabling Automatic Answering ............................................................ • Enabling Call Disconnection Confirmation ............................................... • Configuring the SCOPIA XT Series to Block Incoming Calls by Default ...............
Figure 4-1 Step 4 The call-answer settings Select the required option from the Automatic answer list: • Yes always: this setting enables automatic answer to an incoming call. The system will not prompt you to accept a call if the display shows the Home page. • Never: this setting disables automatic answer to an incoming call. The system will always prompt you to accept a call. • Yes if not already in a call: this setting enables automatic answer only if the system is not in a call.
Figure 4-2 Step 4 Step 5 The call-answer settings Set Confirm disconnection to Yes. Select Save. Configuring the SCOPIA XT Series to Block Incoming Calls by Default You can configure the SCOPIA XT Series to block all incoming calls by enabling the Use Do Not Disturb (DND) feature if you do not want to answer incoming calls. When the Do Not Disturb feature is enabled: • The system blocks notifications of incoming calls. • The icon appears in the system information area of the monitor display.
Figure 4-3 Step 4 Step 5 The call-answer settings Set Do Not Disturb to Yes. Select Save. Configuring the SCOPIA XT Series to Block Its Video Input by Default You can configure the SCOPIA XT Series to block video transmission from your local endpoint at the start of each call. When configured in this way, the system sends a pre-defined image to the remote endpoint. icon appears on your display, indicating that the remote endpoint no longer receives The video from your local endpoint.
Figure 4-4 Step 4 Step 5 The call-answer settings Set Video Privacy to Yes. Select Save. Configuring the SCOPIA XT Series to Enter the Local Presentation Mode Automatically Local presentation mode is an XT Series feature that allows to easily connect a PC laptop to the DVI connector of the XT Codec Unit for having a presentation or any other PC content immediately available on the monitors. When in the local presentation mode, the system does not accept incoming calls automatically.
Procedure Step 1 Step 2 Step 3 Access the SCOPIA XT Series web interface. Select the User Settings tab. Select General under User preferences. Figure 4-5 Step 4 Step 5 Step 6 The user preference settings Select Auto from the Local presentation mode list. Set Show warnings to Yes if you want the system to display a warning when the local presentation mode is activated. Set the required setting in the Keep presentation aspect ratio list: • Yes—to keep the original presentation ratio.
5 Preparing for a Video Call or Videoconference This section gives recommendations on how to prepare your meeting room and your SCOPIA XT Series for a video call or videoconference: • Storing a Camera Position ................................................................. • Connecting the Computer ................................................................. • Selecting the Computer Display Resolution .............................................
A message confirming the stored position appears on the display. Connecting the Computer You need a computer to share a presentation during a call. This procedure describes how to connect computers that are equipped with a DVI out or VGA out connector. The XT Codec Unit supports these DVI input formats: 1920 x 1080, 1440 x 900 (WSXGA), 1600 x 900 (HD+900p)1280 x 1024 (SXGA), 1280 x 720, 1280 x 768 (WXGA), 1280 x 960 (UVGA),1024 x 768 (XGA), 800 x 600 (SVGA), 640 x 480 (VGA).
• Since audio input is not included in the DVI-I port to XT Codec Unit connection, establish a separate audio connection from the computer’s audio output port into the optical audio input port of the XT Codec Unit. • You can also use an external analog-to-digital converter if necessary. Selecting the Computer Display Resolution Configure the computer display to one of the supported picture resolutions and refresh frequencies.
What You Should Know About Participating in a Video Call There are several general recommendations you should follow to optimize your videoconferencing experience. We recommend that you read this section before participating in a videoconference for the first time. • If you are using a portable computer during a meeting, do not place it too close to the microphone pods. Noise produced by the computer cooling system may be increased by the microphones and aggravate the quality of audio in the meeting.
6 Making Calls You can make a video call on the SCOPIA XT Series in several ways. This chapter outlines how to dial to other endpoints in different modes, and how to answer and terminate a call. • Making a Call ................................................................................ • Answering a Video Call ..................................................................... • Ending a Call ................................................................................
Procedure Step 1 Step 2 Dial number using the XT Remote Control Unit. (Optional) To change the default call settings: a. Select the Advanced options button Figure 6-1 . Changing advanced call settings b. Select options using arrow keys on the XT Remote Control Unit and select necessary values using the OK key. Step 3 Press . Redialing the Number Once you dial a new number it is added to the list of dialed numbers; then you can select this number and dial it.
Figure 6-2 Redialing numbers from the SCOPIA XT Series web interface Procedure Step 1 In the Main menu, select Calls. The Recent calls list appears. Step 2 Step 3 Select the relevant call using the arrow keys. Press Call. Dialing from the Phonebook If the endpoint you want to call is listed in your phonebook, you can call it without dialing its number.
If you set your system to automatic answering, the endpoint answers after the predefined number of rings. If you set your system to manual answering, you can either accept or reject the incoming call. When there is an incoming call, the system displays a window with these options: • To accept the call, press Accept or on the XT Remote Control Unit. • To reject the call, select the Reject option on the screen by pressing the right arrow key and on the XT Remote Control Unit.
7 Managing Calls and Videoconferences This chapter details the configurations you can make on your SCOPIA XT Series to control the way the video is displayed, to control the audio output and input, encryption support and managing contacts. • Managing the Video ........................................................................ • Managing the Audio ........................................................................ • Blocking Incoming Calls .......................................................
Procedure Step 1 Step 2 Access the SCOPIA XT Series web interface. Select the Cameras tab. Figure 7-1 Step 3 Step 4 Step 5 Step 6 Positioning cameras Choose the camera you want to position by selecting Local or Remote. Position the camera by selecting arrow buttons under Move. If necessary, adjust the zoom by selecting the Plus and Minus buttons under Zoom. Choose the other camera and position it, if necessary.
How to Change the Video Layout in a Call A video layout is what windows appear and how they are arranged on the monitor. Video layouts of your XT Series depend on whether it uses one or two monitors. The layouts are preconfigured by the administrator so that a set of default layouts is available for you. You can change the video layouts on your XT Series during a call to optimize your videoconferencing experience. • About Video Layouts in the SCOPIA XT Series Using One Monitor ....................
Figure 7-2 Showing the monitor in PIP view Figure 7-3 on page 36 depicts a PaP (Picture and Picture) view in which two images are presented side by side and at the same size. Figure 7-3 Showing the monitor in PaP view Figure 7-4 on page 37 depicts a PoP (Picture out Picture) view in which two images of different size are presented side by side. RADVISION | User Guide for SCOPIA XT4000 Series Version 3.
Figure 7-4 Showing the monitor in PoP view You can use PIP, PaP or PoP views only if your system administrator has configured them in your XT Codec Unit. About Video Layouts in the SCOPIA XT Series Using Two Monitors When you’re not in a call, one monitor shows the system menus; both monitors display the video taken by the local camera.
Figure 7-5 Menu, received video, and local video on HD1 and presentation on HD2 • Configuring to HD1 (Menu & Present) + HD2 (Video Rx). See Figure 7-6 on page 38. HD1 shows the system menus, the presentation (local or remote) if available, and the local video in a small overlapping window. HD2 shows the received video. The audio is automatically enabled on HD1. Figure 7-6 Menu, presentation, and local video on HD1 and received video on HD2 • Configuring to HD1 (Present) + HD2 (Menu & Video Rx).
Figure 7-7 Presentation on HD1, and menu, received video, and local video on HD2 • Configuring to HD1 (Video Rx) + HD2 (Menu & Present). See Figure 7-8 on page 39. HD1 shows the received video. HD2 shows the system menus, the presentation (local or remote) if available, and the local camera image in a small overlapping window.
You can also change the default layout activated every time your XT Series is connected, disconnected or when content is shared. You can change the layout as follows: • To change the position of a PIP view on the monitor, show a PaP or PoP view, or display a full screen view of one of the images, press repeatedly. • When you are in PIP, Pap or PoP view, you can change its content by pressing repeatedly. • When you are in full presentation view, you can change its content by pressing repeatedly.
Before you begin You must setup your computer and the XT Codec Unit before starting the presentation: • Verify that the SCOPIA XT Series is not in a call. • Configure your computer to the resolution and refresh rates supported by the system. See “Selecting the Computer Display Resolution” on page 27 for detailed information. • Check the audio settings. To hear the PC input locally and remotely, you need to route PC audio through the digital audio port.
system can change the bandwidth dedicated to live video and presentation to suite your network requirements. Before you begin Before sharing content, proceed as follows: • Configure your computer to the resolution and refresh rates supported by the system. See “Selecting the Computer Display Resolution” on page 27 for detailed information. • Connect your computer to the DVI-I connector of the XT Codec Unit. See the Quick Setup Guide for installation instructions. • Check the audio settings.
• Adjusting the System Volume ............................................................. • Adjusting the Ringing Volume ............................................................. • Muting the Microphone Pod ............................................................... page 43 page 43 page 44 Adjusting the System Volume When in a meeting, press hear at your site.
Press + or - on the XT Remote Control Unit to adjust the sound you are hear when receiving a call. To change the default ringing volume, perform the procedure in this section. Procedure Step 1 Step 2 Step 3 Access the SCOPIA XT Series web interface. Select the User settings tab. Select General under Call-Answer mode. Figure 7-10 Step 4 Step 5 Call-Answer settings Drag the Ringing volume slider to set the value. Select Save.
Blocking Incoming Calls You can block an incoming call using the Do Not Disturb feature if you do not want to answer. When a remote endpoint calls and you block an incoming call, the XT Series rejects the incoming call and the call is disconnected. The area of the monitor display. icon appears in the system information To block an incoming call, press and hold the Privacy key on the XT Remote Control Unit.
Step 4 Select Add Contact. Figure 7-12 Step 5 Entering general contact information Select the type from the Contact type list: • Person Or • Conference Step 6 If the type of your new contact is Person, enter text in the Last Name, First Name and Company fields. Step 7 Step 8 If the type of your new contact is Conference, enter the conference name. Select the Plus button next to Insert number. Figure 7-13 Step 9 Entering contact dialing information Define the Label.
Step 12 Select the default call rate from the Rate field. SCOPIA XT Series will always use this rate calling this contact. Step 13 Select Save. Searching for a Contact in the Phonebook If you know the name of the contact you want to find in the phonebook, you can search using the name or surname. If you are not sure what is the name of the contact you need to find, you can display all contacts to review them. Procedure Step 1 Step 2 Step 3 Access the SCOPIA XT Series web interface.
Figure 7-15 Step 4 The Contacts page Search for the contact you want to modify. The contact information is displayed. Figure 7-16 Step 5 Step 6 Contact information Select Modify number. Edit fields as necessary. For more information, see “Adding a Contact to the Phonebook” on page 45. Step 7 Press Save to save the modified contact. Deleting a Contact from the Phonebook Use this function to remove unused contacts from your phonebook.
Figure 7-17 Step 4 The Contacts page Search for the contact you want to modify. The contact information is displayed. Figure 7-18 Step 5 Step 6 Contact information Select Delete number. Select Yes to confirm. RADVISION | User Guide for SCOPIA XT4000 Series Version 3.
www.radvision.com About RADVISION RADVISION (NASDAQ: RVSN) is the industry’s leading provider of market-proven products and technologies for unified visual communications over IP and 3G networks.