
Installation guide
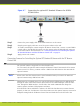


through the VISCA interface. For this type of setup, enable the Always power on camera field
in Administrator settings > I/O Inputs > Cameras.
Procedure
Step 1
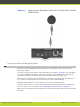
Buy a VISCA Cross cable from a third party, or create a cable of the required length if you’re
planning to position the optional camera far away from the XT Codec Unit
Measure the distance that separates the main camera from the optional camera, and cut the
cable to the required length. The cable’s maximal allowed length is 15m (50ft). Attach each
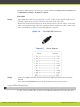
end of the VISCA Cross cable to an 8-pin mini-DIN male connector
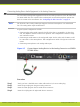
Figure 4-8 8-Pin Mini-DIN Connector
Figure 4-9 Pinout Diagram
Step 2
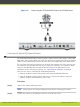
Connect the VISCA Cross cable from the main camera VISCA OUT to the optional camera
VISCA IN.
Check that the SYSTEM SELECT switch on the back panel of the camera is set to 7.
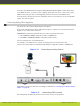
Using a DVD or Blu-ray Player
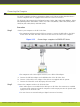
You may connect a DVD or Blu-ray player to the HD CAM or DVI inputs of the XT Codec Unit.
RADVISION | Installation Guide for SCOPIA XT4000 Series Version 3.0 Setting up the SCOPIA XT Series | 22