
User guide


Important:
On the Scopia
®
XT Executive, the system menus are automatically activated when you
receive an incoming call to allow you accept or reject the call.
2. Scopia
®
XT Control enables a number of functions using the keyboard or mouse (see Table
2: Using the keyboard or mouse with Scopia
®
XT Control on page 26).
Table 2: Using the keyboard or mouse with Scopia
®
XT Control
Function Using your keyboard Using your mouse Using XT Remote
Control Unit
Select an option Press Enter. Click on the option. Press ok/menu.
Enter text Use the keyboard. N/A Use the XT Remote
Control Unit keypad to
enter letters and digits.
Go back to previous
page
Press Esc. Click on an empty area on the
screen.
Press Back.
Navigate endpoint
menus
Press the arrows then
Enter.
Select the option. Use the arrow keys then
ok/menu.
Move windows in
video layout
- Drag and drop the windows to
the desired position.
Press and hold Layouts
and select the
desired layout (see
Changing Your Own
Video Layout on
page 61).
Switch control to
computer
Press Esc, Backspace,
or Ctrl+Shift+1.
Select the window in the layout
representing your desktop.
When you are not in a
call, press Present,
Delete or Back.
Zoom in or out - Scroll up or down Press the zoom keys.
Related Links
Controlling the XT Series on page 18
Connecting to a Scopia
®
XT Executive as a Room Endpoint on page 26
Connecting to a Scopia
®
XT Executive as a Room Endpoint
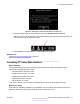
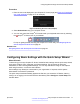
About this task
If using the Scopia
®
XT Executive as a room endpoint, you must first connect to Scopia
®
XT Control
before using your keyboard and mouse to control the Scopia
®
XT Executive. The
icon appears,
indicating that authentication is required.
If you are using the Scopia
®
XT Executive as a personal endpoint, you only authenticate the first
time you connect your computer.
Before you begin
Connect your computer as described in
Connecting a Computer to the XT Series on page 57.
Getting Started
26 Avaya Scopia
®
XT Series User Guide April 2015
Comments? infodev@avaya.com