
User guide

'Managing Calls' | 16
RADVISION | User Guide for SCOPIA XT1000 Version 2.0
Procedure
Step 1 While in a call, press to hide the graphics in the Main Menu page.
Step 2 Use the arrow keys to move the selected camera to the preferred position.
Step 3 Press + or - to zoom in or out.
Step 4 To switch to another camera, press . Press or to bring back the graphics.
Note: You can control the second camera either with its stand-alone remote control or the
XT1000 Remote Control Unit. For this option connect a cascade control cable between the
first and second camera. Ask your system administrator for the availability of such a
cable.
Note: If you connect a camera to the DVI-I input, the system will manage it as PC content.
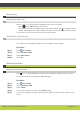
Setting Camera Presets
Use camera presets to save camera positions (up to a maximum of 99 positions) at your local
terminal. This feature allows you to select quickly a preferred camera frame of a location or a
video source. You can create these presets before or during a call.
Procedure
Step 1 Move the camera as described in Using the Camera page 15 and set to the desired position.
Step 2 Press on the XT1000 Remote Control Unit, and enter a two-digit number (from 01 to 99) for
the current display setting.
Note: Upon completion of the preset, the display notifies you of the stored position.
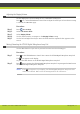
Retrieving Camera Presets
Use this feature to move the camera to a stored preset.
Procedure
Step 1 Press on the XT1000 Remote Control Unit.
Step 2 Enter the memory location number corresponding to the desired preset.