
Installation guide


Performing Initial Configuration of the SCOPIA Elite MCU | 15
RADVISION | Installation Guide for SCOPIA Elite 5100 Series MCU Version 7.5
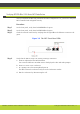
Step 11 Enter the subnet mask without leading zeros at the Enter IP Mask for default device prompt and
then press Enter.
If you are not using a subnet mask, press Enter.
Step 12 Press Enter at the Preferred DNS prompt.
Step 13 Press Enter at the Alternate DNS prompt.
Step 14 Press Enter at the DNS suffix prompt.
Step 15 Allow the unit to complete the reboot process. A new emulator session begins.
Step 16 Close the terminal emulator session.
Accessing the SCOPIA Elite 5100 Series MCU Administrator Interface
The MCU interface is available in these languages:
• English
• Chinese
• Japanese
• Portuguese
• Spanish
• Russian
The default language of the MCU interface is English. When you access the MCU interface, the
login screen is in English unless you choose a different language.
Procedure
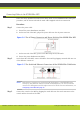
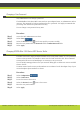
Step 1
Launch your browser and enter the IP address or the name of the MCU.
Step 2 If you need to change the MCU interface language, select a language from the Language list.
The login screen is displayed in the language you selected.
Step 3 Enter the Administrator user name and password in the appropriate fields and select Go.
The default global user name is admin. The default password is password.
Note: If you try to sign in as an Administrator and another Administrator is currently signed in,
the MCU signs you in as a Read only user. The words “Read Only” appear at the top of the
window and a pop-up displays the IP address of the Administrator already signed in. Read
only users cannot edit MCU settings.