
User guide


'Initial Configuration' | 29
RADVISION | Administrator Guide for SCOPIA XT1000 Version 2.0
Step 4 Set the fields as required.
Step 5 Press Save.
Step 6 (Optional) If SPDIF is associated with DVI, verify the DVI input is enabled in Settings > I/O
Connections > Cameras > DVI. Press to start data sharing.
Configuring the EchoCanceller
Configure these fields after enabling echo cancellation in Configuring the Microphone Array Pod(s)
page 27 or in Configuring Other Audio Inputs page 28.
You may also access this page from a previous screen in the configuration.
Procedure
Step 1 In the Administrator settings menu select I/O connections.
Step 2 Scroll to Audio - Inputs.
Step 3 Select the EchoCanceller page.
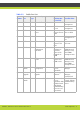
Field Name Description
Enabled Enables/disables this audio input.
Gain Use the slider to adjust the fixed Gain Control ,thus setting the voice
signal to the desired level.
Echo canceller Enable the echo canceller when working with an external microphone
system that does not contain echo cancellation. Disable this setting
when working with an external mixer that handles echo cancellation. If
enabled, check the field settings in Configuring the EchoCanceller
page 29, and configure as required. The audio coming from SPDIF is
selected (i.e., can be sent to the remote peer ) only when the DVI input
is used. To hear the audio also locally, see Configuring Audio Outputs
page 30.
Audio selection SPDIF associated with DVI - for example, in case a PC is connected to
the Codec Unit DVI-I and you wish to hear the presentation the PC
currenlty shows.
SPDIF always - The audio coming from SPDIF connection is always
selected.
HD camera - Select the audio associated to the currently selected HD
camera.