
Installation guide


D6600 NetCom
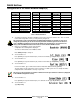
Configuration of the D6680 Network Adapter(s)
D6600 NetCom System Guide
© 2001 Radionics Page 29 46542C
9. IF YOU HAVE NOT INSTALLED THE OPTIONAL D6672 SERIAL COM1 EXPANSION KIT SKIP THIS
STEP!!
If you have COM1 installed, press
CAN
then
and repeat steps 4-7 above for section 6.2 COM1
Network Adapter.
10. Press
CAN
, then
twice to scroll down to section 6.4 D6200 Network Connection. Press
M / E
twice.
11. Enter the IP address of the Host PC that will be running the D6200 Software.
When entering an IP address through the keypad of the D6600, an alpha character, either - , must be
pressed to enter a decimal point in the IP address.
For example, an IP address 202.96.168.127 may be entered as 202 96 168 127, then press
M / E
.
12. Press the
twice to go to 6.4.3 Network Programming Enable. Verify it is set to 1.
If not set to 1, press
M / E
, then enter [1], then
M / E
.
13. Press
CAN
multiple times to return to the idle stage (time and date on the LCD).
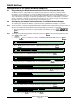
3.9 Editing Program Parameters
The D6600 must have account database information entered into it before it can be ready to manage and receive
signals from alarm panels connected to D9133TTLs or C900TTLs. Radionics recommends programming this
information using the D6200 Programming Software.
The D6200 is a GUI, a Graphical (rather than purely textual) User Interface. The D6200 is a GUI that allows the
user to perform the following functions:
• Retrieval of data files from the D6600 (CPU/Host/Network, Account Database, or Line Card)
• Editing of the D6600 data files (CPU/Host/Network, Account Database, or Line Card)
• Sending the files back to the D6600 (CPU/Host/Network, Account Database, or Line Card)
• Upgrading the firmware installed in the D6600 (CPU, System, or PSTN line cards)
Section 4.0 D6200 Programming Software Overview provides information and procedures on how to
accomplish these tasks.