
Install guide


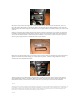


Connect the permanent +12V cable directly from the back of the head unit to this fuse box to ensure
the absolute best quality +12V power supply. The head unit is a critical component, if it does not have
a quality +12V supply or earth connection it will never sound it’s best. If you are taking this
installation seriously then I cannot stress how important this relatively simple modification is. y
4 – Fitting a CD Changer
Most of you will want to fit a CD Changer if you are replacing the head unit. These little boxes are
great, allowing you to stick a stack of CDs in the car and switch between them at will. Remember that
CD Changers have to be matched to head units, there are lots of different standards and connectors,
even from the same manufacturer. Make sure you get a CD changer that will work with your head
unit.
The glovebox is pretty small in the GTV and there is virtually no space under the seats, so the only
logical place to fit a CD changer is in the boot. There are two great places for fitting these devices. If
you have a phase I car, I suggest fitting the unit to the top of the boot, close to the edge of the
opening. You can easily run the cable back through the top of the bootlining.
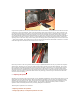
If you have a phase II car then you have a ready-made spot for a CD-Changer, the “cubby-hole”
above the fuel tank to the left of the boot. If you are going to use this spot then make sure you get a
small piece of MDF cut to mount the unit onto – DO NOT screw directly to the metal of the car body,
that’s the fuel tank, remember? This is quite easy anyway, take out the bootlining at the top part of
the rear of the boot. This comes out very easily by just removing some grip studs and thumb screws.
You will see the “shelf” on the left where the little “cubby-hole” sits. Get some MDF cut roughly to the
size of the shelf.