
Install guide


Alfa Romeo, in fact all cars manufactured by the FIAT Group, have one distinct advantage, the stereo
connectors used are industry standard ISO connectors. This means that you will not need a special
adaptor to fit your new stereo, the sockets behind the stereo will fit the plugs on your new stereo,
regardless of manufacturer. However, I would recommend using an ISO extension adaptor as it
makes it much easier to fit your new head unit. These are available from any good ICE supplier for
about £10.
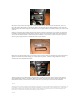
Open up your new stereo box and locate your new “cage”. Fit this by inserting it into the slot and
pushing out the metal cut-outs, work your way around the cage until you get a nice tight fit. Then fit
the ISO extender if you have one. Go back to your new stereo box and dig out the main unit, don’t
worry about the stereo face at this point. On the back of your new stereo you will find a socket for the
aerial and two ISO connectors, dig out the cables from behind the stereo and simply connect
everything up – Easy. Now slide the unit into the cage, as you push it back it should “click” into
position.
That’s it, your new head unit is fitted. Dig out the face and clip it on, you should now be able to start
playing with your new stereo.y
3 – Wiring modifications for the head unit
This chapter is for those of us who want to modify the standard wiring, if you don’t feel confident
with this then please skip this chapter. I’m going to cover three points here:
• Getting your stereo to turn on and off with the ignition
• Automatic stereo illumination
• High quality earthing and +12V power supply
Getting your stereo to turn on and off with the ignition
Have you ever noticed that your stereo doesn’t automatically turn off when you switch off you
ignition? Annoying isn’t it? It’s actually an error in the wiring loom, I believe some cars actually don’t
suffer from this fault, so I put it down to manufacturing problems – No surprise there then! Anyway,
this can be easily fixed without too much effort.
First of all, locate the two ISO connectors that plug into the back of your stereo. I suggest that you
make sure your stereo is removed and that you take off the panels that sit either side of the central
tunnel as it feeds back into the footwell. These are held in place by two screws and a clip at the
furthest part of the unit, near the end of the footwell. Now you should have a pretty clear view of the
cables behind the stereo.
Disconnect the battery. Now go back inside the car and locate the large white connector the connects
up to the cables that run through the centre console past the gear stick, towards the handbrake and
the buttons between the two seats. disconnect that as well.
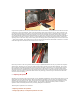
Going back to the ISO connectors, in particular the white connector, you will see that it has a number
of cables going into it from behind the dashboard, each cable is for a different function. One of these
is supposed to be the switched +12V, this is only supposed to come on when the ignition is turned on,
however it doesn’t, it’s always on. This is the RED cable.
Trace this cable back, unwrapping the insulating tape on the cable cluster as needed and cut this
cable cleanly about three inches away from the connector. Seal the end of the cable coming from
behind the dashboard with electrical tape and strip the other end (the one coming from the ISO
connector) so you can fit it to a standard electrical connector. Now take a length of electrical cable.
For this purpose I took a 1m length of standard, UK-Spec 13A power cable and stripped it back, giving
me three 1m lengths of thin cable (blue brown and green). Take a standard electrical connector
(screwbox or crimp connector) and connect this length of cable to the red cable coming from the ISO
connector (the one that you stripped the end off earlier).
Now go back to the large white connector that you unplugged earlier, you’ll see a whole load of
cables going into it. One of these will be a true switched +12V. In my car this is a red cable, but all
GTVs are different, so the chances are it'll be a different colour on your car. You can easily find out
which one of these cables is a switched +12V by checking the connectors one by one with a digital
multimeter. This cable is used to turn things on like the cigarette lighter or the sunroof switch (if
fitted) on when you turn on the ignition. Trace this cable back as far as you can – Unwrapping the