
Install guide


Work your way around the cage with a small screwdriver and bend the cut-outs back in, once you
have all of them bent back you should be able to remove the cage by simply sliding it out. Keep the
original head unit and it’s cage in a safe place as you might want to re-install it when you come to sell
your car.
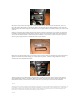
Fitting a new head unit is simply the reversal of this procedure, but before you do this you will want
to install a surround plate into the stereo aperture. This is an inexpensive item and it is available at
your local Alfa Romeo dealer. I believe they are all black, so if you have a phase II interior you will
want to get it sprayed silver to match the rest of your interior.
Make sure you fit this item now, if you want to fit it at a later date you will have to remove the stereo
again! It is worth the hassle though, for a little piece of plastic, it makes a huge difference to the
overall look of the installed head unit.
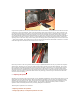
This surround does not affix itself to the aperture, it relies on the new stereo cage to hold itself in
place. Whilst this works, it will rattle. When you fit this piece take the time to smear the back of it
with silicon sealant to ensure that it won’t rattle once you have your new head unit installed.
*****
At this point you may want to jump ahead in the guide. If you are planning on fitting a CD changer, go
to chapter 4, if you are fitting any external amplifiers or sub woofer, go to chapter 6 & 7, follow the
instructions there first and then come back to this chapter. However, if you are just changing the
head unit, or the head unit and the speakers, please read on.
*****