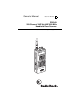
Owner’s Manual Cat. No. 20-514 A PRO-89 200-Channel VHF/Air/UHF/800 MHz Handheld Race Scanner Please read before using this equipment.
INTRODUCTION Your new RadioShack 200-Channel VHF/Air/UHF/800 MHz Handheld Race Scanner lets you in on all the action in the pits or on the track at the big race. This scanner gives you direct access to over 33,500 frequencies, including those used by participants and staff at auto races, police and fire departments, ambulance services, and amateur radio services. You can select up to 200 channels to scan, and you can change your selection at any time.
Direct Search — lets you search for new and unlisted frequencies starting from a specified frequency. Priority Channel — lets you designate a channel to be scanned every two seconds so you do not miss important calls. Weather Band Key — scans seven preprogrammed weather frequencies to keep you informed about correct weather conditions. Weather Alert — automatically sounds the alarm tone to advise of hazardous weather conditions when it detects the alert signal on the local NOAA weather channel.
Your scanner can receive all of these frequencies: • 29–54 MHz • 108–136.9875 MHz • 137–174 MHz • 380–512 MHz • 806–823.9875 MHz • 849–868.9875 MHz • 894–960 MHz This Owner’s Manual also includes the section “A General Guide to Scanning” on Page 52 to help you target frequency ranges in your service area so you can search for a wide variety of transmissions. FCC NOTICE Your scanner might cause TV or radio interference even when it is operating properly.
SCANNING LEGALLY Your scanner covers frequencies used by many different groups including police and fire departments, ambulance services, government agencies, private companies, amateur radio services, military operations, pager services, and wireline (telephone and telegraph) service providers. It is legal to listen to almost every transmission your scanner can receive. However, there are some transmissions you should never intentionally listen to.
CONTENTS Preparation ........................................................................... 8 Installing Batteries ........................................................... 8 Using AC Power ............................................................... 9 Using Vehicle Battery Power ......................................... 10 Charging Rechargeable Batteries ................................. 10 Connecting an Antenna ................................................. 11 Connecting a Supplied Antenna ..
Changing the Stored Car Number ................................ Viewing Frequencies Associated with a Car Number ... Deleting a Frequency from a Car Number .................... Scanning by Car Number .............................................. Finding Car Numbers Associated With Channels ......... 39 39 40 40 41 Special Features ................................................................ Delay .............................................................................
PREPARATION INSTALLING BATTERIES You can power your scanner with four AA batteries (not supplied). For the best performance and longest life, we recommend RadioShack alkaline batteries. You can use either the black non-rechargeable battery holder or the yellow rechargeable battery holder (both supplied) to hold the batteries. If you use the yellow battery holder, we recommend nickel-cadmium or nickel-metal hydride batteries (not supplied).
Warning: Dispose of old batteries promptly and properly. Do not burn or bury them. Caution: If you do not plan to use the scanner with batteries for a month or more, remove the batteries. Batteries can leak chemicals that can destroy electronic parts. USING AC POWER You can power the scanner using a 9V, 300-mA AC adapter and a size C Adaptaplug adapter (neither supplied). Both are available at your local RadioShack store.
USING VEHICLE BATTERY POWER You can power the scanner from a vehicle’s 12V power source (such as a cigarette-lighter socket) using a 9V, 300-mA DC adapter and a size C Adaptaplug (neither supplied). Both are available at your local RadioShack store. Cautions: You must use a power source that supplies regulated 9V DC and delivers at least 300 mA. Its center tip must be set to positive and its plug must fit the scanner's PWR DC 9V jack.
Note: Do not overcharge Ni-Cd batteries. Overcharging causes them to get hot and shortens their life. It takes between 14 and 16 hours to recharge Ni-MH or 7 and 8 hours to recharge Ni-Cd batteries that are fully discharged. You can operate the scanner while recharging the batteries, but charging takes longer. Note: Ni-Cd batteries last longer and deliver more power if you occasionally let them fully discharge. To do this, simply use the scanner until B flashes on the display and the scanner beeps.
1. Align the slots around the antenna’s connector with the tabs on the antenna jack. 2. Press the antenna down over the jack and turn the antenna’s base clockwise until it locks into place. Connecting an Outdoor Antenna Instead of a supplied antenna, you can connect an outdoor base-station or mobile antenna (not supplied) to your scanner using a BNC connector. Your local RadioShack store sells a variety of antennas. Choose the one that best meets your needs.
Cautions: • Do not run the cable over sharp edges or moving parts that might damage it. • Do not run the cable next to power cables or other antenna cables. Warning: Use extreme caution when you install or remove an outdoor antenna. If the antenna starts to fall, let it go! It could contact overhead power lines. If the antenna touches a power line, contact with the antenna, mast, cable, or guy wires can cause electrocution and death. Call the power company to remove the antenna.
• Do not listen at extremely high volume levels. Extended high-volume listening can lead to permanent hearing loss. • Once you set the volume, do not increase it. Over time, your ears adapt to the volume level, so a volume level that does not cause discomfort might still damage your hearing. Traffic Safety • Do not use an earphone or headphones with your scanner when operating a motor vehicle or riding a bicycle in or near traffic. Doing so can create a traffic hazard and could be illegal in some areas.
UNDERSTANDING THE SCANNER Once you understand a few simple terms used in this manual and familiarize yourself with your scanner’s features, you can put the scanner to work for you. You simply determine the type of communications you want to receive, then set the scanner to scan them. A frequency is the tuning location of a station (expressed in kHz or MHz). To find active frequencies, you can use the search function.
CAR Lets you store car numbers and frequencies in the scanner’s channels, add and delete frequencies from car numbers, display car numbers, and listen to the channel where a car number is stored. Each time you press CAR, you see the following information in the following order: – Manual Mode – Car Number Input Mode – Car Number Display Mode – Car Number Input Mode – Manual Mode BAND Lets you search the scanner’s preprogrammed service-search banks.
MON/CL Lets you listen to frequencies stored in the 20 monitor memories; clears an incorrect entry. LIGHT/ Locks and unlocks the keypad to prevent accidental entries; turns the backlight on and off. PGM Programs frequencies into channels. DELAY/• Programs a 2-second delay for the selected channel; enters a decimal point. ENT (enter) Enters frequencies into channels. A LOOK AT THE DISPLAY The display has indicators that show the scanner’s current operating status.
FD/PD Indicates that the scanner is searching the fire/ police service bank. AIR Indicates that the scanner is searching the air service bank. HAM Indicates that the scanner is searching the amateur radio service bank. ▲ /▼ Indicates the search or scan direction. M Flashes with a number (1–20) to show which monitor memory you are listening to. CH Appears with digits (1–200) or P and a frequency to show which channel the scanner is tuned to. B Appears when the batteries are low.
CAr Appears when you listen to the car race service bank. CAr No. _ _ _ Appears when you input the car number. Ch-FULL Appears when you try to enter a frequency into a channel during a search when all channels are full. F L-out Appears when you start a direct search from a locked-out frequency. FLo-FULL Appears when you try to lock out a frequency during a search when 50 frequencies are already locked out. L-r Appears when you review the locked-out frequencies.
StArt Appears when the scanner starts wired or on-air programming. C-Err Appears when the scanner receives a checksum error during wired or on-air programming. d-Err Appears when the scanner receives a data error during wired or on-air programming. End Appears when the scanner has finished wired or on-air programming. oFF tonE Appears when you turn off the key tone. on tonE Appears when you turn on the key tone. P.-SA Appears when the power save function is turned on. on P.
Service Banks The scanner is preprogrammed with the frequencies allocated by auto racing, fire/police, aircraft, ham radio, and marine services. This is handy for quickly finding active frequencies instead of searching through an entire band (see “Searching the Service Banks” on Page 27). Note: The frequencies in the scanner’s service banks are preset. You cannot change them. Auto Racing Group Frequency Range (MHz) Step (kHz) 1 150.995–151.995 5 152.870–153.725 5 154.490–154.625 5 2 460.000–470.
Step (kHz) Group Frequency Range (MHz) 3 865.6125 865.6625 865.7125 936.2125 937.1500 937.2000 937.2875 Group Frequency Range (MHz) Step (kHz) 1 33.420–33.980 20 37.020–37.420 20 39.020–39.980 20 42.020–42.940 20 44.620–45.860 40 45.880 – 45.900 – 45.940–46.060 40 46.080–46.500 20 153.770–154.130 60 154.145–154.445 15 154.650–154.950 15 155.010–155.370 60 155.415–155.700 15 155.730–156.210 60 158.730–159.210 60 166.250 – 170.
Group Frequency Range (MHz) Step (kHz) 3 453.0375–453.9625 12.5 458.0375–458.9625 12.5 460.0125–460.6375 12.5 465.0125–465.6375 12.5 856.2125–860.9875 25 866.0125–868.9875 12.5 4 Air Frequency Range (MHz) Step (kHz) 108.000–136.9875 12.5 Amateur Radio Group Frequency Range (MHz) Step (kHz) 1 29.000–29.700 5 2 50.000–54.000 5 3 144.000–148.000 5 4 420.000–450.000 12.5 Marine Channel Frequency (MHz) 06 156.3000 07 156.3500 08 156.4000 09 156.4500 10 156.
Channel Frequency (MHz) 11 156.5500 12 156.6000 13 156.6500 14 156.7000 15 156.7500 16 156.8000 17 156.8500 18 156.9000 19 156.9500 20 157.0000/161.6000 21 157.0500 22 157.1000 23 157.1500 24 157.2000/161.8000 25 157.2500/161.8500 26 157.3000/161.9000 27 157.3500/161.9500 28 157.4000/162.0000 64 156.2250 65 156.2750 66 156.3250 67 156.3750 68 156.4250 69 156.4750 70 156.5250 71 156.
Channel Frequency (MHz) 72 156.6250 73 156.6750 74 156.7250 77 156.8750 78 156.9250 79 156.9750 80 157.0250 81 157.0750 82 157.1250 83 157.1750 84 157.2250/161.8250 85 157.2750/161.8750 86 157.3250/161.9250 87 157.3750/161.9750 88 157.4250 Note: Both frequencies (transmission and reception) are shown for marine channels used for duplex transmission.
OPERATION TURNING ON THE SCANNER/SETTING VOLUME AND SQUELCH 1. Turn SQUELCH until the indicator points to MIN before you turn on the scanner. 2. To turn on the scanner, turn VOLUME clockwise until you hear a hissing sound. 3. Turn SQUELCH clockwise, just until the hissing sound stops. Notes: • To listen to a weak or distant station, turn SQUELCH counterclockwise. If reception is poor, turn SQUELCH clockwise to cut out weak transmissions.
2. Use the number keys and • to enter the frequency (including the decimal point) you want to store. 3. Press ENT to store the frequency into the channel. Notes: • If you made a mistake in Step 2, Error appears and the scanner beeps three times when you press ENT. Simply start again from Step 2. • Your scanner automatically rounds the entered frequency down to the closest valid frequency. For example, if you enter a frequency of 151.473, your scanner accepts it as 151.470.
Notes: • You can use the scanner’s delay feature while searching the service banks, see “Delay” on Page 42. • The following steps show you how to listen to the HAM, FD/PD, CAR, and AIR service banks. To listen to the MRN bank, see “Listening to the Marine Bank” on Page 35. 1. Press BAND. The last selected band name (such as HAM ), SRCH , -b-, frequency and the group number (if any) appear. Note: -b- does not appear if the CAR service bank is selected. 2.
Or, to store the displayed frequency in a channel you select, press PGM, use the number keys to enter the channel number you want to use to store the frequency, then press PGM again. The channel number flashes. If a channel number you entered is already programmed with a frequency, the channel number and the programmed frequency appear for about 2 seconds. Then the channel number flashes and the new frequency appears. Press ENT to program the new frequency or press CL/MON to cancel.
Using Direct Search During a direct search, the scanner searches up or down, starting from a frequency you specify. Follow these steps to use direct search. Note: You can use the scanner’s delay feature while using direct search. 1. Press MAN then enter the frequency (including the decimal point) you want to use as a starting point for the search. Note: To start from a frequency already stored in one of your scanner’s channels, press MAN and enter the desired channel number, then press MAN again. 2.
nel number you want to use to store the frequency, then press PGM again. The channel number flashes. If a channel number you entered is already programmed with a frequency, the channel number and the programmed frequency appear for about 2 seconds. Then the channel number flashes and the new frequency appears. Press ENT to program the new frequency, or press CL/ MON to cancel. If you press ENT, the channel and frequency flash twice and the scanner stores the displayed frequency.
Note: See Step 5 under “Searching the Service Banks” on Page 27 for more information about storing a frequency in a monitor memory. To select other monitor memories, enter the desired monitor memory’s number (1–20), then press MON/CL again or repeatedly press MON/CL. Moving a Frequency from a Monitor Memory to a Channel 1. Press MAN, enter the channel number where you want to store the frequency, then press PGM. 2. Press MON/CL.
Notes: • To reverse the scanning direction, press ▲ or ▼. • To set the scanner to remain on the current channel for 2 seconds after the transmission ends, see “Delay” on Page 42. • To set the scanner to remain on the current channel, even after the transmission stops, press MAN at any time during the transmission so MAN appears and SCAN disappears (see “Monitoring a Stored Channel” on Page 34).
MONITORING A STORED CHANNEL You can continuously monitor a specific channel without scanning. This is useful if you hear an emergency transmission on a channel and do not want to miss any details — even though there might be periods of silence — or if you simply want to monitor that channel. Follow these steps to manually select a channel. 1. Press MAN. 2. Enter the channel number (1–200). 3. Press MAN again.
CLEARING ALL LOCKED-OUT CHANNELS 1. Press PGM. PGM appears. 2. While holding down MON/CL, press L/O RVW/L/O. L-o Ch0000 appears. 3. Press ENT. The scanner clears all locked-out channels. Or, if you do not want to clear the channels, press MON/CL. LISTENING TO THE MARINE BANK To listen to the marine bank, repeatedly press BAND until MRN appears. To change the channel manually, press ▲ or ▼. To scan through the marine bank, hold down ▲ or ▼ for about 2 seconds. MAN disappears and SCAN and ▲ or ▼ appear.
3 162.450 4 162.475 5 162.500 6 162.525 7 162.550 WX Alert Your scanner’s WX alert warns you of serious weather conditions by sounding an alarm if a National Weather Service broadcaster in your area broadcasts a weather alert tone. To set the scanner so it sounds an alarm when a weather alert tone is broadcast, press PRI/ALERT while you are listening to the WX channel. ALErt appears. If the scanner detects the weather alert, it sounds an alarm. Press any key to turn off the alarm.
SCANNING AT THE RACES Your scanner is specially designed to help you listen to communications at auto races. Drivers and their pit crews and corner watchers, pace car drivers, security officers, emergency personnel, track officials, and representatives of governing organizations such as NASCAR, SCCA, and NHRA all use radios to communicate with each other during a race.
Note: After you store a car number and a frequency, you can store additional frequencies then associate those frequencies with the same car number. See “Adding Frequencies to a Car Number.” Follow these steps to store a car number and frequency. 1. Press CAR. CAR# and CAr No. appear and _ flashes. _ _ 2. Enter the car number. If the number is one or two digits, enter the number then press CAR. If the number is three digits, enter the number only. The car number and _ _ _ . _ _ _ appear.
4. Enter the frequency (including the decimal point) you want to associate with the displayed car number by using the number keys and DELAY/•. 5. Press ENT to store the frequency. The frequency is associated with the car number you entered. ADDING A CAR NUMBER TO THE CHANNEL You can assign the car number after you program the frequency into the channel. 1. If a car number appears on the display, press CAR twice. A channel number appears. 2.
3. Repeatedly press ▲ or ▼ to view each of the car numbers you entered. As you press ▲ or ▼, you see all associated frequencies and _ _ _._ _ _. DELETING A FREQUENCY FROM A CAR NUMBER 1. Recall the car number. 2. Repeatedly press ▲ or ▼ until the frequency you want to delete appears. 3. Press PGM. 4. Press 0 then ENT. SCANNING BY CAR NUMBER Once you store car numbers into channels, you can set the scanner so it displays the car numbers you assigned to the channels as it scans them.
FINDING CAR NUMBERS ASSOCIATED WITH CHANNELS If you are listening to a channel and want to know what car number you are hearing, simply press CAR twice. If a car number has been associated with this frequency, the car number and frequency appear. Press CAR twice again to return to normal channel listening. To see what car numbers are stored, press CAR twice, then repeatedly press ENT. The car numbers (from lowest channel number to highest) appear.
SPECIAL FEATURES DELAY Many agencies use a two-way radio system that has a period of several seconds between a query and a reply. To avoid missing a reply, you can program a 2-second delay into any channel or frequency. When your scanner stops on a channel or frequency with a programmed delay, DLY appears and the scanner continues to monitor that frequency for 2 seconds after the transmission stops before resuming scanning or searching.
To remove the lockout from a channel, manually select that channel again, then press L/O/L/O RVW. L/O disappears. Notes: • Your scanner automatically locks out empty channels. • You can still manually select locked-out channels. Clearing All Lockouts from Channels 1. Press MAN. MAN appears. 2. While holding down MON/CL, press L/O RVW/L/O. Lo ALL-CL appears. 3. Press ENT. The scanner clears all locked-out tags from channels. Or, if you do not want to clear, press MON/CL.
Removing a Lockout From a Frequency 1. Start a service bank or direct search. 2. Hold down L/O/L/O RVW for about 2 seconds. L-r appears. 3. Repeatedly press ▲ or ▼ until the desired frequency appears. 4. Press L/O/L/O RVW. The frequency disappears. If there is another locked-out frequency, it appears instead. Or, if there are no more locked-out frequencies, L-r 000.0000 appears. Removing Lockouts From All Frequencies 1. Hold down L/O/L/O RVW for about 2 seconds during a service bank or direct search.
3. Press ENT. The scanner clears any lockouts from all frequencies in all service banks. Or, if you do not want to clear the lockouts, press MON/CL. USING PRIORITY The priority feature lets you scan through channels and still not miss important or interesting calls on a frequency you select. You can program one frequency into the priority channel. As the scanner scans, if the priority feature is turned on, the scanner checks the priority channel for activity every 2 seconds. 1.
USING POWER SAVE If the scanner does not detect a signal within 5 seconds after you manually select a channel, the scanner enters the powersaving standby mode and P.–SA appears. In the standby mode, the scanner rests for 1 second then checks for a signal for 1/2 second, using only 40 percent of the power normally consumed. The scanner continues this until you press any button or it receives a signal. on P.-SA appears if power save is on. oFF P.-SA appears if power save is off.
USING THE KEY LOCK Once you program your scanner, you can protect it from accidental program changes by turning on the keylock feature. When the keypad is locked, the only controls that operate are SCAN, MAN, LIGHT, PGM, VOLUME, and SQUELCH. Note: The keylock does not prevent the scanner from scanning channels or monitoring a single channel, whichever feature you last selected. To turn on the keylock, hold down until the scanner beeps three times and appears.
Resetting the Scanner 1. Turn off the scanner, then turn it on again. 2. Insert a pointed object such as a straightened paper clip into the reset opening on the side of the scanner (as shown), then gently press the reset button inside the opening. Note: If the scanner still does not work properly, you might need to initialize the scanner (see “Initializing the Scanner”). Initializing the Scanner Important: This procedure clears all information you stored in the scanner’s memory.
WIRED/ON-AIR PROGRAMMING You can program your scanner using data you transfer from your personal computer to the scanner using an optional PC cable (called wired programming). You can also program your scanner by receiving data transmitted on a frequency your scanner can receive (called on-air programming).
4. When the scanner successfully receives all data, End and FiniSh appear. If the scanner received an error while receiving data, End and d-Err appear. If the scanner received a checksum error while receiving data, C-Err and a number appear. The number shown next to C-Err indicates the packet number where the error occurred. Note: If the scanner did not receive an end bit from the PC, End does not appear. Wired Programming Specifications Interface ...........................................................
5. When the scanner successfully receives all data, End and FiniSh appear. If the scanner received an error while receiving data, End and d-Err appear. If the scanner received a checksum error while receiving data, C-Err and a number appear. The number shown next to C-Err indicates the packet number where the error occurred. Note: If the scanner did not receive an end bit from the PC, End does not appear. On-Air Programming Specifications Interface ......................
A GENERAL GUIDE TO SCANNING Reception of the frequencies covered by your scanner is mainly “line-of-sight.” That means you usually cannot hear stations that are beyond the horizon. GUIDE TO FREQUENCIES National Weather Frequencies 162.400 162.500 162.425 162.525 162.450 162.550 162.475 Birdie Frequencies Every scanner has birdie frequencies. Birdies are signals created inside the scanner’s receiver. These operating frequencies might interfere with transmissions on the same frequencies.
GUIDE TO THE ACTION BANDS Typical Band Usage (MHz) VHF Band Low Range 6-Meter Amateur Aircraft U.S. Government 2-Meter Amateur High Range 29.00–50.00 50.00–54.00 108.00–136.00 137.00–144.00 144.00–148.00 148.00–174.00 UHF Band Military Aircraft U.S. Government 70-Centimeter Amateur Low Range FM-TV Audio Broadcast, Wide Band 800 Band Law Enforcement Conventional Systems Conventional/Trunked Systems Public Safety Trunked Private/General 380.00–384.00 406.00–420.00 420.00–450.00 450.00–470.00 470.00–512.
Activities Base Stations Mobile Units Repeater Units Control Stations Frequencies (MHz) 451.025–454.950 456.025–459.950 460.025–464.975 465.025–469.975 Note: Remote control stations and mobile units operate at 5 MHz higher than their associated base stations and relay repeater units. BAND ALLOCATION To help decide which frequency ranges to scan, use the following listing of the typical services that use the frequencies your scanner receives.
PTR . . . . . . . . . . . . . . . . . . . . . . . . . . . . . . . . . . . . . . Private Trunked ROAD . . . . . . . . . . . . . . . . . . . . . . . . Road & Highway Maintenance RTV . . . . . . . . . . . . . . . . . . . . . . Radio/TV Remote Broadcast Pickup TAXI . . . . . . . . . . . . . . . . . . . . . . . . . . . . . . . . . . . . . . . . Taxi Services TELB . . . . . . . . . . . . . . . . . . . . . . . . . . . . . . . . . . . Mobile Telephone (Aircraft, Radio Common Carrier, Landline Companies) TELM . . .
U.S. Government Band (137–144 MHz) 137.000–144.000 . . . . . . . . . . . . . . . . . . . . . . . . . . . . . . . GOVT, MIL 2-Meter Amateur Band (144–148 MHz) 144.000–148.000 . . . . . . . . . . . . . . . . . . . . . . . . . . . . . . . . . . . HAM VHF High Band (148–174 MHz) 148.050–150.345 . . . . . . . . . . . . . . . . . . . . . . . . . . . CAP, MAR, MIL 150.775–150.790 . . . . . . . . . . . . . . . . . . . . . . . . . . . . . . . . . . . MED 150.815–150.980 . . . . . . . . . . . . . . . . . . . . .
ULTRA HIGH FREQUENCY (UHF) — (300 MHz–3 GHz) U. S. Government Band (406–420 MHz) 406.125–419.975 . . . . . . . . . . . . . . . . . . . . . . . . . . . . . GOVT, USXX 70-Centimeter Amateur Band (420–450 MHz) 420.000–450.000 . . . . . . . . . . . . . . . . . . . . . . . . . . . . . . . . . . . HAM Low Band (450–470 MHz) 450.050–450.925 . . . . . . . . . . . . . . . . . . . . . . . . . . . . . . . . . . . . RTV 451.025–452.025 . . . . . . . . . . . . . . . . . . . . . . IND, OIL, TELM, UTIL 452.0375–453.
Private Trunked Band 935.0125–939.9875 . . . . . . . . . . . . . . . . . . . . . . . . . . . . . . . . . . PTR General Trunked Band 940.0125–940.9875 . . . . . . . . . . . . . . . . . . . . . . . . . . . . . . . . . . GTR FREQUENCY CONVERSION The tuning location of a station can be expressed in frequency (kHz or MHz) or in wavelength (meters). The following information can help you make the necessary conversions.
TROUBLESHOOTING If your scanner is not working as it should, these suggestions might help you eliminate the problem. If the scanner still does not operate properly, take it to your local RadioShack store for assistance. PROBLEM POSSIBLE CAUSE REMEDY Scanner is totally inoperative. The AC or DC adapter is not connected. Be sure the adapter’s barrel plug is fully inserted into the PWR DC 9V jack. The batteries are dead. Replace the batteries with fresh ones, or recharge the rechargeable batteries.
CARE AND MAINTENANCE Your RadioShack 200-Channel VHF/Air/UHF/800 MHz Handheld Race Scanner is an example of superior design and craftsmanship. The following suggestions will help you care for your scanner so you can enjoy it for years. Keep the scanner dry. If it gets wet, wipe it dry immediately. Liquids might contain minerals that can corrode the electronic circuits. Use and store the scanner only in normal temperature environments.
SPECIFICATIONS Frequency Coverage (MHz): 10 Meter Amateur Radio ................ 29–29.7 (in 5 kHz steps) VHF Lo ........................................... 29.7–50 (in 5 kHz steps) 6 Meter Amateur Radio ..................... 50–54 (in 5 kHz steps) Aircraft ............................. 108–136.9875 (in 12.5 kHz steps) Government ................................... 137–144 (in 5 kHz steps) 2 Meter Amateur Radio ................. 144–148 (in 5 kHz steps) VHF Hi ...........................................
Antenna Impedance .................................................. 50 Ohms Audio Output Power (10% THD) .................. 190 mW Nominal (using batteries, 240 mW using external power (DC 9V)) Built-In Speaker ......................... 13/8 Inches (36 mm), 8 Ohms Operating Temperature .........................................14° to 140°F (–10° to 60°C) Power Requirements ..................... 6 Volts DC, 4 AA Batteries AC Adapter ...........................................
NOTES 63
Limited One-Year Warranty This product is warranted by RadioShack against manufacturing defects in material and workmanship under normal use for one (1) year from the date of purchase from RadioShack company-owned stores and authorized RadioShack franchisees and dealers.