
Unit installation


Installation and Operation Manual Chapter 4 Configuration
FCD-E1 Supervision Terminal Operating Instructions 4-21
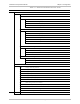
Table 4-5. Mnemonic Mode Menu Structure (Cont.)
MM Main Menu
L2 Channel 2 loopback commands submenu
LL2 Activate remote loopback on channel 2
LR2 Activate remote loopback on channel 2
LB2 Activate BER test on channel 2
LI2 Activate inband-activated loopback on channel 2
4.7 Supervision Terminal Operating Instructions
Before using the supervision terminal, make sure the preparations listed in the
Configuration Sequence section on page 4-1 and the Preliminary Configuration on
page 4-5 are completed, and all the relevant equipment has been turned on.
Starting a Single FCD-E1Session
When the terminal is used to control a single FCD-E1, always assign node address
0 to the FCD-E1. Use the following start-up sequence to connect to an FCD-E1
assigned node number 0.
1. If you use the AUTO (Autobaud) mode, press the <Enter> key three times.
This allows the FCD-E1 to identify the terminal data rate.
2. Assuming that the FCD-E1 successfully identified the data rate of the
supervision terminal, you will be notified if the FCD-E1 failed the power-up
self-test:
If you see
FCD SELFTEST FAILED, the FCD-E1 must be repaired before
you can continue using it.
If FCD-E1 successfully passed the power-up self-test, it sends the following
message:
FCD SUPERVISORY PORT ONLINE
3. By now, the FCD-E1 prompt should already be displayed on the terminal
screen, after the on-line announcement.
If you see
PASSWORD>, this indicates that password protection is enabled. In
this case, type the current case-sensitive password (four to eight characters).
The default password is RAD.
If your password is accepted, the FCD> prompt is displayed.
4. FCD-E1 is now in session, under your control. On your terminal, you will see
the prompt:
FCD>
On the FCD-E1 front panel, you will see the message
TERMINAL ON LINE.
The front panel controls are disabled as long as FCD-E1 is under remote
control.