
Owner`s manual


12
Only limited cleaning will be required under normal use of the burner system.
TO CLEAN THE BURNER SYSTEM
1. Remove the glass / gems. Use a vacuum cleaner to remove loose
particles from all surfaces of the system. Do not use cleaning fl uids.
2. Dust the assembly and the burner. Using a compressed air duster
(commonly available at computer, electronic, or offi ce supply stores);
blow through all of the burner ports. See the burner fi gure on the
previous page for locations.
3. Reinstall the glass / gems as instructed in this manual.
If, after a period of use, the fl ames start to exhibit unusual shapes and
behavior, or the burner fails to ignite smoothly, the burner ports may require
some cleaning. If this happens, it is preferable to contact the nearest dealer
to get the burner system serviced.
Do not remove the rating plates or the warning tags. These are an integral safety and identifi cation
component of this appliance.
During periods of heavy use, inspect the burner system frequently for evidence of sooting. If sooting is present,
discontinue use until the source of sooting is corrected.
CLEANING AND SERVICING THE ODS PILOT
Periodic cleaning and maintenance of the burner system is recommended to ensure that the burner system operates
properly. Cleaning of the ODS pilot system is an important part of the maintenance program.
This ODS pilot cleaning procedure must be performed by a qualifi ed professional service technician familiar
with the specifi c characteristics of the burner system.
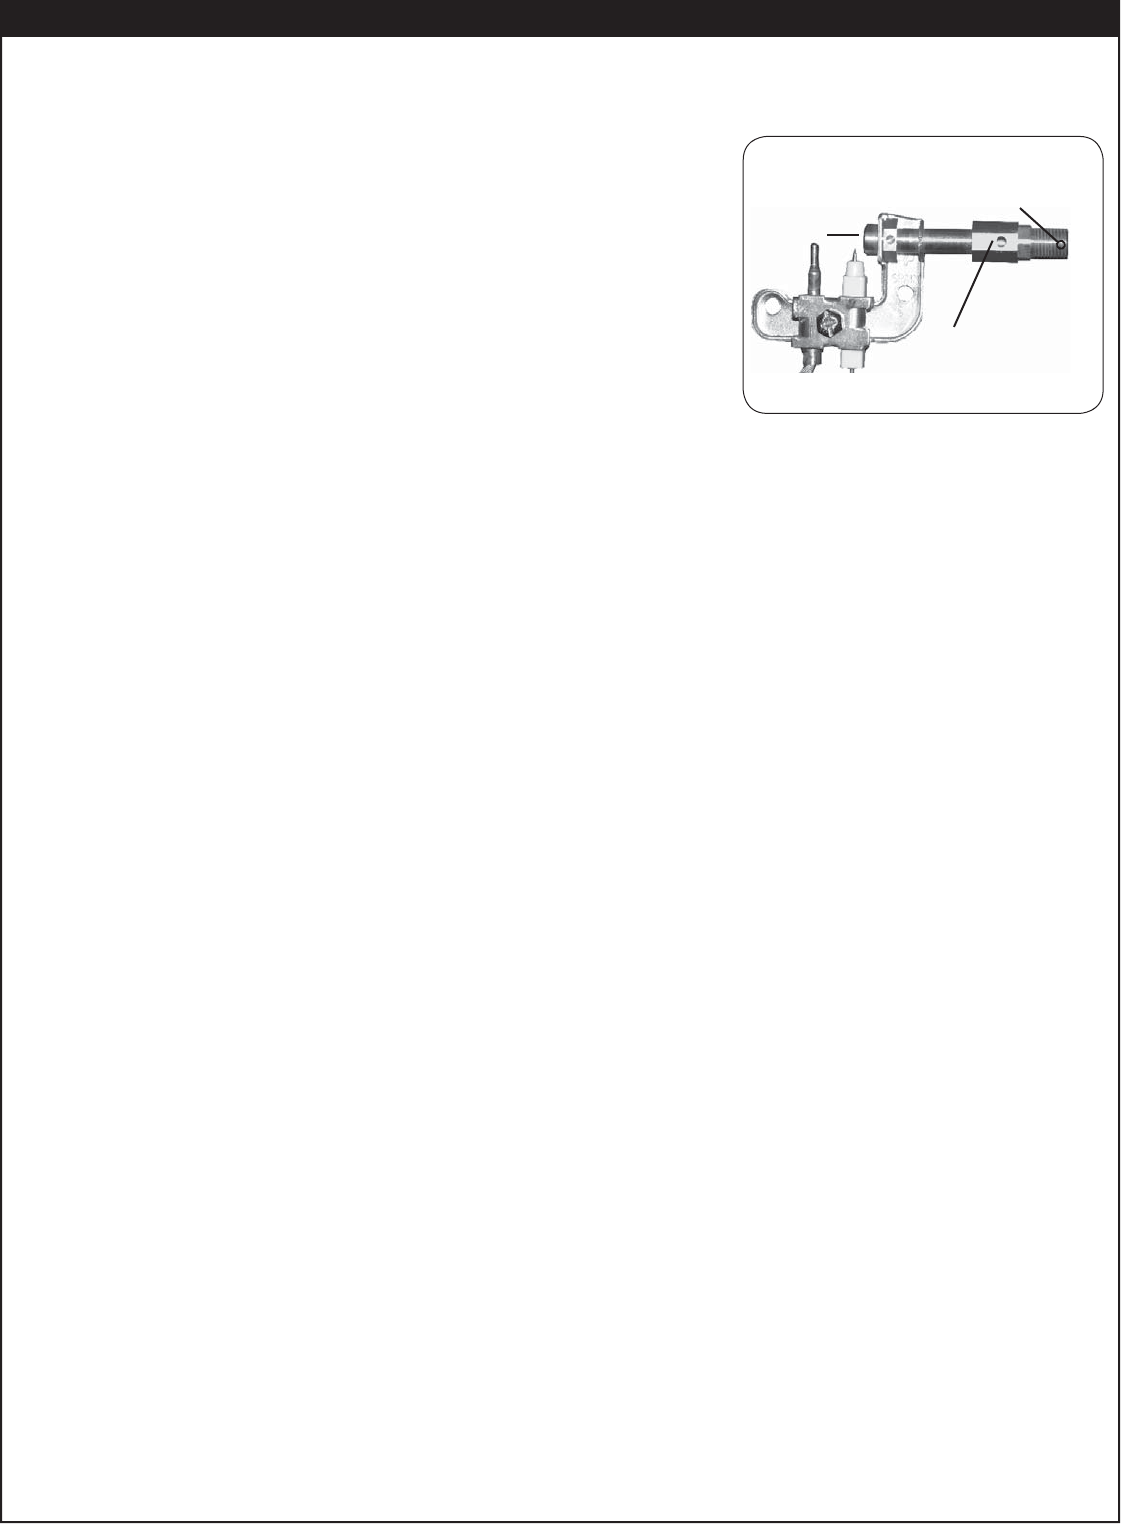
1. Turn the burner system to the OFF position and allow it to cool. Inspect the ODS pilot area (see Fig. 12-1) for any
visual contamination or debris (usually lint, hair, spider webs, or small insects). Lightly brush off all external
surfaces while vacuuming loosened debris from the ODS pilot opening. Be careful not to brush any foreign
material into the ODS pilot opening.
2. Clean out the air intake openings (see Fig. 12-1) by lightly brushing around the openings while vacuuming.
Note: It is very important that the air intake openings be kept clear of debris. Should the openings become
blocked, the ODS pilot system will not operate properly.
3. Light the ODS pilot according to the relevant LIGHTING INSTRUCTIONS page. Periodically verify the ODS
pilot fl ame appears as shown in the CHECKING THE ODS PILOT FLAME APPEARANCE section.
4. If the ODS pilot fl ame does not burn as indicated in the instructions, extinguish the ODS pilot by turning the
valve to the full OFF position. Using a compressed air duster, insert the fl exible nozzle through the air intake
openings, ensuring that the nozzle is pointed toward the ODS pilot opening (see Fig. 12-1). Blow air through
the intake openings to clear out any debris that may be in the system.
5. Relight the ODS pilot and inspect it to be sure it is burning as shown in the instructions. If not, extinguish the
ODS pilot and turn off the gas supply to the burner system. Using an adjustable or a
1
/
4
" wrench, disconnect
the ODS pilot gas line (see Fig. 12-1) from the valve.
6. Insert the fl exible nozzle of the compressed air duster and blow air into the input end of the ODS pilot gas line
to remove any blockages. Do not blow air directly into the ODS pilot opening. Blow air in the direction
of the gas fl ow.
7. Reinstall the ODS pilot gas line and check for leaks.
8. Light the ODS pilot to make sure it is operating properly (see LIGHTING INSTRUCTIONS).
9. If the ODS pilot still does not operate properly, the ODS pilot may need to be replaced with the same model
as the one on the burner system.
CLEANING AND SERVICING
Fig. 12-1
ODS pilot
opening
Air intake
openings
(on each side)
ODS pilot gas line
connects here