
User's Manual

CHAPTER 2 Installing Transceiver Devices
Page 46 of 64 Quick Response Premiere Wireless Call System Hardware Installation Guide
0510-1099-E
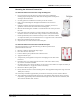
Setting Up the Door/Window Transceiver For Use
To set up the Door/Window transceiver for use
1. Activate the Door/Window transceiver by opening the door or window.
If the transceiver is working properly, an Exit alarm event will be listed on the Event List at the
Central Server. The system senses the Door/Window transceiver when it goes into alarm and adds it
to its list of devices.
2. Reset the Door/Window transceiver by closing the door or window and pressing the reset button if
applicable.
If the transceiver is reset properly, the alarm event will automatically clear from the Event List at the
Central Server. If Enforce Joint Commission is enabled, you must clear the alarm at the Central
Server by selecting a reason.
3. At the Central Server, update the Door/Window transceiver information, for example, giving it a
name and/or assigning it to a room or unit. Be sure to enable the Inactivity Check-In feature and
select beginning and end times. Refer to the “Update Devices” section in the applicable Series
Software Administrator Guide.
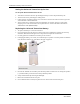
Replacing the Door/Window Transceiver Battery
To replace the battery on a Door/Window transceiver
1. Use your fingers to open the front cover of the transceiver by pushing the retaining clip on the top
downward. This allows the hinged cover to drop down and expose the circuit board.
2. Carefully pull the circuit board free from the pins on enclosure.
3. If changing the battery, use a small, non-conductive piece of plastic or wood to push the 3V Lithium
coin cell battery from the rear of the battery clip until it pops free.
NOTE: Do not use a metal screwdriver or metallic instrument to remove the battery. This
May damage the device.
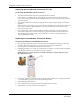
4. Insert the 3V Lithium coin cell battery into the battery holder as shown. Be sure to align the positive
(+) end of the battery as marked on the battery and battery holder.
5. Verify LED light communication.
6. Once communication is verified, return the circuit board onto the two pins.
7. Snap the front cover of the transceiver back into place.