
User's Manual


CHAPTER 1 Installing Hardware Components
Quick Response Premiere Wireless Call System Hardware Installation Guide Page 11 of 64
0510-1099-E
Install Routers
Routers receive signals from transceivers and re-transmit them to the Gateway.
There are two models of Routers, one with an internal antenna and one with an
external antenna for greater range. Routers can be supervised; a routine signal is
sent from each Router and if the signal is not received by the system, a Device Fault
event is generated in the Event List at the computer.
The Router has four (4) single-color LED lights; two green and two red. For more
information on LED lights and LED sequence refer to “LED Sequence” on page 25.
The two lights furthest from the Reset Button indicate device transceiver
communication status These set of lights flashes briefly (once) every check-in (30
seconds by default), when a tamper alarm is triggered or cleared, and when a data is
forwarded.
Green indicates communication is good and data is forwarded OK to the next
Router.
Red indicates communication failure and data is NOT forwarded to the next
Router.
The two lights closest to the Reset Button indicate RS232 communication status. These set of lights
flashes briefly (once) when data is transmitted to an external RS232 device (i.e. Quick Look™).
Green indicates that the external RS232 device loopback is detected.
Red indicates that the external RS232 device loopback is not detected.
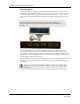
Place a Pendant into Survey Mode
A Pendant in Survey Mode is used to survey the coverage area when installing Routers. Any
Pendant transceiver can be configured for Survey Mode. While in Survey Mode the Pendant
periodically blinks either green or red, depending on whether or not it is in range of a Router.
Pressing the button on a Pendant in Survey Mode does not generate or clear alarms.
Prepare Pendant for Survey Mode configuration
1. Insert the 3V Lithium coin cell battery into the Pendant.
2. Allow the Pendant to sit “untouched” for two minutes while it downloads the site’s
channels.
3. Remove the battery from the Pendant.
To configure a Pendant for Survey Mode
1. Hold down the button on the Pendant transceiver.
2. While holding the button down, insert a 3V Lithium coin cell battery into the battery holder
of the Pendant transceiver.
3. Continue holding the button down until you see the light blink (approximately 2 seconds).
The Pendant blinks green or red every 1 1/2 seconds. Green indicates that the Pendant is
within range of a Router; red indicates the Pendant is outside of the coverage area.