
Installation Guide


4
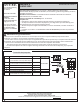
CARE AND MAINTENANCE
Wipe clean using soft, dry cloth or static duster. Always avoid using harsh chemicals and abrasives to clean
fixture as they may damage the finish.
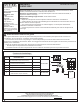
TROUBLESHOOTING
PROBLEM POSSIBLE CAUSE CORRECTIVE ACTION
Bulbs will not light.
Fuse blows or the
circuit breaker trips
when light is turned
on.
1. Bulb is burned out.
2. Power is off.
3. Faulty wire connection.
4. Faulty switch.
Crossed wires or power wire is
grounding out.
1 . Replace light bulb.
2. Make sure power supply is on.
3. Check wiring.
4. Test or replace the switch.
Check wire connection.
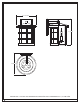
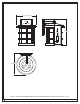
STEP 6:
a. Make sure the surface of the exterior wall and fixture
backplate are free of dirt.
b. Using silicone sealer (not included) start on one side of
fixture backplate and follow contour where the fixture
backplate meets the exterior wall surface.
c. Proceed to seal around backplate.
To ensure proper moisture drainage, do not seal
bottom of fixture backplate.
NOTE:
Silicone Sealer
Exterior Wall Surface
Fixture Backplate
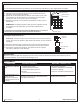
Your installation is now complete! Restore electricity
and save this sheet for future reference.
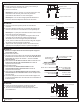
Glass replacement:
Note: Place a cloth or towel on the ground under the
work area to prevent loss of mounting hardware if
dropped.
a. Remove lock screw, cage, glass from the fixture body.
b. Remove the glass and add the replacement into the
same position.
c. Attach the cage with the glass back onto the fixture body
and secure with lock screws.
STEP 5:
a. Install correct bulbs referring to fixture markings and/or labels for maximum wattage.
Fixture Body
Glass
Lock Screw
Cage
2018 QuoizelInc.
Printed in China