
Instructions / Assembly
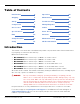


Table Of Contents
- QuickJack Manual
- Table of Contents
- Introduction
- Shipping
- Safety
- Components
- Accessories
- Specifications
- Frequently Asked Questions
- Setup Checklist
- Setup
- Setup Safety Rules
- Tools
- Selecting a Site
- Unpacking
- Clearances
- QuickJack Assembly Kit
- Air and Hydraulic Cylinders
- Installing the Hydraulic Elbow Fittings
- Preparing the Short Hydraulic Hoses
- About Quick-Connect Fittings
- Routing the Short Hydraulic Hoses
- Preparing and Connecting the Long Hydraulic Hoses
- Pressurizing the Air Cylinders
- Find a Location for the Power Unit
- Installing the Hydraulic Fittings on the Power Unit
- Connect the Power Unit to a Power Source
- Filling the Hydraulic Fluid Reservoir on the Power Unit
- Check the Breather Valve
- Connect the Hydraulic Hoses
- Bleeding the Hydraulic Cylinders
- Final Checklist Before Operation
- Test the QuickJack
- Leave the Manual with the Owner/Operator
- Operation
- Maintenance
- Troubleshooting
- Wiring Diagrams
- Labels
- Parts Sheets
- Automotive Lift Institute (ALI) Store
- Maintenance Log
- CE Documentation

Manual. QuickJack™ Portable Car Jack, Setup and Operation Manual, P/N 5900959, Manual Revision J3,
Released October 2019.
Copyright. Copyright © 2019 by BendPak Inc. All rights reserved. You may make copies of this document if you
agree that: you will give full attribution to BendPak Inc., you will not make changes to the content, you do not gain
any rights to this content, and you will not use the copies for commercial purposes.
Trademarks. BendPak and the BendPak logo are registered trademarks of BendPak Inc. QuickJack and
JackPak are trademarks of BendPak Inc. All other company, product, and service names are used for
identification only. All trademarks and registered trademarks are the property of their respective owners.
Limitations. Every effort has been made to ensure complete and accurate instructions are included in this
manual. However, product updates, revisions, and/or changes may have occurred since this manual was
published. BendPak reserves the right to change any information in this manual without incurring any obligation for
equipment previously or subsequently sold. BendPak is not responsible for typographical errors in this manual.
Warranty. The QuickJack warranty is more than a commitment to you: it is also a commitment to the value of
your new product. For full warranty details and to register your new QuickJack product, contact your nearest
QuickJack dealer or visit quickjack.com/warranty.
Safety. Your new product was designed and manufactured with safety in mind. Your safety also depends on
proper training and thoughtful operation. Do not set up, operate, maintain, or repair the unit without reading and
understanding this manual and the labels on the unit.
Owner Responsibility. In order to maintain your product properly and to ensure operator safety, it is the
responsibility of the product owner to read and follow these instructions:
• Follow all setup, operation, and maintenance instructions.
• Make sure product setup conforms to all applicable local, state, and federal codes, rules, and regulations,
such as state and federal OSHA regulations and electrical codes.
• Consult a qualified person or organization to address any special regional structural and/or seismic
requirements specified by any other agencies and/or codes such as the Uniform Building Code (UBC) and/or
International Building Code (IBC).
• Read and follow all safety instructions. Keep them readily available for operators.
• Make sure all operators are properly trained, know how to safely operate the unit, and are properly supervised.
• Do not operate the product until you are certain that all parts are in place and operating correctly.
• Carefully inspect the product on a regular basis and perform all maintenance as required.
• Service and maintain the unit only with approved replacement parts.
• Keep all instructions permanently with the product and make sure all labels are clean and visible.
• Only use this product if it can be used safely!
Unit Information. Enter the Model Number, Serial
Number, and the Date of Manufacture from the label
on your unit. This information is required for part or
warranty issues.
Model:
Serial:
Date of Manufacture: