
Instructions / Assembly


Table Of Contents
- QuickJack Manual
- Table of Contents
- Introduction
- Shipping
- Safety
- Components
- Accessories
- Specifications
- Frequently Asked Questions
- Setup
- Tools
- Selecting a Site
- Unpacking
- Air and Hydraulic Cylinders
- QuickJack Assembly Kit
- Installing the Hydraulic Elbow Fittings
- Preparing the Short Hydraulic Hoses
- Routing the Short Hydraulic Hoses
- Preparing the Long Hydraulic Hoses
- Pressurizing the Air Cylinders
- Preparing Your Power Unit
- Power Sources for VAC Power Units
- Power Sources for 12 VDC Power Units
- Installing Fittings on Your Power Unit
- Filling the Power Unit Hydraulic Fluid Reservoir
- Check the Breather Valve
- Bleed the Hydraulic Cylinders
- Test of Proper Setup
- Operation
- Maintenance
- Troubleshooting
- Wiring Diagrams
- Labels
- Parts Sheets
- Maintenance Log
- CE Documentation
QuickJack Portable Car Jack 22 P/N 5900959 — Rev. H — May 2018
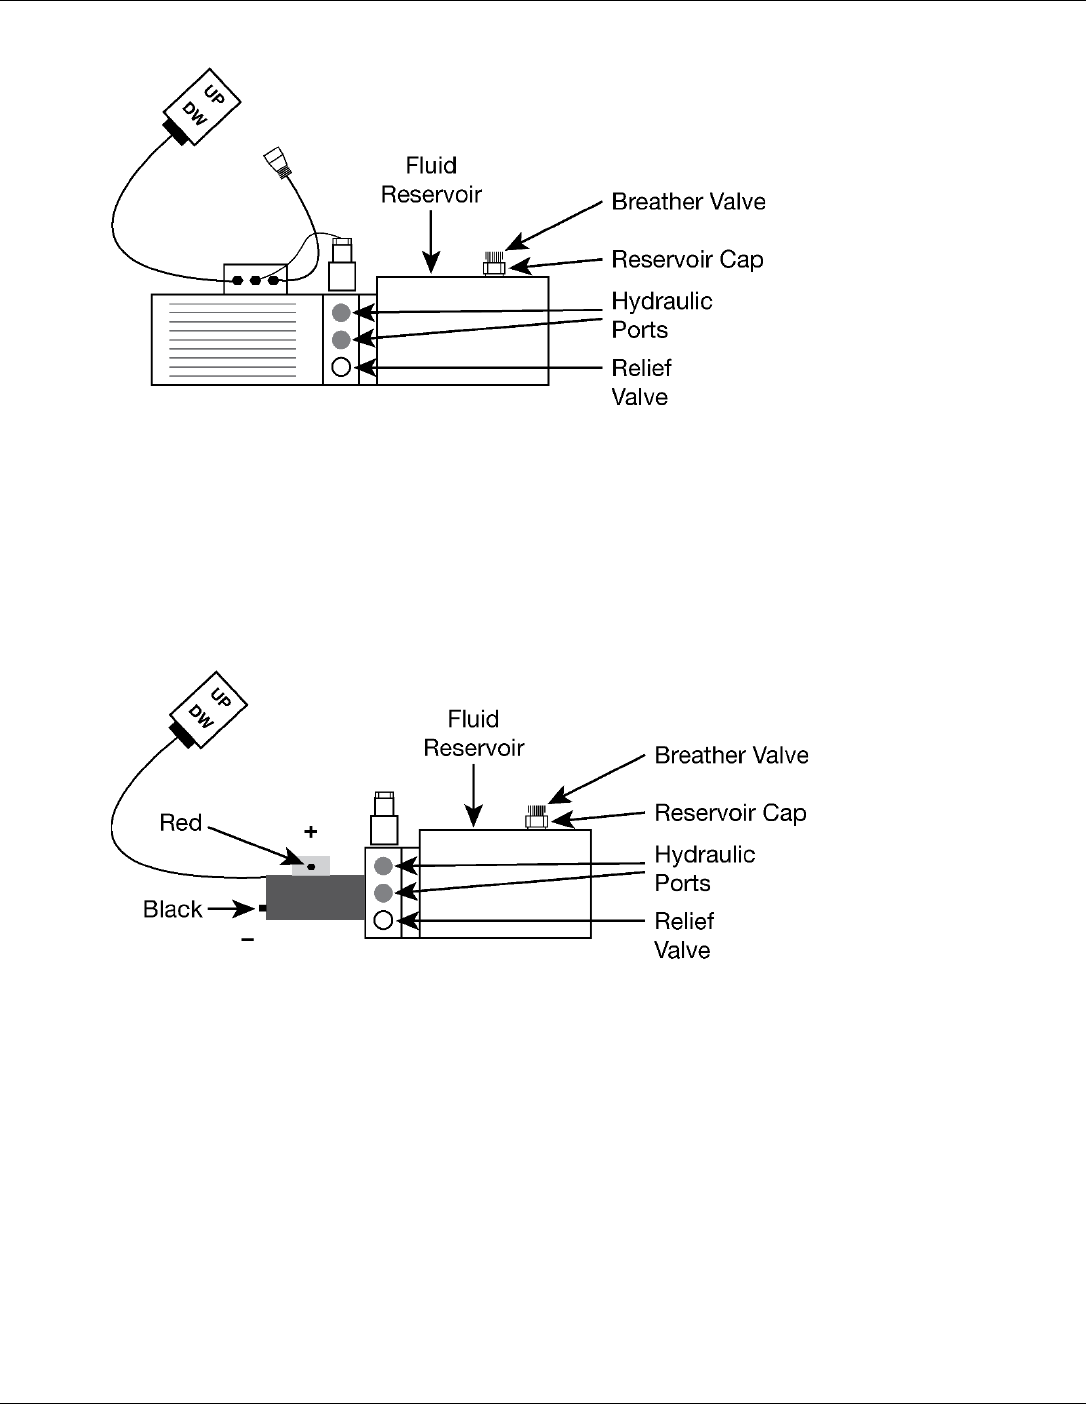
220/240 VAC Power Unit
Drawing not necessarily to scale. Some Power Units may be slightly different.
Power Sources for 12 VDC Power Units
If you are using a 12 VDC Power Unit with your QuickJack, you can connect it to a car battery, certain
portable 12 VDC power packs, or a mini car jump starter.
12 VDC Power Unit
Drawing not necessarily to scale. Some Power Units may be slightly different.
Keep the following in mind:
• Connect your 12 VDC Power Unit directly to a 12-volt power source. The minimum requirement for
jumper cables is 7 gauge/10 mm.
• Make sure to connect the 12 VDC
negative
(black, –) source to the
negative
(black, –) terminal
and the 12 VDC positive (red, +) power source to the positive (red, +) terminal.
• Remove all jewelry while working with the 12 VDC Power Unit.