
Instructions / Assembly


Table Of Contents
- QuickJack Manual
- Table of Contents
- Introduction
- Shipping
- Safety
- Components
- Accessories
- Specifications
- Frequently Asked Questions
- Setup
- Tools
- Selecting a Site
- Unpacking
- Air and Hydraulic Cylinders
- QuickJack Assembly Kit
- Installing the Hydraulic Elbow Fittings
- Preparing the Short Hydraulic Hoses
- Routing the Short Hydraulic Hoses
- Preparing the Long Hydraulic Hoses
- Pressurizing the Air Cylinders
- Preparing Your Power Unit
- Power Sources for VAC Power Units
- Power Sources for 12 VDC Power Units
- Installing Fittings on Your Power Unit
- Filling the Power Unit Hydraulic Fluid Reservoir
- Check the Breather Valve
- Bleed the Hydraulic Cylinders
- Test of Proper Setup
- Operation
- Maintenance
- Troubleshooting
- Wiring Diagrams
- Labels
- Parts Sheets
- Maintenance Log
- CE Documentation
QuickJack Portable Car Jack 15 P/N 5900959 — Rev. H — May 2018
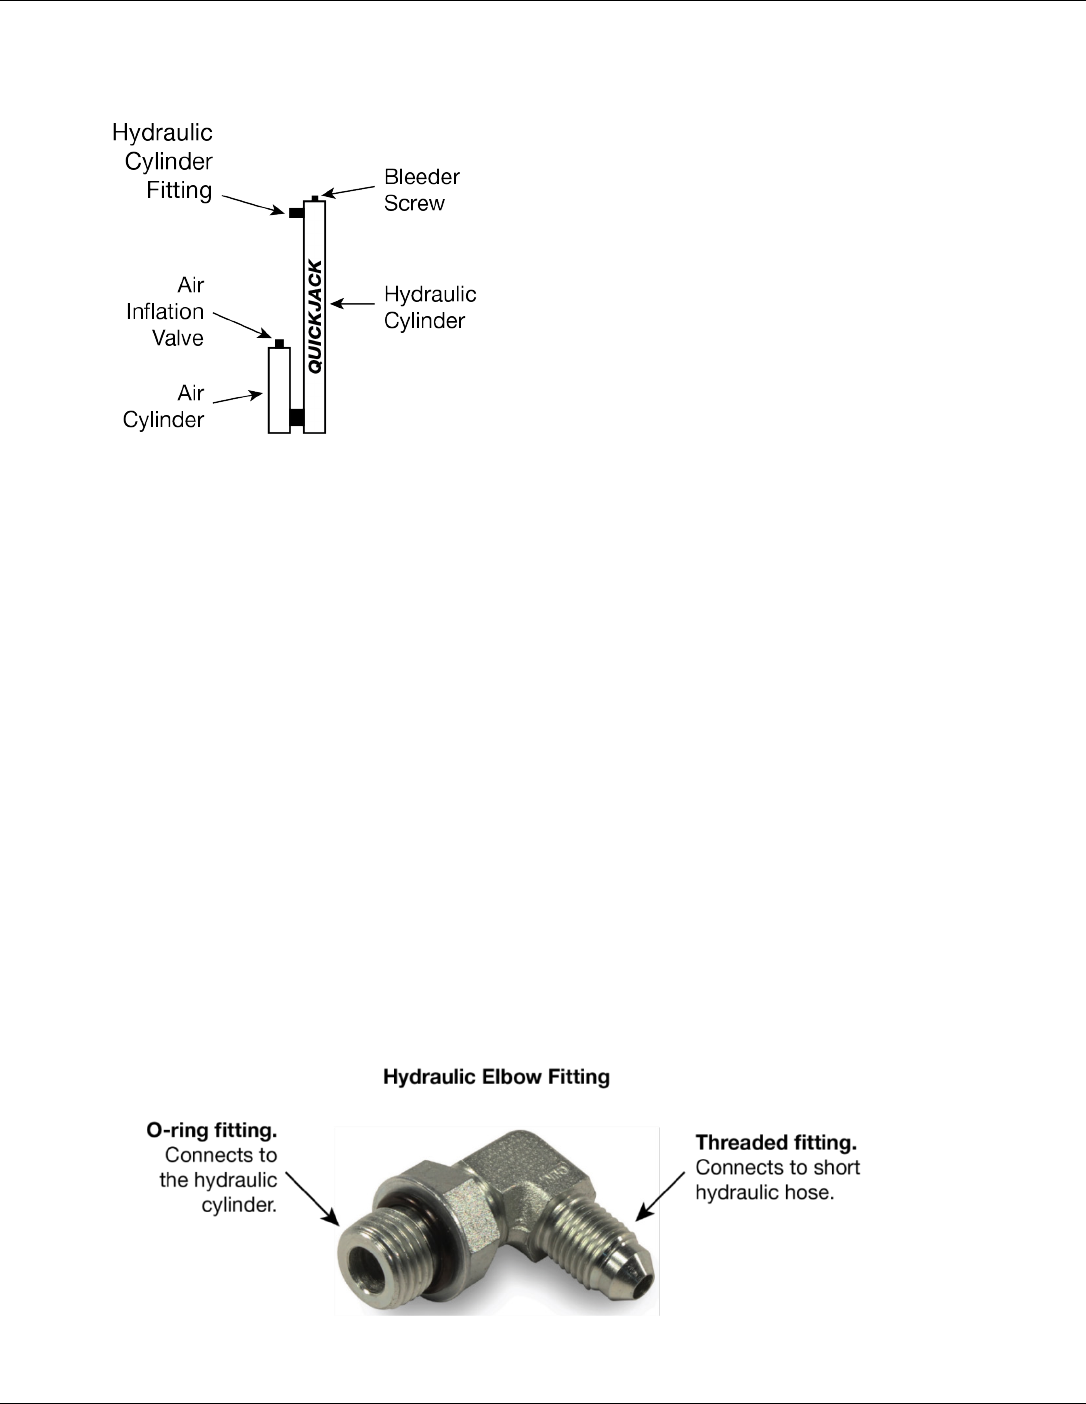
Air and Hydraulic Cylinders
Each QuickJack Frame
has one Air Cylinder and one Hydraulic Cylinder.
QuickJack Assembly Kit
Many of the items you will be using during initial setup come in the QuickJack Assembly Kit, which is a
clear plastic container included in your QuickJack packaging.
The QuickJack Assembly Kit includes:
• Four female Quick-Connect Fittings (for Long Hydraulic Hoses, both ends of each hose)
• Two male Quick-Connect Fittings (one for each Short Hydraulic Hose)
• Two Power Unit Quick-Connect Fittings (connect both to the Hydraulic Ports on the front of the
Power Unit)
• Two Hydraulic Elbow Fittings (one for each Hydraulic Cylinder)
• Thread Seal Tape
• Feet for the bottom of the Power Unit (some Power Units may come with feet already installed)
Installing the Hydraulic Elbow Fittings
You need to install one Hydraulic Elbow Fitting on each Hydraulic Cylinder, one on each QuickJack
Frame.
To install a Hydraulic Elbow Fitting:
1. Remove the shipping plug from the Hydraulic
Cylinder
Fitting.