
User`s manual

Eagle 2000 – 2kW FM Broadcasting Amplifier
User’s manual – Page 31 of 66
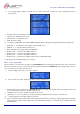
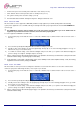
2) The read-only Analog Inputs menu will show. It’s split in three pages and lists the results of internally carried out
measurements:
• Forward Power: forward output power level
• Input Power: driving input power level
• Reflected P.: reflected power level
• BIAS Volt: bias voltage.
In stand-by mode the BIAS Volt value is NEGAT (negative), whereas during the normal operation it will be a voltage value
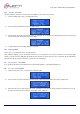
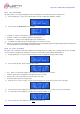
• Heatsink T. C: temperature of the amplifier section heatsink (in °C)
• Ambient T. C: environmental temperature (in °C).
• Main Voltage: power supply voltage of the MOS FETs
• Module Curr. 1: current of the amplifier module # 1
• Module Curr. 2: current of the amplifier module # 2
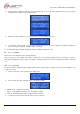
• Module Curr. 3: current of the amplifier module # 3
• Module Curr. 4: current of the amplifier module # 4 (not used with Eagle 2000).
To quit and go back to the Debug Page, press the knob.
9.5.b Logic Inputs menu
This menu allows to check the proper operation of the ON/STAND-BY button by checking its dedicated contacts of the control board.
Moreover, it shows the presence of an external stand-by command coming from the REMOTE I/O connector
[16]. Finally, it shows if
one or more alarms are currently released (Ö 12.2).
1) From the Debug Page (Ö
9.5), select Logic Inputs.
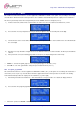
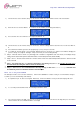
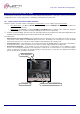
2) Press the knob. The Logic Inputs page will be shown (see bottom note):
• Start Button: proper operation of the ON/STAND-BY button. It is tested on the related contacts in the CPU board (in order
to also test the wirings). When pressed, OFF changes into ON
• standby: if case of an active stand-by command, you will see ON
• (alarm name) - if one or more alarms are currently released it/they will be shown from this line (see bottom note)
3) To quit and go back to the Debug Page, press the knob.
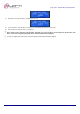
If one or more alarms will be released, they will be displayed from the 3
rd
line, so the Logic Inputs page could be eventually
split in two ones in order to make sufficient room to accommodate the alarm(s). To scroll the alarms, simply turn the knob
counterclockwise.