
User's Manual


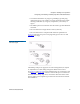


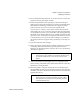
Table Of Contents
- Contents
- Figures
- Tables
- Preface
- Tape Drive Product Information
- SDLT 600 Tape Drive Specifications
- Installing Your Tape Drive
- Warranty Note
- Safety, Handling, and ESD Protection
- Pre-Installation Guidelines
- Configuring and Installing an Internal Tape Drive with SCSI Interface
- Configuring and Installing an Internal Tape Drive with Fibre Channel Interface
- Configuring and Installing a Tabletop Tape Drive with SCSI Interface
- Configuring and Installing a Tabletop Tape Drive with SCSI Interface
- Confirming the Installation
- Using Your Tape Drive
- Regulatory Compliance
- Super DLTtape I and Super DLTtape II Data Cartridges
- DLTtape VS1 Data Cartridge
- Glossary
Chapter 4 Using Your Tape Drive
Performing a Trial Back-up
SDLT 600 Product Manual
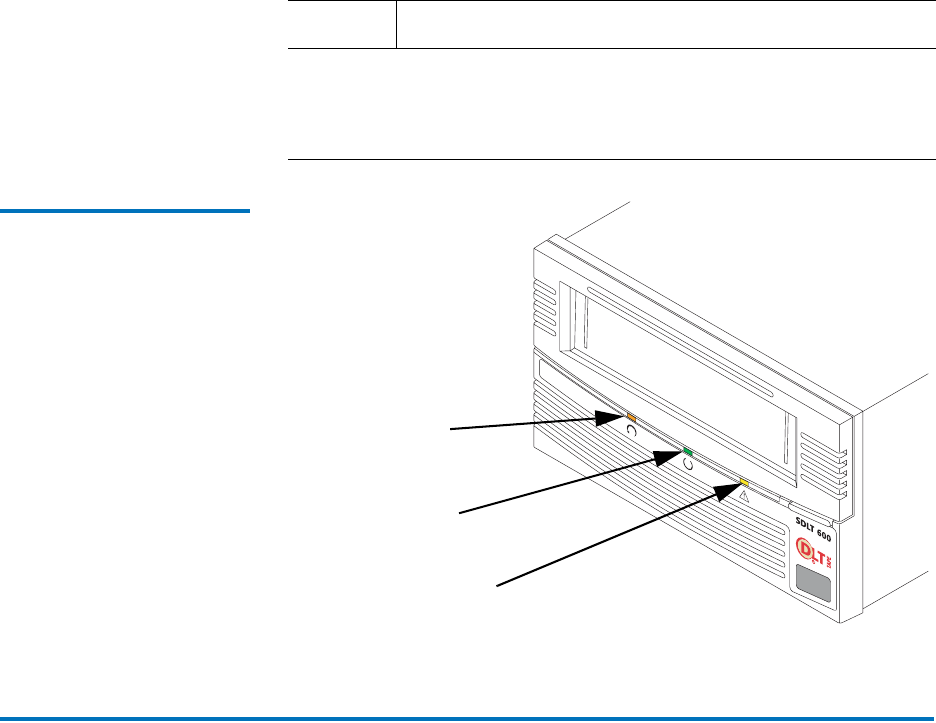
Figure 19 Front Panel LEDs
Performing a Trial Back-up 4
Complete the following steps to perform a trial backup and verify correct
tape drive installation:
• Insert a data cartridge. Push the data cartridge completely into the
system. The tape will load automatically.
• Choose a sample file set from the host computer.
• Create a backup file and then restore the file set. If the backup file
completely restores, without any errors, you installed the system
correctly.
Note: If a data cartridge is in place when power is turned on, all
stages remain the same except stage 3. It may take a
considerably longer time for stage 3 to complete due to tape
rewind and searching operations that occur during that stage.
Stage What You Observe
Green/Orange LED
Green LED
Yellow LED
(Cleaning Required)
(Drive Density)
(Drive Status)