
User`s guide

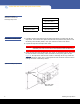


6 Installing the Tape Drives
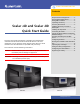
Scalar i40 and Scalar i80 Quick Start Guide
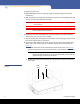
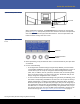
Figure 3 Acceptable
Installation Locations for
Half-Height Tape Drives
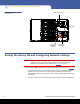
Installation Instructions 1 If needed, remove filler plates from the back of the library to make room for the
tape drives. Unscrew the two captive thumbscrews and pull the filler plates out of
the library. Save the filler plates in case you need to use them in the future.
2 Unpack the tape drive and tape drive cable.
Caution: The tape drive always resides in a drive sled, and together they are
effectively one unit. Do not remove the tape drive from the drive sled.
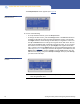
3 Insert the tape drive into the drive slot. The “shelf” on the bottom of the drive sled
fits into the notch in the library chassis and slides on the plastic guide rails (see
Figure 4). The tape drive must be level to slide in smoothly. At the very end of the
slide, you will feel a slight “click” as the tape drive sled connector connects into its
mating connector in the library chassis.
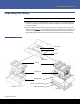
Figure 4 Installing a Tape Drive
Tape Drive Slot 5
Tape Drive Slot 4
Tape Drive Slot 3
Tape Drive Slot 2 Tape Drive Slot 2
Tape Drive Slot 1 Tape Drive Slot 1
Scalar i40 Scalar i80
Notch in library
chassis
Drive sled “shelf”
slides in notch