
User's Guide


&KDSWHU
6FDODU$,7
2.
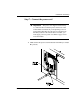
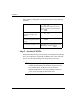
Connect the female end of the power cord to the power connector
on the back of the library.
3.
Plug the male end of the power cord into the power source.
Note:
The library has autoranging voltage selection, so you do not
need to change the voltage setting.
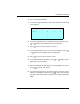
Step 8 – Power on the library
1.
Make certain the library's door is closed and locked.
2.
Turn on the host computer system.
Note:
If your host system requires that attached peripheral devices
be powered on before the host, turn on the library before
you turn on the host.
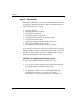
3.
Push the power switch on the back of the library to the on position
(the
I
is pressed).
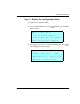
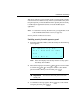
Wait while the library performs its power-on sequence. During this time,
the following activities occur:
S The cooling fan begins to rotate.
S The LCD illuminates and displays the Main Screen.
S Each tape drive and the library perform a power-on self-test.