
User's Manual


Appendix B StorNext Administration Tasks
Connecting to a StorNext Network Using Xsan 2
StorNext 3.1.3 Installation Guide 120
<?xml version="1.0" encoding="UTF-8"?>
<!DOCTYPE plist PUBLIC "-//Apple//DTD PLIST 1.0//EN" "http://
www.apple.com/DTDs/PropertyList-1.0.dtd">
<plist version="1.0">
<dict>
<key>computers</key>
<array/>
<key>metadataNetwork</key>
<string>My IP Address</string>
<key>ownerEmail</key>
<string>me@mycompany.com</string>
<key>ownerName</key>
<string>My Name</string>
<key>role</key>
<string>CLIENT</string>
<key>sanName</key>
<string>My SAN name</string>
<key>serialNumbers</key>
<array>
<dict>
<key>license</key>
<string>xsan client license number</string>
<key>organization</key>
<string>organization name</string>
<key>registeredTo</key>
<string>registered to name</string>
</dict>
</array>
</dict>
</plist>
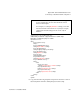
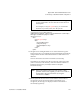
5 Copy from the following template and paste into the file to create an
automount.plist file located in /Library/Filesystems/Xsan/config/.
Note: Items in red indicate data you should enter which applies
to your configuration. Do not enter the literal red text
shown in the template.
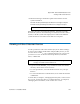
For example, for <string>My IP Address</string> you would
enter the netmask in the format X.Y.Z.0/24 (for example,
<string>10.65.182.0/24</string>) not the words “My IP
Address.”