
User's Guide


28 Troubleshooting and Diagnostics
3. Press and hold the Unload button for two seconds to select Drive R/W Diagnostics.
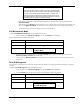
The front panel indicators will display the following:
Indicator State, Character, or Message
Status LED
Amber, solid
Single-character display
1, flashing
LCD
Drive R/W Diagnostic
Drive Self Test
After 60 seconds the front panel indicators will display the following:
Indicator State, Character, or Message
Status LED
Amber, solid
Single-character display
C, flashing
LCD
Drive R/W Diagnostic
Load Scratch Tape
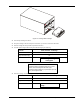
4. Within 60 seconds, insert a scratch data cartridge that is not write-protected into the drive (or the drive will exit
Maintenance Mode). Refer to Convert FMR Tape to Scratch Tape elsewhere in this chapter for a description of a
valid scratch data tape.
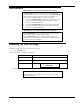
Caution
Data on the cartridge will be overwritten. Insert only a scratch data cartridge for
these tests.
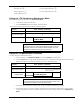
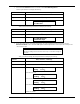
After you insert the cartridge, the front panel indicators will display the following:
Indicator State, Character, or Message
Status LED
Amber, solid
Single-character display
1, flashing
Drive R/W Diagnostic
Writing =====
which alternates with:
Drive R/W Diagnostic
Locating =====
After several minutes:
Drive R/W Diagnostic
Reading =====
which alternates with:
Drive R/W Diagnostic
Locating =====
LCD
until the test finishes.