
User's Manual


meter, and shutter will be activated together (and the camera will shoot as soon as it can). The MD Delay requires a two step
motor drive cable listed in Appendix C. Motor drive cables will be added periodically, so please consult your dealer or the
Quantum Web Site (qtm.com) for the latest models available.
5.0 Mounting FreeXwire
FreeXwire units mount by several means:
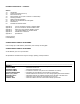
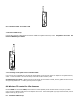
5.1 Pole Mount Adapter 513: This item is included with your Receiver FW8R. Attach it to the back of FreeXwire and clamp
it around any pole, leg, or structure where the antenna can be opened away from metal objects.
SYNC
EXT
INON
OFF 21
QUANTUM
43RELAY
FreeWire
STATUS
ON
TEST
LOCAL
TM
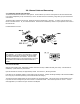
5.2 Mounting directly to a bracket: Use the #8/32 screw included with FreeWire to secure it through a hole in a bracket.
Any other screw used must protrude not more than 3/4” (2 cm) into the FreeXwire case
,
or you will damage FreeXwire!
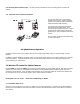
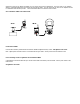
5.3: Direct Hot Shoe Mounting with FW12 or the Uni-Mod
FW11
Connect the Hot Shoe Adapter FW12 or Uni-
Mod FW11 to a Transmitter FW9T and slip it
into a camera hot shoe.
FreeWire
QUANTUM
RELAY
LOCAL
TEST
1OFF 32 4
STATUS
ON
TM
A Receiver FW8R mounted to Uni-Mod on a camera shoe will have no
connection to the motor drive. If you desire remote motor drive triggering,
connect a separate motor drive cord (Appendix
C) between MD out and the camera motor
drive.
You may also mount the FW12 or FW11 to a
“dead” shoe for convenience, in which case
sync-in (for FW9T units) or sync-out (for FW8R
units) connections will be necessary.