
User Manual


Over Range Typical Reading
The display will stay lit for a few seconds, after releasing Measure, with the last reading frozen in the display.
3. RANGE CONTROL
The Range button on the left side of Photo-Meter sets the readout range on the digital display. Each time the
Range button is pressed the meter switches to the next higher range. At the highest range, the next Range
button press switches to the lowest (most sensitive) range.
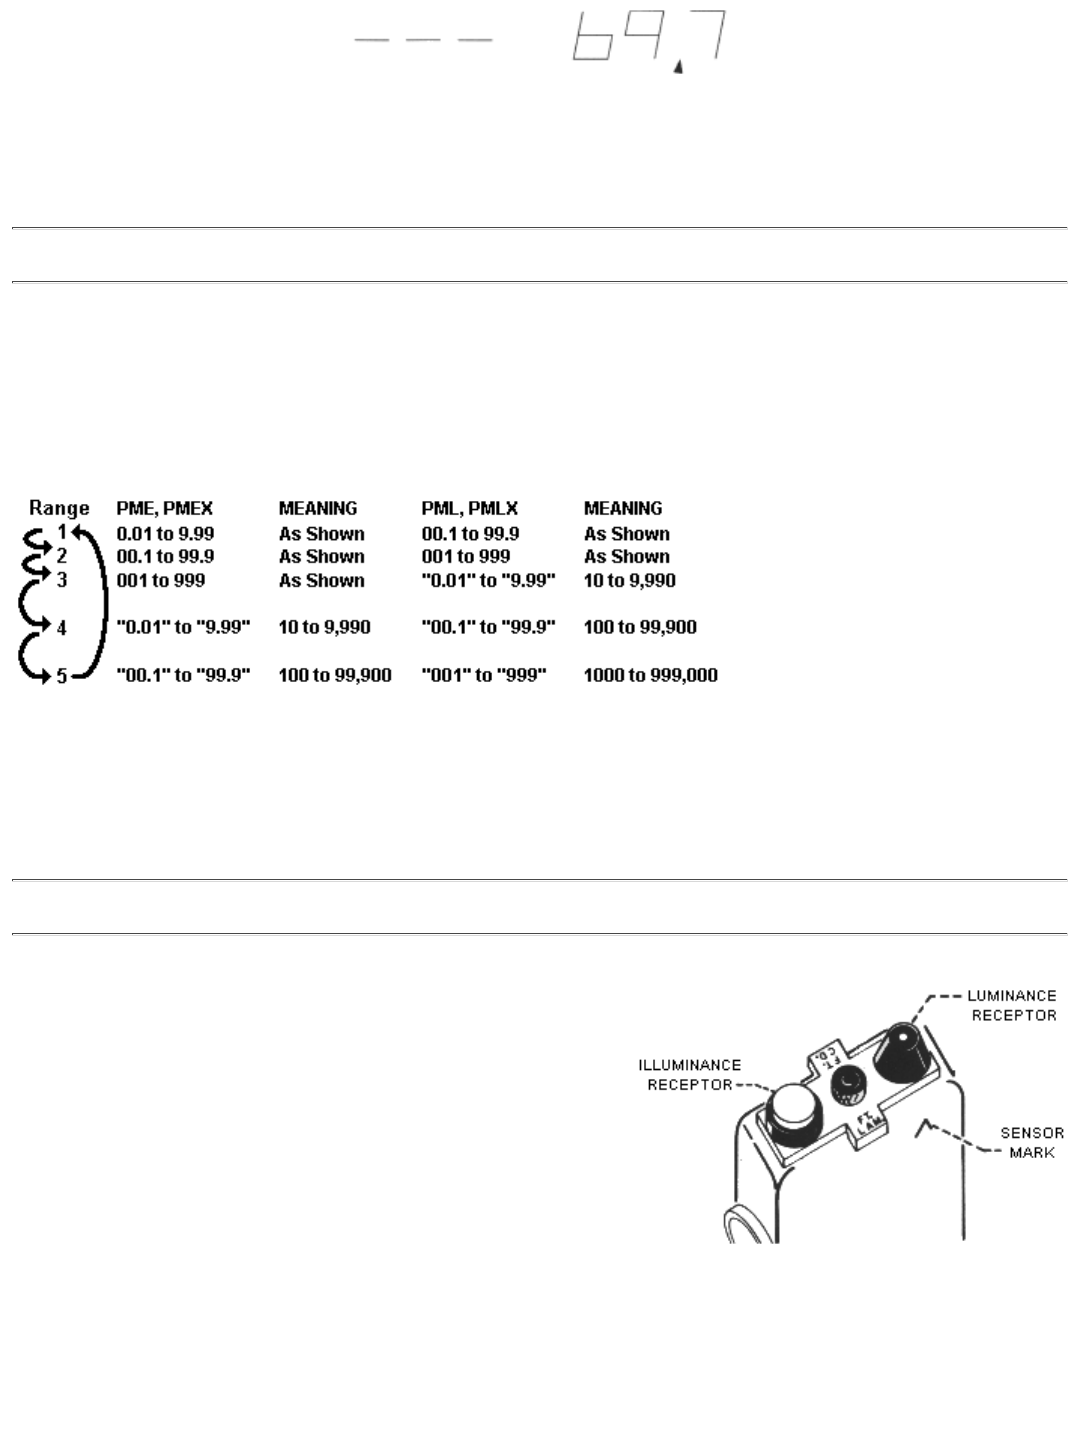
The table below illustrates how to cycle through the ranges. Each arrow signifies the action when Range is
depressed.
The quotes ("xxx") indicate a fast blinking display. When that occurs, multiply the display number by 1000
for the correct reading. For example, a blinking "6.43" signifies a reading of 6,430.
The units of measurement are indicated by the turret tabs, as read from the front of the Photo-Meter.
4. MEASURING MODE
For Models PMEX, PMLX:
The turret on top of the instrument may be set for illuminance
or luminance measurements. To change the mode of
measurement lift off the turret, rotate it 180°, and press it back
into place.
The turret has two labels on tabs that identify the mode of
measurement. The tab next to the front of the instrument is the
current mode. Model PMEX can be set for foot-candles or
foot-Lamberts. Model PMLX can be set for lux or nits
(candela/m
2
).
For Models PME, PML:
These models come with a single mode turret calibrated for illuminance: PME: foot-candles; PML: lux. They
may be calibrated also for luminance measurements using Luminance Receptor PM13 as an optional
accessory. Factory re-calibration is required.