
User's Manual
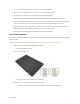
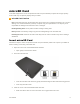
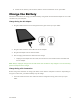
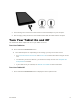

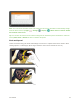
Table Of Contents
- Table of Contents
- Introduction
- Get Started
- Basic Operations
- Your Tablet Interface
- Contacts
- Messaging and Internet
- Camera and Video
- Apps and Features
- Connectivity
- Settings
- Basic Settings
- Wi-Fi Settings Menu
- Bluetooth Settings
- Data Usage Settings
- More Settings
- Virtual Private Networks (VPN)
- Display Settings
- Sound and Notification Settings
- Storage Settings
- Battery Settings
- Applications Settings
- Location Access Settings
- Security Settings
- Lock Screen Settings
- Accounts Settings
- Language and Input Settings
- Backup and Reset
- Date and Time Settings
- Accessibility Settings
- Printing Settings
- Activate This Device
- About Tablet
- System Update
- For Assistance
- Index

Get Started 8
All data on the memory card is erased, and the card is formatted for use on your tablet.
Charge the Battery
Follow these instructions to charge your tablet’s battery using either the included AC adapter or via a USB
connection on your computer.
Charge Using the AC Adapter
1. Plug the USB connector into the charger/accessory jack at the top of your tablet.
2. Plug the other end of the USB cable into the AC adapter.
3. Plug the AC adapter into an electrical outlet.
4. After charging, disconnect the tablet from the charger.
Unplug the AC adapter from the outlet, and remove the micro USB cord from the tablet and
the AC adapter.
Note: Always unplug the charger from the wall socket after the tablet is fully charged to save unnecessary
power consumption of the charger.
Charge Using a PC Connection
Before using a PC connection to charge your tablet, ensure that the computer is turned on. Depending on
the type of connection, your tablet’s battery may not charge.
1. Insert the small end of the micro USB cord into the charger/accessory jack on the top of your
tablet.