CELSIUS Mobile H EasyGuide
Are there ... ... any technical problems or other questions you need clarified? Please contact: • your sales partner • your sales outlet You will find further information in the "Safety, Warranty and Ergonomics" booklet. The latest information on our products, tips, updates, etc., can be found on the Internet under: http://www.fujitsu-siemens.
Dieses Handbuch wurde auf Recycling-Papier gedruckt. This manual has been printed on recycled paper. Ce manuel est imprimé sur du papier recyclé. Este manual ha sido impreso sobre papel reciclado. Questo manuale è stato stampato su carta da riciclaggio. Denna handbok är tryckt på recyclingpapper. Dit handboek werd op recycling-papier gedrukt. Herausgegeben von/Published by Fujitsu Siemens Computers GmbH Bestell-Nr./Order No.
Introduction Important notes CELSIUS Mobile H Preparing the notebook for use Working with your notebook Operating Manual Connecting external devices Settings in BIOS Setup Troubleshooting and tips Memory extension Technical data Index June 2001 edition
DPMS and VESA are registered trademarks of Video Electronics Standards Association. Intel is a registered trademark, Pentium and Celeron are trademarks of Intel Corporation, USA. Microsoft, MS, MS-DOS, Windows, and Windows NT are registered trademarks of Microsoft Corporation. OS/2 and PS/2 are registered trademarks of International Business Machines, Inc. Zip is a trademark of Iomega Corporation. Macrovision is a trademark of Macrovision Corporation, USA.
Contents A26391-Kyyy-Z120-1-7619
Introduction Your CELSIUS Mobile A is a versatile and ergonomic notebook. Innovative technology and ergonomic design make this notebook the ideal user-friendly and reliable travel companion. To simplify the initial start-up of your notebook, one or two operating systems are preinstalled on the hard disk (dual-installation). If two operating systems are preinstalled, you can select which of the two operating systems you want to install during initial start-up.
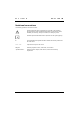
錯誤! 尚未定義樣式。 錯誤! 尚未定義樣式。 Notational conventions The following symbols are used in this manual: ! i Indicates information which is important for your health or for preventing physical damage. Failure to follow the instructions may lead to loss of data, invalidate your warranty, destroy the notebook, or endanger your life. Indicates important information which is required to use the system properly. Ê Text which follows this symbol describes activities that must be performed in the order shown.
Important notes Here you will find essential safety information regarding your notebook. In addition, the manufacturer's notes contain helpful information about your notebook. Safety Pay attention to the information provided in the manual "Safety and Warranty" and in the following security notes. ! Observe the sections in the manual marked with the symbol on the left. • • When connecting and disconnecting cables, observe the relevant notes in this operating manual.
錯誤! 尚未定義樣式。 錯誤! 尚未定義樣式。 Cleaning the notebook". This notebook complies with the relevant safety regulations for data processing equipment. If you have questions as to whether you can set up the notebook in the intended environment, please contact your sales point or our Hotline/Help Desk. Notes on installing and removing boards and modules ! Only qualified technicians should repair the device. Unauthorised opening or incorrect repair may greatly endanger the user (electric shock, fire risk).
錯誤! 尚未定義樣式。 錯誤! 尚未定義樣式。 Notes on diation Exposure Statement This device and its antenna(s) must operate with a separation distance of at least 20 cm from all persons and must not be co-located or operating in conjunction with any other antenna or transmitter. End-users must be provided with specific operating instructions for satisfying RF exposure compliance. Manufacturer’s notes Keep this operating manual together with your device.
錯誤! 尚未定義樣式。 錯誤! 尚未定義樣式。 As an Energy Star Partner, Fujitsu Siemens Computers GmbH has determined that this product meets the Energy Star guidelines for energy efficiency.
錯誤! 尚未定義樣式。 錯誤! 尚未定義樣式。 Disposal and recycling This device has been manufactured to the highest possible degree from materials which can be recycled or disposed of in a manner that is not environmentally damaging. The device may be taken back after use to be recycled, provided that it is returned in a condition that is the result of normal use. Any components not reclaimed will be disposed of in an environmentally acceptable manner. Do not throw lithium batteries into the household waste.
錯誤! 尚未定義樣式。 錯誤! 尚未定義樣式。 device complies with Part 15 of the FCC Rules. Operation is subject to the following two conditions: (1) This device may not cause harmful interference, and (2) this device must accept any interference received, including interference that may cause undesired operation. Battery storage i If you do not use the batteries for long periods, remove them from the notebook. Never store the batteries in the unit. Store the battery in a fully charged state.
錯誤! 尚未定義樣式。 錯誤! 尚未定義樣式。 • • • • • Switch off the notebook. • To protect against damaging jolts and bumps, use a notebook carrying case to transport your notebook. • Protect the notebook from severe shocks and extreme temperatures (e.g. direct sunlight in a car). Unplug the power adapter and all peripheral devices from the mains outlet. Disconnect the power adapter cable and the data cables of all peripheral devices. Close the LCD screen so that it locks into place.
錯誤! 尚未定義樣式。 錯誤! 尚未定義樣式。 Cleaning the notebook Ê Ê Ê Switch off the notebook. Pull the power plug of the network adapter out of the mains outlet. Remove the battery. How to remove the battery is described in the section "Inserting and removing the battery". ! Do not clean any interior parts yourself; leave this job to a service technician. Do not use any cleaning agents that contain abrasives or may corrode plastic. Ensure that no liquid enters the notebook. Wipe the casing with a dry cloth.
Preparing the notebook for use ! Please read the chapter "Important notes". Before you can work with your notebook, you need to charge the battery and install and configure the delivered software. The operating system and required drivers are preinstalled. Upon delivery, the battery can be found in the battery compartment and is not charged. You need to charge the battery if you want to operate your notebook with a rechargeable battery.
錯誤! 尚未定義樣式。 錯誤! 尚未定義樣式。 2 1 Ê Press the release button (1) and open the LED display panel (2). Connecting the power adapter and switching on the notebook 1 3 a 2 Ê Ê Ê Connect the power adapter cable to the DC jack (DC IN) of the notebook (1). Connect the power cable to the power adapter (2). Plug the power cable into the mains supply (3). The power indicator on the notebook and the indicator on the power adapter (a) should illuminate. The battery is charging.
錯誤! 尚未定義樣式。 The power-on indicator ! 錯誤! 尚未定義樣式。 on the notebook lights up. After switch-on a self-test (POST, Power On Self Test) is automatically carried out. Never switch the notebook off during the self-test. First-time software installation ! Leave the external power adapter connected to your notebook during the initial installation.
Working with your notebook This chapter describes the basics for operating your notebook. 錯誤 找不到參照來源。" for instructions on how to connect devices such as Please see the chapter " ! a mouse and a printer to the notebook. ! Please take note of the information in the chapter "Important notes". Switching on the notebook 2 1 Ê Ê Press the release button (1) and open the LED display panel (2). Press the Suspend/Resume button to switch on the notebook (3).
錯誤! 尚未定義樣式。 Switching off the notebook 2 Ê Shut down the operating system properly. If the notebook is not switched off automatically, press the Suspend/Resume button (1) and release it again. Ê Immediately press the Suspend/Resume button again once, and hold it down for approximately four seconds until you hear an acoustic signal. Ê Close the LCD screen of the notebook (2) so that it locks into place.
錯誤! 尚未定義樣式。 Indicators The following icons appear in the display field of your notebook: 1 A The meanings of the symbols are as follows: Power-on indicator • • The indicator lights up: The notebook is on. • The indicator is dark: The notebook is switched off. The indicator flashes (1 second on / 1 second off): The notebook is in energy-saving mode. Power indicator The power adapter is supplying power to the notebook.
錯誤! 尚未定義樣式。 2 Indicator PC card 2 The indicator lights up when a PC card disk in slot 2 is being accessed. You must not remove the PC card from the slot when this indicator is lit. Hard disk indicator The indicator lights up when the hard disk drive is being accessed. Floppy disk drive indicator The indicator lights up when a floppy disk in the floppy disk drive is being accessed. You must not remove the floppy disk from the floppy disk drive when this indicator is lit.
錯誤! 尚未定義樣式。 / 7{ 7 / 7{ 7 / 7{ Alt Gr 7 / 7{ NumLk Fn / 7{ 7 7 Backspace key The Backspace key deletes the character to the left of the cursor. Tab key The Tab key moves the cursor to the next tab stop. Enter key (return, enter, line feed, carriage return) The enter key terminates a command line. The command you have entered is executed when you press this key.
錯誤! 尚未定義樣式。 Caps Lock key The Caps Lock key activates uppercase mode (CapsLK indicator lit). The Caps Lock function causes all the characters you type to appear in uppercase. In the case of overlay keys, the character on the upper left on the keycap appears when that key is pressed. To cancel the Caps Lock function, simply press the Caps Lock key again. Shift key The Shift key causes uppercase characters to appear.
錯誤! 尚未定義樣式。 Indicators").
錯誤! 尚未定義樣式。 Indicators"). If the numeric keypad is enabled (NumLK indicator is lit) and you hold down the [Fn] key, you can output the characters printed in blue on the bottom right of the keys.
錯誤! 尚未定義樣式。 Key combinations The following description of key combinations refers to functions when using Microsoft Windows. Some of the following key combinations may not function in other operating systems and with some device drivers. Other key combinations are described in the relevant manuals supplied with your application programmes. Key combinations are performed as follows: Ê Ê Press and hold the first key in the combination.
錯誤! 尚未定義樣式。 Fn Reducing the display brightness This key combination reduces the brightness of the display. F12 Fn + Strg + Switching between internal and external screen If an external monitor is connected, the monitor on which the output is to be displayed can be selected with this key combination. You can opt to use: • just the notebook's internal display • just the external display • both the internal and the external display.
錯誤! 尚未定義樣式。 1 = Touchpad 2 = Touchpad buttons Moving the pointer Ê Move your finger on the touchpad. Selecting Ê Tap the touchpad once or press the left button once. Executing a command Ê Tap the touchpad twice or press the left button twice. Dragging an object Ê Ê Ê Ê Move the pointer to the item you wish to select. Select the desired object, and leave your finger on the touchpad. Drag the object to the desired position. Lift your finger from the touchpad.
錯誤! 尚未定義樣式。 Battery The battery is one of the most important components of your notebook. When not plugged into a mains outlet, the notebook runs on its built-in battery. You can increase the life of the battery by caring for the battery properly. The average battery life is around 500 charge/discharge cycles. You can extend the battery life by taking advantage of the available energy saving functions. ! Only use batteries released for your notebook.
錯誤! 尚未定義樣式。 Indicators"). When you switch on the notebook, it takes a few seconds before the battery status is displayed. You can charge the battery by connecting the notebook to the power adapter (see "Connecting the power adapter and switching on the notebook"). The battery can only be charged when the ambient temperature is between 5°C and max. 35°C. With the notebook switched on or off, the battery will completely recharge in approximately three to four hours.
錯誤! 尚未定義樣式。 Indicators"). When you switch on the notebook, it takes a few seconds before the battery status is displayed. During mobile operation you can also use a "battery charge meter" for energy-saving monitoring under Windows. A battery icon is shown in the taskbar. When you position the cursor on the battery icon, the battery charge level is displayed with a blue status bar. This blue bar progressively decreases as the battery discharges.
錯誤! 尚未定義樣式。 Using the power-management features The notebook uses less power when the power management features are enabled. You will then be able to work longer when using the battery before having to recharge it. i If you are connected to a network or use the integrated modem, PC LAN card, or PC modem card, we advise against enabling an energy saving mode. This could lead to an interruption of your network connection.
錯誤! 尚未定義樣式。 Energy-saving modes of notebook You can set two energy-saving modes with your notebook. In the Suspend mode (Suspend to DRAM/Standby) all current data (active programmes, files) are buffered in the main memory, and in the Save-to-Disk mode (Save to Disk/HibernateMode) all current data are saved on the hard disk. Then the notebook is switched off. After the notebook is switched on, you can continue working exactly where you left off before.
錯誤! 尚未定義樣式。 Operating systems with APM (Windows 95, Windows NT with APM extensions) i For operating systems with APM (Advanced Power Management) you can set the energysaving functions in the BIOS Setup (e.g. Suspend to RAM, Save to Disk, LCD off etc.). Setting energy-saving modes Ê Call the BIOS Setup. Ê Set which energy-saving mode you want to use in the Power menu.
錯誤! 尚未定義樣式。 Ê Ê Ê Enter CD\UTILITY\PHDISK at the DOS prompt and press the Enter key. Enter PHDISK after the DOS prompt. Follow the instructions on the screen. i Be sure to define a sufficiently large partition. If you require additional information on the programme parameters, enter PHDISK or PHDISK /INFO at the DOS prompt. ! We recommend that you use the considerably more flexible option FILE when running PHDISK.
錯誤! 尚未定義樣式。 Hard disk The hard disk is the most important storage medium of your notebook. You can work considerably faster and more efficiently if you copy applications and files from floppy disks or CDs to your hard disk. When the hard disk is accessed, the hard disk indicator lights up . Inserting and removing modules Modules can be optical drives, additional hard disk or floppy disk drives or batteries. ! Only use modules released for this notebook.
錯誤! 尚未定義樣式。 Removing modules 1 2 Ê Push the slide in the direction of the arrow up to the stop (1). i Ê Before removing the left module, slide the release button to the right. Before removing the right module, slide the release button to the left. Remove the module the direction of the arrow (2).
錯誤! 尚未定義樣式。 Installing modules 1 2 Ê Push the slide in the direction of the arrow up to the stop (1). i Ê Ê Before removing the left module, slide the release button to the right. Before removing the right module, slide the release button to the left. Position the module at the edge of the casing (2) and then press it into the notebook. Release the slide (2).
錯誤! 尚未定義樣式。 Optical drives Depending on the model, your notebook is equipped with a CR-ROM drive, a CD-RW drive, or a DVDROM drive. ! This device contains a light-emitting diode, classified according to IEC 825-1:1993: LASER CLASS 1, and must not be opened. Avoid touching the surface of a CD/DVD. Handle CDs/DVDs only by their edges! Always store CDs/DVDs in their cases. Thus you avoid dust contamination, scratches, bending or other damage.
錯誤! 尚未定義樣式。 Manual removal (emergency removal) In the event of a power failure or damage to the drive it may be necessary to manually remove the CD/DVD. Ê Ê Switch off the notebook. Push a pen or a piece of wire (such as a paper clip) into the opening for manual ejection. The drive tray is unlocked. You can now pull the drive tray out of the drive. i Where the opening for manual ejection is located please refer to the documentation of the drive.
錯誤! 尚未定義樣式。 5 4 7 6 1 2 3 1= 2= 3= 4= 5= 6= 7= Insertion direction Label area Write protection tab for a 1.44 Mbyte floppy disk Identification of a 1.44 MB floppy disk or write protect switch on a 120 MB floppy disk Eject button for inserted floppy disks Disk is write-protected Disk is not write-protected To insert a diskette: Ê Push the floppy disk into the drive in the insertion direction (1) until it engages. The label should be facing upward.
錯誤! 尚未定義樣式。 A26391-Kyyy-Z120-1-7619 39