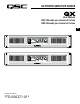
TM GX POWER AMPLIFIER SERIES User Manual GX3 300 watts per channel at 8 ohms GX5 500 watts per channel at 8 ohms EN TD-000271-01 REV.
IMPORTANT SAFETY PRECAUTIONS AND EXPLANATION OF SYMBOLS EN 1- Read these instructions. 2- Keep these instructions. 3- Heed all warnings. 4- Follow all instructions. 5- WARNING: To prevent fire or electric shock, do not expose this equipment to rain or moisture. Do not use this apparatus near water. 6- Clean only with a dry cloth. 7- Do not block any ventilation openings. Install in accordance with the manufacturer’s instructions.
GX POWER AMPLIFIER SERIES Professional Power Amplifiers WELCOME Thank you for purchasing a QSC Audio amplifier. The GX Series is the latest in a long line of hard-working, low cost amplifiers, designed to produce the best possible results for a wide range of users. In most cases, you can plug and play with no surprises, but for best results, we recommend you review the enclosed user guide. UNPACKING Confirm that the amplifier has no visible shipping damage.
FRONT PANEL FEATURES MODEL NUMBER ON-OFF SWITCH Move the rocker switch up to turn on the amplifier. The blue PWR LED will turn on immediately. The red CLIP LEDs may trigger for 1-2 seconds until the amp has completed its turn-on cycle. If no lights come on, check the power cord and the AC reset on the rear panel. COOLING VENTS The internal fan draws air in from the left side, and exhausts on the right side. Keep vents clear. The fan speeds up in response to heavy use. EN DIMENSIONS 10.1 (25.
GAIN CONTROLS, CH1, CH2 The markings show attenuation in dB. For normal use, keep the control in the upper half of its range (less than 10 dB of attenuation). If set below half, the source may overload before the amplifier reaches full power. RACK MOUNTING Fits standard 19-inch rack, 2RU. Accepts #10 or 6 mm screws, as determined by the rack rails. Add rear support to prevent damage in portable rigs. EN RED CLIP LEDS Red flashing indicates the amp is being overdriven.
REAR PANEL FEATURES CROSSOVER SWITCH CROSSOVER POSITION EXHAUST VENT Keep vent clear. Install in open-back rack. Splits a full-range signal to drive a subwoofer and top box. CH 1 receives the lows, from 20-100Hz, for the subwoofer. CH 2 receives 100Hz to 20kHz, to power a full range speaker. When using CROSSOVER mode, connect signal to CH 1 only. Use the two Gain controls to balance the LF and HF signals (see Front Panel). EN FULL RANGE POSITION For normal, 2-channel use with all inputs active.
AC BREAKER RESET If the amplifier shuts off after a long burst of power, turn off the AC switch and check the circuit breaker. The button can be pressed back in after a 30 second cool-down period. If the breaker trips repeatedly, the amplifier may need servicing. SERIAL NUMBER AND RATINGS The rated AC voltage and output power is shown on the serial number plate. Record the serial number in a safe place. EN AC INLET SPEAKER CONNECTIONS BINDING POSTS Accepts banana plugs (not permitted in CE regions).
SYSTEM HOOKUP EXAMPLES INPUT CONNECTIONS SPEAKER CONNECTIONS 8 OR 4 OHM XLR MIXER SIGNAL LEVEL SOURCE SPEAKON SET TO FULL RANGE ¼ EN MIXER SIGNAL LEVEL SOURCE ¼ SET TO FULL RANGE WIRE PHONO MIXER SIGNAL LEVEL SOURCE BANANA JACKS SET TO FULL RANGE CONNECTION MULTIPLE SPEAKERS To connect two speakers to one amplifier channel, connect one speaker with Speakon or 1/4 –inch jack, and connect the other speaker with a banana plug or wires to the binding posts.
SYSTEM HOOKUP EXAMPLES SUBWOOFER AND TOP BOX Move the CROSSOVER switch to the CROSSOVER position. Connect a single source, into the Ch 1 input. Connect a subwoofer to the Ch 1 output and connect a 2-way to box to the Ch 2 output. 8 OR 4 OHM INPUT TOP SET TO CROSSOVER 8 OR 4 OHM SUB POWERING HOUSE AND MONITOR SPEAKERS 8 OHM MAIN Set the CROSSOVER switch to the FULL RANGE position. Use a mixer with Main and Monitor outputs. Connect cables into Ch 1 and 2 respectively.
TROUBLESHOOTING NO POWER, NO LIGHTS, NO FAN Confirm that the AC cord is fully seated and connected to a live outlet. Check the AC source by trying another device such as a lamp. Check the BREAKER on the back of the amplifier by pushing in the button. If the breaker trips off quickly, the amplifier needs servicing. AMPLIFIER LOSES VOLUME EN NO SOUND, WITH BLUE LED ONLY, NO GREEN OR RED LED Confirm that the Gain controls are turned up.
SPECIFICATIONS GX3 GX5 8Ω, both channels driven 300 W 500 W 8Ω, single channel driven 350 W 600 W 4Ω, both channels driven 425 W 700 W 4Ω, single channel driven 500 W 850 W 2Ω, both channels driven, 1% clipping 200 W 350 W Signal to Noise (20 Hz – 20 kHz) 100 dB Input Sensitivity 1.2 Vrms Voltage Gain at 8Ω 32.2 dB 34.4 dB Output Circuitry Class B 2-tier Class H Power Requirements (1/8 power, pink noise at 4Ω 120 V AC) 6.
WARRANTY (USA only; other countries, see your dealer or distributor) Disclaimer QSC Audio Products, Inc. is not liable for any damage to amplifiers or any other equipment that is caused by negligence or improper installation and/or use of this loudspeaker product. EN QSC Audio Products 3 Year Limited Warranty QSC Audio Products, Inc.