
Operation Manual


820
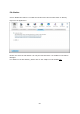
Configuring camera settings on the NAS
Login the Surveillance Station Pro by a web browser to configure the IP cameras. Go to
“Camera Settings” > “Camera Configuration”. Enter the IP camera information, for
example, name, model, and IP address.
Click “Test” on the right to ensure the connection to the IP camera is successful.
If your IP camera supports audio recording, you may enable the option on the “Recording
Settings” page. Click “Apply” to save the changes.
Configure the settings of IP camera 2 following the above steps.
After you have added the network cameras to the NAS, click . The first
time you connect to this page by a web browser, you have to install additional plug-ins
in order to view the images of IP camera 1 and IP camera 2. You can start to use the
monitoring and recording functions of the Surveillance Station Pro.