
User guide


Chapter 2 Managing Fabrics 43
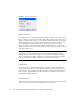
3. Click the Apply button to display the Save Zoning & Error Check dialog.
4. Click the Perform Error Check button to have the application check for zoning
conflicts, such as empty zones, aliases, or zone sets.
5. Click the Save Zoning button to implement the changes.
6. Click the Close button to close the Error Check dialog.
7. On the Edit Zoning dialog, click the Close button to close the Edit Zoning
dialog.
Note – Domain ID conflicts can result in automatic reassignment of switch domain
IDs. These reassignments are not reflected in zones that use domain ID/port number
pair to define their membership. Be sure to reconfigure zones that are affected by a
domain ID change.
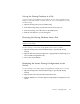
Renaming a Zone
To rename a zone, do the following:
1. In the Zone Sets tree of the Edit Zoning dialog, click the zone to be renamed.
2. Open the Edit menu and select Rename.
3. In the Rename Zone dialog, enter a new name for the zone.
4. Click the OK button.
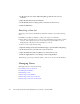
Removing a Zone Member
Removing a zone member will affect every zone and zone set in which that zone is a
member. To remove a member from a zone:
1. In the Edit Zoning dialog, select the zone member to be removed.
2. Open the Edit menu and select Remove.
3. Click the Yes button in the Remove dialog to save the change.
4. Click the Apply button in the Edit Zoning dialog to save the change.
5. Click the Close button to close the Edit Zoning dialog.