
Technical data


DATA CENTER TECHNICAL BRIEF
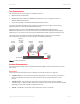
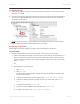
3. In the Virtual Port Creation dialog, enter the symbolic name and name of the guest that will be used to
store the guest and click OK.
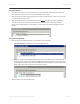
You will see that the NPIV port has been created, and flagged with a special icon
Configuring Zoning
1. On the Brocade 5100, create an alias and zone with that virtual port and storage, but do not to add the
host WWN to the zone. The only two things in that zone will be the new NPIV port and the storage. You
do not need to reboot the host to make the NPIV port available, but it must be zoned.
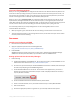
2. To copy any or all of the information for a port to the clipboard, select the attribute in the Properties tab
and right-click.
Setting Up NPIV with Brocade HCM and Microsoft Hyper-V 7 of 12