QUICK START GUIDE [ Quick Start Guide ] FIBRE CHANNEL SWITCH INSTALLATION z
Quick Start Guide Installation Instructions Congratulations on your purchase of the QLogic 3810 Fibre Channel Switch. This guide describes the steps to install and activate your new switch using a Windows® workstation. For advanced options and instructions (including Solaris®, Linux®, and Mac OS X® installations), refer to the QLogic 3810 Fibre Channel Switch Installation Guide, which is available at www.qlogic.com. NOTE Do not apply power to the switch until instructed in Step 4. Step 1.
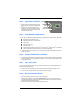
Step 4. Apply Power to the Switch INPUT POWER LED ❑ Plug the AC power cord into the switch and into a wall outlet or power strip. Verify that the Input Power LED is lit. HEARTBEAT LED ❑ The switch runs its self tests, and begins normal operation—this may take a few minutes. Verify that the Heartbeat LED is blinking (once per second), and the System Fault LED is not lit. SYSTEM FAULT LED Step 5.
Step 9. Connect Devices ❑ Connect fiber optic cables between the installed transceivers and their corresponding devices. Each port auto-negotiates the correct port type with the connected device. Congratulations You have successfully installed your QLogic 3810 Switch. Please feel free to contact your QLogic approved reseller or QLogic Technical Support at any phase of integration for assistance. QLogic Technical Support can be reached by the following methods: Web: http://support.qlogic.