
user manual
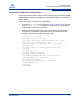
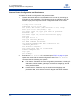

Table Of Contents
- Table of Contents
- 1 Introduction
- 2 Command Usage
- 3 Configuring CHAP
- 4 Command Reference
- Command Listing
- Command Syntax
- Admin
- Beacon
- Clear
- Date
- FcipRoute
- FRU
- Help
- History
- Image
- Initiator
- Localmap
- Logout
- Password
- Ping
- Quit
- Reboot
- Remote Map
- Remote Peer
- Reset Factory
- Save
- Set
- Set CHAP
- Set FC
- Set Features
- Set iSCSI
- Set iSNS
- Set Mgmt
- Set NTP
- Set Properties
- Set SNMP
- Set System
- Show
- Show CHAP
- Show FC
- Show FcipRoutes
- Show Features
- Show Initiators
- Show iSCSI
- Show iSNS
- Show Localmaps
- Show Logs
- Show Memory
- Show Mgmt
- Show NTP
- Show Performance
- Show Presented Initiators
- Show Presented Targets
- Show Properties
- Show Remotemaps
- Show Remotepeers
- Show SNMP
- Show Stats
- Show System
- Show Targets
- Show VLAN
- Shutdown
- Target
- Traceroute
- A Log Messages
- B Simple Network Management Protocol (SNMP)
- Index

3 – Configuring CHAP
Normal Session—Uni-directional CHAP
SN0054659-00 A 3-5
A
Normal Session—Uni-directional CHAP
To configure single-direction CHAP to be used during a normal session:
1. Do not enable CHAP on the presented target.
2. Use the initiator add command:
a. Add the initiator that is about to do a normal login.
b. Enable the CHAP for this initiator.
c. Create a secret (for example, secret_initiator).
d. Use the set chap command to update the CHAP settings of the
initiator.
3. Go to the MS Initiator.
4. Click Targets.
5. Select the target you want to login to.
6. Click Advanced.
7. Select Chap Login Information.
8. Type the secret (secret_initiator) that you created in into Target Secret.
9. Click OK.
10. Click OK. The initiator completes the normal login.