
Specifications


The initial installation is performed using the install utility located in the root of the ELDK ISO image
directory tree. The install utility has the following syntax:
$ ./install [-d <dir>] [<cpu_family1>] [<cpu_family2>] ...
-d <dir> Specifies the root directory of the ELDK being installed. If omitted, the ELDK goes into
the current directory.
<cpu_family> Specifies the target CPU family the user desires to install. If one or more
<cpu_family> parameters are specified, only the target components specific to the
respective CPU families are installed onto the host. If omitted, the target components for
all supported target architecture CPU families are installed.
Note: Make sure that the "exec" option to the mount command is in effect when mounting the ELDK ISO
image. Otherwise the install program cannot be executed. On some distributions, it may be necessary to
modify the /etc/fstab file, adding the "exec" mount option to the cdrom entry - it may also be the case that
other existing mount options, such as "user" prevent a particular configuration from mounting the ELDK
DVD with appropriate "exec" permission. In such cases, consult your distribution documentation or mount the
DVD explicitly using a command such as "sudo mount -o exec /dev/cdrom /mnt/cdrom" (sudo allows regular
users to run certain privileged commands but may not be configured - run the previous command as root
without "sudo" in the case that "sudo" has not been setup for use on your particular GNU/Linux system).
You can install the ELDK to any empty directory you wish, the only requirement being that you have to have
write and execute permissions on the directory. The installation process does not require superuser privileges.
Depending on the parameters the install utility is invoked with, it installs one or more sets of target
components. The ELDT packages are installed in any case.
Refer to section 3.6. Working with ELDK for a sample usage of the ELDK.
Note: If you intend to use the installation as a root filesystem exported over NFS, then you now have to
finish the configuration of the ELDK following the instructions in 3.7. Mounting Target Components via
NFS.
Note: Installation of the Glibc- and uClibc-based ELDK versions into one directory is not yet supported.
Note: Installation of the 32-bit and 64-bit ELDK versions into one directory is not yet supported.
3.5.4. Installation and Removal of Individual
Packages
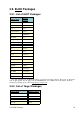
The ELDK has an RPM-based structure. This means that on the ISO image, individual components of the
ELDK are in the form of RPM packages, and after installation, the ELDK maintains its own database which
contains information about installed packages. The RPM database is kept local to the specific ELDK
installation, which allows you to have multiple independent ELDK installations on your host system. (That is,
you can install several instances of ELDK under different directories and work with them independently).
Also, this provides for easy installation and management of individual ELDK packages.
To list the installed ELDK RPM packages, use the following command:
bash$ ${CROSS_COMPILE}rpm -qa
To remove an ELDK package, use the following command:
bash$ ${CROSS_COMPILE}rpm -e <package_name>
3.5.4. Installation and Removal of Individual Packages 13