Remote Start Keyless Entry Model 1401 Owner’s Guide © 2008 Directed Electronics, Vista, CA G4102P 2008-09
Contents Government regulations......................................................................................5 Warning! Safety first..........................................................................................7 What’s included.................................................................................................9 Important information.........................................................................................9 Your warranty.........................................
Government regulations This device complies with Part 15 of FCC rules. Operation is subject to the following two conditions: (1) This device may not cause harmful interference, and (2) This device must accept any interference received, including interference that may cause undesirable operation. This equipment has been tested and found to comply with the limits for a class B digital device, pursuant to Part 15 of the FCC Rules.
This device complies with the Industry Canada Radio Standards Specification RSS 210. Its use is authorized only on a no-interference, no-protection basis; in other words, this device must not be used if it is determined that it causes harmful interference to services authorized by IC. In addition, the user of this device must accept any radio interference that may be received, even if this interference could affect the operation of the device.
Warning! Safety first The following safety warnings must be observed at all times: Due to the complexity of this system, installation of this product must only be performed by an authorized Directed dealer. When properly installed, this system can start the vehicle via a command signal from the remote control transmitter. Therefore, never operate the system in an enclosed area or partially enclosed area without ventilation (such as a garage).
Use of this product in a manner contrary to its intended mode of operation may result in property damage, personal injury, or death. (1) Never remotely start the vehicle with the vehicle in gear, and (2) Never remotely start the vehicle with the keys in the ignition. The user must also have the neutral safety feature of the vehicle periodically checked, wherein the vehicle must not remotely start while the car is in gear.
What’s included • • • • • • Two five-button/1-way Supercode remotes The control module (installed out-of-sight) Control center with integrated status LED and Valet override switch A remote start defeat toggle switch Window decals Your warranty registration Important information Congratulations on the purchase of your state-of-the-art remote start and keyless entry system. Due to the complexity of this system, it must be installed by an authorized dealer only.
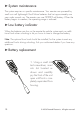
➤ System maintenance The system requires no specific maintenance. Your remotes are powered by small coin cell lightweight 3-volt lithium batteries that last approximately one year under normal use. The remote uses one CR2032 cell battery. When the battery begins to weaken, the operating range is reduced. ➤ Low battery indicator When the batteries are low on the remote the vehicle system emits an additional honk when unlocking to let you know its time to change the battery.
+ + + + 2. Turn both the unit front and circuit board over, remove battery from clip and replace. Note: Verify that the battery polarity is correct when replacing. 3. Reposition all parts and snap together. ➤ Two car operation You can use the remote control system for two cars, with full command capability for both vehicles.
1-way remote 1 2 3 4 5 6 Feature Description 1 Transmit indicator 2 Lock button Press for one second to lock. 3 Unlock button Press for one second to unlock. 4 Remote start button Press for one second to activate remote start. 5 Auxiliary button Press and hold for 1.5 second to activate optional trunk release. 6 Function button 1 Allows access to programming and modifies operation of the other buttons. 2 Note: If Keypad Lock is On, press and then press to exit.
➤ Transmitter configuration AUX Level Direct Access x1 AUX AUX x2 AUX x3 x4 Button Lock Silent Lock Unlock Silent Unlock Valet Mode Car Finder Remote Start Reset Timer Mode Smart Start AUX Runtime Rear Defogger AUX AUX AAUUXX Trunk Release AUX 1 AUX 2 AUX 3 Function Shift © 2008 Directed Electronics. All rights reserved.
➤ Feature list Unlock Command: Press one time to Lock Notes: Press/hold for 1.5 seconds to lock the system and then activate the Panic output* Unlock Command: Press one time to Unlock AUX AUX Remote Start Command: Press one time to activate Remote Start AUX AUX Aux (trunk) Command: Press and hold for 1.5 seconds to open trunk. AUX Function shift Command: Press 1 to 4 times. ( See Function shift table) Notes: Each Press then release, shifts the function of the command button.
Runtime reset AUX Command: Press one-time and then . Notes: Re-starts the remote start runtime counter if remote start is active. . AUX Aux 1 AUX Command: Press one time and then press . Notes: This is an optional feature. See your sales rep/installer for AUX details. Valet mode AUX Command: Press Notes: two-times and then . Prevents the system from automatically activating the Failsafe Starter Kill and locking the door passively. AUX Timer mode AUX Command: Press two-times and then .
Smart start AUX Command: Press three-times and then press . Notes: Enables or disables the Smart Start feature. The parking lights AUX flash fast 5 times when turning the feature on, and flash slowly 5 times when turning the feature off. Aux 3 AUX Command: Press three times and then press . Notes: This is an optional feature. See your sales rep/installer for deAUX tails. Rear defogger AUX Command: Press four times, and then . (after remote start is on.
Using the system ➤ Locking the vehicle To lock the vehicle, press the button on the remote control. The horn in the vehicle “honks” one-time, and the parking lights flash one-time. If the power door locks have been connected, the doors lock. The system automatically checks for errors when it locks. If errors are found when locking: If the door is open when you lock the vehicle, the horn honks once and the parking lights flash.
➤ Valet mode You can prevent your system from automatically activating the Failsafe® Starter Kill. When the system is in Valet mode, the feature is disabled. The doors do not automatically lock. This is useful when washing or having the vehicle serviced. To enter or exit valet mode with the valet/program switch: 1. Turn the ignition key on and then off. 2. At anytime during the next 10 seconds, press and release the Valet switch on the control center.
➤ Remote feature programming The remote control has a menu for programming user features. Before you start make sure the keypad is unlocked. (See page 12) To program the remote user features: AUX 1. Press and hold the button on the remote for 12 seconds. (ignore the car indicator at 3 seconds). The remote transmit LED turns on solid to indicate the Main Menu. 2. Press and hold the button for 1.5 seconds: The remote LED blinks two-times. You are now in the Remote Configuration menu.
➤ Overriding the optional starter kill To bypass the optional starter kill without a remote control: Use your override switch located on the control center (see diagram below) to bypass the system. This switch bypasses the system only if you have the vehicle key. To check proper operation: 1. 2. While the vehicle is locked, open the door. Immediately insert the key into the ignition and turn it to the Run or On position.
Using the remote start Read this user guide, including the Warnings section at the beginning of this guide before using the remote start. Ensure that the vehicle is parked in an open area, not in a garage. To use your remote start to pre-warm or pre-cool your vehicle, remember to set the climate controls to the desired settings before shutting Off the engine. To remote start your vehicle: • Press the button on the remote control. The vehicle parking lights flash.
➤ Manual transmission vehicles If the vehicle has manual transmission the proper steps must be followed before leaving the parked vehicle, or the remote start feature is disabled. This process is called MTS, manual transmission start. 1. 2. 3. 4. 5. 6. 7. 8. 9. While the vehicle is running, put the transmission in neutral. Press the vehicle’s foot brake. Apply the emergency brake. Release the vehicle’s foot brake. Note: Pressing the brake again after this step will disable the remote start feature.
➤ Timer mode This unit can be programmed to start and run the engine every three hours, for a maximum of six cycles. The engine will run for the programmed run time and then shut down. After three hours, the system will restart the engine. Note: This feature works only when the system has been locked with the remote. Important: Timer Mode should be used in open areas only. Never start and run the vehicle in an enclosed space such as a garage or carport.
To exit timer mode without the transmitter: 1. 2. Make sure the remote start system is not operating the engine. Turn the ignition on. Timer Mode is exited and the parking lights flash slowly four times. Note: The Bitwriter can change the amount of times the remote start activates and, it can change the intervals between activations in timer mode. ➤ Turbo timer mode Turbo timer mode keeps the engine running after arriving at your destination for a programmable period of 1, 3, 5 or 10 minutes.
To enter turbo timer mode with a manual transmission: Perform the manual transmission procedure (See p. 22) with the door open. Transmit the timer mode feature with the remote by pressing two-times, and then press . AUX After exiting the vehicle, lock the system and the vehicle remains running for the programmed runtime. (The remote start feature is still enabled). You can still remote start the vehicle after the turbo timer has timed out and shut Off the vehicle.
To activate Smart Start mode: • Press the button on the remote 3 times and then press the button. AUX The parking lights flash 5 times fast to confirm the remote is in Smart Start mode. To activate Smart Start mode with a manual transmission: 1. 2. 3. Enter the MTS procedure. Exit the vehicle and press the button on the remote (the vehicle shuts down when locking). Press the button on the remote 3 times and then press the button.
➤ Turning on the rear defogger The rear defogger (if connected) is programmed to automatically activate when remote start is turned on. If the interior cabin temperature is above 55˚ F the defogger will not activate. To manually activate the rear defogger after remote start is on: • Press four times, and then press confirm the defogger activation. .
Safety features This system has several important safety features to ensure proper operation of the motor and prevent accidental damage to the engine or its components. ➤ Optional starter anti-grind circuitry Whenever the vehicle is remote started, advanced anti-grind circuitry prevents the starter from engaging, even if the key is turned to the start position. This prevents damage to the starter motor if the key is turned to the start position during remote start operation.
Diagnostics The microprocessor at the heart of the system is constantly monitoring the switches that are connected to the main unit. ➤ Locking If the system is locked at the same time that the door input is active, you will hear one horn honk to indicate locking, and then a second horn honk to indicate Bypass Notification.
Owner recognition Owner recognition lets up to four users of the system have unique settings to meet their specific needs. It is almost like having four separate systems in your vehicle, one for each user. This feature is only available to authorized dealers using the Bitwriter or Bitwriter 2 program tool. Rapid resume logic This Directed system will store its current state to non-volatile memory. If power is lost and then reconnected the system will recall the stored state from memory.
Programming options Your system has many custom programmable options. Some may require installation labor. Ask your authorized dealer for details. The following is a list of the programmable options, with the factory settings in Bold. • Active locking (remote only) passive locking, the system automatically locks the doors 30-seconds after the last door is closed; or Auto Re-lock automatically re-locks the doors 60 seconds after unlocking (if no door is opened).
Convenience expansions Listed below are some of the expansion options available. Please consult your dealer for a complete explanation of all the options available to you. Power Trunk Release: The accessory output of the system can operate a factory power release for the vehicle’s trunk or hatch. Sometimes an optional relay is required. If the factory release is not power-activated, Directed®’s 522T trunk release solenoid can often be added.
Glossary of terms Control Center: The control center contains the system’s radio-frequency antenna, the valet and override switch, and the Status LED. For maximum remote-control range, the Control Center is usually located at the top of the windshield, centered near the rear-view mirror. Control Module: The “brain” of your system. Usually hidden underneath the dash area of the vehicle. It houses the microprocessor which monitors your vehicle and controls all of the system's functions.
© 2008 Directed Electronics. All rights reserved.
✂ Quick reference guide • Cut along the dotted line and fold to keep in purse or wallet for a quick and easy reference. 1 Locking To lock press for one second. The doors lock. The LED on the control center flashes and the horn honks one time. (if connected). The parking lights flash once to confirm locking. 2 • Unlocking To unlock press . The doors unlock, and the horn honks (if connected) two times. LED flashes for one-second. The parking lights flash two times to confirm unlocking.
Remote Start Press . The parking lights turns on (if connected). The vehicle starts and runs for the programmed duration. • Rear Defogger Press four-times, and then press (only after remote start is On.) The parking lights flash 4 times confirming activation of the defogger output. • To disable the remote start system Move the shutdown toggle switch to the Off position. Cut along the dotted line and fold to keep in purse or wallet for a quick and easy reference. ✂ • 1 2 3 comes .
Limited lifetime consumer warranty Directed Electronics.
WITHOUT LIMITATION, LIABILITY FOR THEFT, DAMAGE AND/OR VANDALISM. THIS WARRANTY DOES NOT COVER LABOR COSTS FOR MAINTENANCE, REMOVAL OR REINSTALLATION OF THE UNIT OR ANY CONSEQUENTIAL DAMAGES OF ANY KIND. IN THE EVENT OF A CLAIM OR A DISPUTE INVOLVING DIRECTED OR ITS SUBSIDIARY, THE VENUE SHALL BE SAN DIEGO COUNTY IN THE STATE OF CALIFORNIA. CALIFORNIA STATE LAWS AND APPLICABLE FEDERAL LAWS SHALL APPLY AND GOVERN THE DISPUTE.
The company behind this system is Directed Electronics Since its inception, Directed Electronics has had one purpose, to provide consumers with the finest vehicle security and car stereo products and accessories available. The recipient of nearly 100 patents and Innovations Awards in the field of advanced electronic technology. Directed is ISO 9001 registered. Quality Directed Electronics products are sold and serviced throughout North America and around the world.