
User manual


64
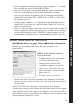
USB to RS232 adapter (PN 41685): For computers with only a USB port.
**Important** Make sure that the TimeTrax software is installed prior
to connecting the TimeTrax unit to the PC. Connect the white 50’
RJ45 cable (fig. D) to the RJ45/DB9 adapter (fig. B) and then connect
the RS232/USB adapter (fig. C) to the back of your PC (fig. A).
STEP II: Test that Windows, COM Port and DB9 are working properly.
• If the hardware is setup correctly, you will need to connect the
loop-back plug included in the shipment to the DB9 that is plugged
into your computer.
• Click the Reconnect Button on your screen.
• If the loop-back plug is found, it indicates that Windows, the COM
Port and the adapter are working properly.
IIa: Test that the Cable is working properly.
• Unplug the white Cat5 cable from the TimeTrax Pro unit and
from the back of the PC.
• Plug them both back in, in the reverse order.
• If this still does not work, replace the white cable with another
Ethernet or Cat5 cable.
IIb: If the LCD displays time and date, test the Time Clock.
• First, try unplugging the unit and letting it sit for a few minutes,
then plug it back into the wall socket.
• If it is still not connecting correctly, you will need to reset the
clock.
NOTE: Resetting the time clock erases all stored punches. To reset the clock,
unplug the unit and hold down the 0 key while plugging it back in. If it does not
connect at this point, the clock needs to be replaced.
Step III: Loop-Back Plug Not Found
• If the loop-back plug is not found, try connecting a USB to RS232
adapter (Pyramid P/N 41685) into the PC and then connecting
the DB9 to the USB adapter.
• If this still does not work, it may be necessary to contact your
computer support personnel.
Restoring Database From a Crashed Hard Drive
• Reload your TimeTrax Pro Software as shown in the Installing the Software
section of this manual. Note: Please make sure that you are installing the
same version that you are currently running.
• If you have AUTOMATIC BACKUP activated, go to CONFIGURE TAB on
the VERTICAL ICON BAR and Click on AUTOMATIC BACKUP.
TROUBLESHOOTING