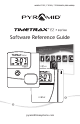
MODELS TTEZ, TTEZEK, TTEZPROXEK (PPDLAUBKN) Software Reference Guide pyramidtimesystems.
TIMETRAX™ EZ SERIES SOFTWARE REFERENCE GUIDE TIMETRAX™ PRODUCT & SOFTWARE LICENSING AGREEMENT Copyright © 2001-2013 Pyramid Time System, LLC Portions of this program Copyright © 1991-2005 Microsoft Corp. Portions of the report generation software are distributed under a licensing agreement with Data Dynamics, Ltd. Portions of this program Copyright © 1994-2000 eHelp Corp. All rights reserved. Portions of this program Copyright © 1990-2005 Info-ZIP, and distributed under license dated 2005-Feb 10.
TIMETRAX™ EZ SERIES SOFTWARE REFERENCE GUIDE No rental, leasing or commercial hosting. You may not rent, lease, lend or provide commercial hosting services to third parties with the TimeTrax™ software. Software Transfer.
TIMETRAX™ EZ SERIES SOFTWARE REFERENCE GUIDE 7) APPLICABLE LAW. This EULA is governed by the laws of the State of Connecticut. Should You have any questions concerning this EULA, or if You desire to contact PYRAMID TIME SYSTEMS for any reason, please contact the Pyramid Time System distributor serving you or write: PYRAMID TIME SYSTEMS, 45 Gracey Avenue, Meriden, CT 06451, or e-mail custsvc@PTI.cc, or call Toll Free 1.888.479.7264. 8) LIMITED WARRANTY.
TIMETRAX™ EZ SERIES SOFTWARE REFERENCE GUIDE TABLE OF CONTENTS TABLE OF CONTENTS . . . . . . . . . . . . . . . . . . . . . . . 1 Software Requirements . . . . . . . . . . . . . . . . . . . . 2 PRODUCT OVERVIEW & FEATURES . . . . . . . . . . . . . . . . . 3 UPGRADES & ACCESSORIES . . . . . . . . . . . . . . . . . . . . 4 CUSTOMER SUPPORT & WARRANTY . . . . . . . . . . . . . . . .
TIMETRAX™ EZ SERIES SOFTWARE REFERENCE GUIDE SOFTWARE REQUIREMENTS Please verify system meets ALL requirements listed below. Do not install TimeTrax™ software if system does not meet minimum requirements. Single User installation, Local Area Network (LAN) only1 DHCP DHCP enabled network Windows XP, Vista, 7 or 8 TM User Profile with Admin rights English Regional settings & hardware input in English 1 TimeTrax™ Time & Attendance software does not operate on server PC’s.
TIMETRAX™ EZ SERIES SOFTWARE REFERENCE GUIDE PRODUCT OVERVIEW Thank you for choosing the TimeTrax™ EZ Series Time Clock System! TimeTrax™ empowers business with essential employee time tracking tools to manage, report & export employee time & attendance. With the TTEZ Series Time Clock System, employees can simply punch In and Out using a swipe card (TTEZ & TTEZEK) or proximity badge (TTEZPROXEK).
TIMETRAX™ EZ SERIES SOFTWARE REFERENCE GUIDE UPGRADES To add employees or enhance software capabilities, software upgrades are available. When you are ready to take it to the next level, visit pyramidtimesystems.com or contact our customer support team at 888.479.7264, 8am-5pm EST, Mon-Fri, to easily upgrade your software.
TIMETRAX™ EZ SERIES SOFTWARE REFERENCE GUIDE CUSTOMER SUPPORT Help ◦◦TimeTrax™ Click “Help” from main toolbar to access index of help topics. ◦◦ Troubleshooting For answers to Frequently Asked Questions, please refer to pyramidtimesystems.com/SUPPORT ◦◦Online & Email Support 1 Visit pyramidtimesystems.com 2 Click “Support” button on menu bar for customer support info.
TIMETRAX™ EZ SERIES SOFTWARE REFERENCE GUIDE CONNECT TERMINAL Please install and mount TimeTrax™ EZ, EZEK, or EZPROXEK Terminal before installing TimeTrax™ software. The software will search for terminal once it is connected to the network.. 2 1 3 6 5 1 Connect Ethernet cable (TTEZEK & TTEZPROX) into Ethernet port located in compartment on back of terminal. If connecting serial unit (TTEZ), connect USB cable into the USB port located on the back of terminal (not shown).
TIMETRAX™ EZ SERIES SOFTWARE REFERENCE GUIDE MOUNT TERMINAL To mount terminal. 1 Hold mounting bracket flush against wall with cable access cutout towards floor. 2 Level bracket and mark four screw holes close to corner tabs. 3 Drill holes as marked and insert included anchors if needed. 4 Screw mounting bracket to wall with included screws. 5 Drill hole centered in rectangular opening of bracket for cables.
TIMETRAX™ EZ SERIES SOFTWARE REFERENCE GUIDE INSTALL TIMETRAX™ EZ SOFTWARE 1 2 Insert TimeTrax™ CD into CD-ROM drive. 3 Click “Yes/Unblock” to allow program to make changes to this computer. 4 TimeTrax™ EZ InstallAware Wizard will automatically open. Click “Next” to begin install.1 Click “Finish” when install is complete. Click on Pyramid TimeTrax™ desktop icon. 5 Enter temporary User Name “ADMIN”. Enter temporary password “PTI” (case sensitive). Click “Login”.
TIMETRAX™ EZ SERIES SOFTWARE REFERENCE GUIDE PAYROLL SETUP 1 Choose “Yes” to continue to Payroll SetUp Screen. 2 Click “Edit” to start. 3 Choose Pay Period format (weekly, bi-weekly, monthly or semi-monthly)1, start day, and start time2. Click “Save” then click “Setup Pay Categories” to continue. 1 Overtime may be accrued to next Pay Period for hourly employees paid on a monthly or semi-monthly basis.
TIMETRAX™ EZ SERIES SOFTWARE REFERENCE GUIDE PAY CATEGORIES SETUP 1 Click “Edit” to begin Category ◦◦Pay Predefined employee hour classifications: Holiday, Other, Overtime 1.5, Overtime 2, Regular, Sick & Vacation. Multiplier ◦◦Rate Rate at which Pay Category is paid Example: Holiday is rate multiplier 1 if employee is paid regular rate for day. Time and a half is rate multiplier 1.5. to Weekly Overtime ◦◦Apply Check box if category hours can accrue towards overtime.
TIMETRAX™ EZ SERIES SOFTWARE REFERENCE GUIDE EMPLOYEE GROUPS SETUP 3 Click “Edit” to begin. Enter Daily and Weekly Overtime. 1Choose “Advanced” for additional Employee Group settings (see next page). Hours Before Missed Punch Assumed ◦◦Max Maximum number of hours employee can work without punching out before system assumes employee failed to punch out. Interval Round ◦◦Pay Check “Enable” to use Pay Interval Rounding. Divides each clock hour into intervals of 5,6,10 or 15 minutes.
TIMETRAX™ EZ SERIES SOFTWARE REFERENCE GUIDE ADVANCED EMPLOYEE GROUPS SETUP Rules ◦◦Shift Allows employee to punch at any time and generates warning when employee punches outside of defined shift. Define warning in minutes before or after shift starts or ends. Overtime, Sunday Overtime, 7th Day Weekend Overtime ◦◦Saturday Choose to specify Saturday, Sunday and/or 7th Day worked are automatically categorized as overtime regardless of number of hours worked during regular pay period.
TIMETRAX™ EZ SERIES SOFTWARE REFERENCE GUIDE ADVANCED EMPLOYEE GROUPS SETUP (cont.) If using QuickBooks, click “Yes”.1 1 See pg. 36, Step 5 for QuickBooks Requirements & Syncing information. pyramidtimesystems.
TIMETRAX™ EZ SERIES SOFTWARE REFERENCE GUIDE EMPLOYEE DETAILS SETUP Click “Add” to enter a new employee1. Click “Edit” to change existing record. Click “Save” after entering or editing each employee or click “Cancel” to discard changes. Card 1,2,3 (Required field to interface employee with terminal) ◦◦Enter card number located on back of swipe card or proximity badge assigned to employee. In the event a card is lost or damaged, TimeTrax™ allows three unique numbers to be assigned to each employee.
TIMETRAX™ EZ SERIES SOFTWARE REFERENCE GUIDE VERTICAL ICON BARS To select “Payroll”, “Setup” or “Configure”, click buttons at top & bottom of each Vertical Icon Bar or click “File/Show More Menus” on top menu bar. ◦◦Payroll Working Vertical Icon Bar used for daily transactions. ◦◦Setup Employee Groups and Payroll setup handled initially through InstallAware Wizard. ◦◦Configure Standard one-time setup for systems administration. pyramidtimesystems.
TIMETRAX™ EZ SERIES SOFTWARE REFERENCE GUIDE CONFIGURE Set Date and Time Adjust date, time, as well as Daylight Savings Time settings (No DST, STD USA DST, STD EURO DST or set custom DST rule. Click “Set Date & Time” on Configure Vertical Icon Bar. Click “Save Date/Time Changes”. 16 CONFIGURE 888.479.
TIMETRAX™ EZ SERIES SOFTWARE REFERENCE GUIDE CONFIGURE Preferences Changes Date, Time Totals and Time of Day Format. Changes will appear in both software and reports. Format ◦◦Date Select MMDDYYYY, MMDDYY, DDMMYYYY or DDMMYY. Totals Format ◦◦Time Select Minutes or Hundredths of an hour. of Day Format ◦◦Time Select 12 Hour-AM/PM or 24 Hour Military (applies to software & time clock terminal. Text to Uppercase ◦◦Force Select for uppercase text entries.
TIMETRAX™ EZ SERIES SOFTWARE REFERENCE GUIDE CONFIGURE Automatic Backup 1 Click “Automatic Backup” on Configure Vertical Icon Bar. 2 Check “Activate Automatic Backup” to turn on automatic backups which will appear upon exit of software. 3 Click “Browse” to find location where you would like to store the backups. 4 Click “Backup Now” for immediate backup. 5 Click “Apply” after screen changes. It is strongly recommended to create a User Name and Password immediately for data security.
TIMETRAX™ EZ SERIES SOFTWARE REFERENCE GUIDE CONFIGURE TimeTrax™ Security User Names and Passwords, as well as security for anyone that logs into TimeTrax™ Software. The number of users is unlimited.1 1 Click “TimeTrax Security” on Configure Vertical Icon Bar. 2 Enter desired “User Name”. 3 Enter desired “Password”. 4 Check “Disable Wage Access” to disable view or be able to change wage information for this user. 5 Check “Read Only” to give this user “read only” access to database.
TIMETRAX™ EZ SERIES SOFTWARE REFERENCE GUIDE EMPLOYEE DETAILS SETUP CONFIGURE User Levels Four levels of accessibility ◦◦Restricted Access to Punch Details, Payroll Details, Employee Details, Assert Global Pay, Viewing Options, Date Time Setup Form, Reports/Exports, and Retrieve Punch Data. ◦◦Regular Access to all Restricted User features plus Supervisor Functions, Preferences, Backups, and Archive Reports, Bell Schedule and Department Codes (optional feature).
TIMETRAX™ EZ SERIES SOFTWARE REFERENCE GUIDE CONFIGURE TimeTrax™ Security User Names and Passwords, as well as security for anyone that logs into TimeTrax™ Software. The number of users is unlimited.1 Time Source Standard By default, Time clock Terminal is the most reliable option for time keeping. Default may be changed to PC, however PCs experience fluctuation by gaining and losing time. pyramidtimesystems.
TIMETRAX™ EZ SERIES SOFTWARE REFERENCE GUIDE PAYROLL Get Punches All TimeTrax™ EZ terminals (EZ, EZEK & EZPROX) will hold up to 6,000 punches before download is required, however punch download is recommended on a regular basis to prevent data loss. Click “Get Punches” on Payroll Vertical Icon Bar. Click “Initiate Retrieval of Punch Data”. Punches may also be retrieved at “login” by clicking “Download Punches”. 22 PAYROLL 888.479.
TIMETRAX™ EZ SERIES SOFTWARE REFERENCE GUIDE Punch Details Displays In and Out punches. View, insert, edit and delete punches, or assign comments to punches. View Current, Previous and 2 prior Pay Periods. Categorizes pay type and notifies user of possible errors. Punch ◦◦Insert Click “Insert Punch”, choose date and time of punch. Click “Save”. Punch ◦◦Edit Click “Edit Punch”, change date and/or time of punch. Click “Save”. 1 Punch ◦◦Delete Highlight punch. Click “Delete Punch”.
TIMETRAX™ EZ SERIES SOFTWARE REFERENCE GUIDE PAYROLL Payroll Details Allows user to enter exceptions to employee payroll record and approve/un-approve payroll records. Most fields are pre-populated from Punch and Employee Detail screens. Pay Type ◦◦Special Click “Edit Payroll Details”. Choose which special pay to add. 1 Enter hours associated with special pay in hours field then click “Save”. ◦◦Approve User must click “Approve” at end of each pay period.
TIMETRAX™ EZ SERIES SOFTWARE REFERENCE GUIDE PAYROLL Assert Global Special Pay Pays all employees or group of employees same number of hours (i.e. Independence Day @ 8 hrs). Global Special Pay ◦◦Assert Click “File” from top menu bar. Click “Assert Global Pay” from drop down. Selection ◦◦Employee Choose “All Employees in the Selected Payroll Group”, “Employees by Groups in the Selected Payroll Group”, or “Individual Employees in the Selected Payroll Group”.
TIMETRAX™ EZ SERIES SOFTWARE REFERENCE GUIDE PAYROLL Workdays/Workweeks Setup days Individual Employees, Employees within Employee Groups or Employees within Payroll Setup normally work. “Enable Workdays Setup and Track Absences” must be checked in the Configure vertical icon bar under preferences option (pg. 16) to access this feature. 1 Click “Workdays/Workweeks”. Regular Workweek ◦◦Only Set workweek template for specified individual or group. Enter days which make up regular workweek.
TIMETRAX™ EZ SERIES SOFTWARE REFERENCE GUIDE PAYROLL Reports/Exports Reports Generate up to 10 Analytical Employee and Payroll reports. Click “Reports/Exports”. Choose “Report”, “Pay Period” and “Employee Group” or “Individual Employees” to be included on report. Click “Create Report”. Report ◦◦Payroll Total regular/overtime/special hours worked including wage information for selected pay period.
TIMETRAX™ EZ SERIES SOFTWARE REFERENCE GUIDE PAYROLL Reports (cont.) Punch Report Punches, Missed Punches, Absenteeism and Warnings. If no warnings are used, the report will show edited punches. If warnings are used, report will show actual punches. Detailed Payroll Report Combines Payroll Report and Time Card Report.1 Card Report Swipe Card or Prox Badge # and Employee Name card or badge is assigned to.
TIMETRAX™ EZ SERIES SOFTWARE REFERENCE GUIDE PAYROLL Reports/Exports Reports Export payroll to selected Payroll Provider. Click “Reports/Exports”. Follow detailed steps for selected Payroll Provider (refer to table of contents). pyramidtimesystems.
TIMETRAX™ EZ SERIES SOFTWARE REFERENCE GUIDE PAYROLL QuickBooks Requirements ◦◦QuickBooks and TimeTrax™ must be installed on same computer. ◦◦User must be administrator in both TimeTrax™ and QuickBooks ◦◦QuickBooks must be in single user mode. ◦◦If QuickBooks is in multi-user mode please do the following: 1 In QuickBooks navigate to “File”. 2 In dropdown click “Switch to Single User Mode”. 3 In QuickBooks click “Edit”. 4 Click “Preferences”. 5 Click “Integrated Applications”.
TIMETRAX™ EZ SERIES SOFTWARE REFERENCE GUIDE PAYROLL QuickBook Requirements (cont.) 9 In QuickBooks click “Edit”. 10 Click “Preferences”. 11 Click “Time Tracking or Time & Expenses”. 12 Click “Company Preferences”. 13 Under Do you track time? Choose “Yes”. 14 Choose “First Day of Work Week” from dropdown. 15 Click “OK”. pyramidtimesystems.
TIMETRAX™ EZ SERIES SOFTWARE REFERENCE GUIDE PAYROLL QuickBook Requirements (cont.) 16 Select “File” 17 Navigate mouse to “Open Previous Company”. The Path where the QuickBooks File is located will be displayed.1 18 Write down Path and click “Close” QuickBooks completely. 1 If there is more than one company, please make sure that company syncing with is on top. 32 PAYROLL 888.479.
TIMETRAX™ EZ SERIES SOFTWARE REFERENCE GUIDE PAYROLL Syncing Employees with QuickBooks 1 Click “Setup” tab. 2 Click on “Payroll Setup/Groups”. 3 Click “Sync Employees with QuickBooks”. 4 Click “Link Rules”. pyramidtimesystems.
TIMETRAX™ EZ SERIES SOFTWARE REFERENCE GUIDE PAYROLL Syncing Employees with QuickBooks (cont.) 5 Click “Employee Import”. 6 Check “Ask before Importing the QuickBooks Employee record into TimeTrax™”. 7 Click “Employee Export”. 8 Check “Ask before exporting the TimeTrax™ Employee Record in QuickBooks”. 9 Click “OK”. 10 Click “Browse” and follow path you previously wrote down. 11 Click “Sync Employees With QuickBooks”. 12 Click “Start Syncing with QuickBooks”. 34 PAYROLL 888.479.
TIMETRAX™ EZ SERIES SOFTWARE REFERENCE GUIDE PAYROLL Syncing Employees with QuickBooks (cont.) 13 Click “Yes” on Application Certificate. 14 Check “Allow this application to access personal data such as Social Security Numbers ad customer credit card information”. 15 Click “Continue”. 16 Click “Done”. pyramidtimesystems.
TIMETRAX™ EZ SERIES SOFTWARE REFERENCE GUIDE PAYROLL Syncing Employees with QuickBooks (cont.) 17 On “Import Employee” Screen, carefully select employees to integrate. Click “Don’t Import” to exclude an employee from Export/Import. 36 PAYROLL 888.479.
TIMETRAX™ EZ SERIES SOFTWARE REFERENCE GUIDE PAYROLL QuickBooks Exporting Requirements 1 In QuickBooks, click “Employee Center”. 2 Double click on employee. 3 In “Change Tab” drop down, click “Payroll and Compensation Info”. 4 1 Check “Use time data to create pay checks”.1 This box must be checked for all employees whose hours will sync with QuickBooks. pyramidtimesystems.
TIMETRAX™ EZ SERIES SOFTWARE REFERENCE GUIDE Exporting Hours to QuickBooks 1 In TimeTrax™, click on “Payroll Tab”. 2 Click on “Reports/Exports”. 3 Under “Employee Selection” choose employees for export hours to QuickBooks. 4 Select “QuickBooks 2003+ Link” from Export Specifications drop down. 5 Click “Setup Export”. 6 Check “Automatically Approve and Proceed with Export”. 38 PAYROLL 888.479.
TIMETRAX™ EZ SERIES SOFTWARE REFERENCE GUIDE PAYROLL Exporting Hours to QuickBooks (cont.) 7 Click “Browse” and follow path you previously wrote down to locate QuickBooks company file. 8 Verify “Regular Pay Item, Overtime 1.5 Pay Item, and Overtime 2 Pay Item” are named exactly the same way in QuickBooks.1 9 Click “Start Exporting to QuickBooks”. 10 Once the export is complete, check that hours are in QuickBooks. 11 Navigate to QuickBooks, and in Employee Center, click drop down “Enter Time”.
TIMETRAX™ EZ SERIES SOFTWARE REFERENCE GUIDE PAYROLL ADP Export 1 Click “Reports/Exports”. 2 Select “ADP” from Export Specifications drop down. 3 Select Pay Period to be included in Export. 4 Select Employees to be included in Export. Check “Employee by Group in the Selected Payroll Group” or “Individual Employees in the Selected Payroll Group”. 5 Click “Setup Export”1 or “Create Export File”. 1 “Setup” is typically a one-time screen for setup.
TIMETRAX™ EZ SERIES SOFTWARE REFERENCE GUIDE PAYROLL ADP Export (cont.) 6 Enter Company Code provided by ADP. 7 Select drive and location where export file will be saved. 8 Click “Continue Export and Save Any Changes”. 9 Contact ADP to obtain steps to import file into ADP software. pyramidtimesystems.
TIMETRAX™ EZ SERIES SOFTWARE REFERENCE GUIDE PAYROLL Generic Text Export 1 Click “Reports/Exports”. 2 Select “Generic Text” from Export Specifications drop down. 3 Select Pay Period to be included in Export. 4 Select Employees to be included in Export. Check “Employee by Group in the Selected Payroll Group” or “Individual Employees in the Selected Payroll Group”. 5 Click “Setup Export”1 or “Create Export File”. 1 “Setup” is typically a one-time screen for setup.
TIMETRAX™ EZ SERIES SOFTWARE REFERENCE GUIDE PAYROLL Generic Text Export (cont.) 6 Under Delimiter, select “Comma” from drop down. 7 Under Quoted?, select “Yes” or “No”. 8 Under Employee by, select “Name”, “SSN” or “EMP#”. 9 Select drive and location where export file will be saved. 10 Click “Continue Export and Save Any Changes”. 11 Enter File Name including file extension. 12 Go to location where file is saved and import into software of choice. pyramidtimesystems.
TIMETRAX™ EZ SERIES SOFTWARE REFERENCE GUIDE PAYROLL Heartland Export 1 Click “Reports/Exports”. 2 Select “Heartland Payroll” from Export Specifications drop down. 3 Select Pay Period to be included in Export. 4 Select Employees to be included in Export. Check “Employee by Group in the Selected Payroll Group” or “Individual Employees in the Selected Payroll Group”. 5 Click “Setup Export”1 or “Create Export File”. 1 “Setup” is typically a one-time screen for setup.
TIMETRAX™ EZ SERIES SOFTWARE REFERENCE GUIDE PAYROLL Heartland Export (cont.) 6 Under Delimiter, select “Comma” from drop down. 7 Under Quoted?, select “Yes” or “No”. 8 Under Employee by, select “Name”, “SSN” or “EMP#”. 9 Select drive and location where export file will be saved. 10 Click “Continue Export and Save Any Changes”. 11 Enter File Name including file extension. 12 Go to location where file is saved and import into software of choice. pyramidtimesystems.
TIMETRAX™ EZ SERIES SOFTWARE REFERENCE GUIDE PAYROLL Paychex Preview Export 1 Click “Reports/Exports”. 2 Select “Paychex Preview” from Export Specifications drop down. 3 Select Pay Period to be included in Export. 4 Select Employees to be included in Export. Check “Employee by Group in the Selected Payroll Group” or “Individual Employees in the Selected Payroll Group”. 5 Click “Setup Export”1 or “Create Export File”. 1 “Setup” is typically a one-time screen for setup.
TIMETRAX™ EZ SERIES SOFTWARE REFERENCE GUIDE PAYROLL Paychex Preview Export (cont.) 6 Enter Branch Number, Client Number and Site Number provided by Paychex. 7 Select drive and location where export file will be saved. 8 Click “Continue Export and Save Any Changes”. 9 Contact PAYCHEX to obtain steps to import file into Paychex software. pyramidtimesystems.
TIMETRAX™ EZ SERIES SOFTWARE REFERENCE GUIDE PAYROLL Paylink Export 1 Click “Reports/Exports”. 2 Select “Paylink Export” from Export Specifications drop down. 3 Select Pay Period to be included in Export. 4 Select Employees to be included in Export. Check “Employee by Group in the Selected Payroll Group” or “Individual Employees in the Selected Payroll Group”. 5 Click “Setup Export”1 or “Create Export File”. 1 “Setup” is typically a one-time screen for setup.
TIMETRAX™ EZ SERIES SOFTWARE REFERENCE GUIDE PAYROLL Paylink Export (cont.) 6 Enter Branch Number, Client ID, Site# and Seq# provided by Paylink, and select whether or not to send hourly rate. 7 Select drive and location where export file will be saved. 8 Click “Continue Export and Save Any Changes”. 9 Contact Paylink to obtain steps to import file into Paylink software. pyramidtimesystems.
TIMETRAX™ EZ SERIES SOFTWARE REFERENCE GUIDE PAYROLL ProData Evolution Export 1 Click “Reports/Exports”. 2 Select “ProData Evolution Export” from Export Specifications drop down. 3 Select Pay Period to be included in Export. 4 Select Employees to be included in Export. Check “Employee by Group in the Selected Payroll Group” or “Individual Employees in the Selected Payroll Group”. 5 Click “Setup Export”1 or “Create Export File”. 1 “Setup” is typically a one-time screen for setup.
TIMETRAX™ EZ SERIES SOFTWARE REFERENCE GUIDE PAYROLL ProData Evolution Export (cont.) 6 Enter Rate Codes provided by ProData Evolution. 7 Select drive and location where export file will be saved. 8 Click “Continue Export and Save Any Changes”. 9 Contact ProData to obtain steps to import file into ProData software. pyramidtimesystems.
TIMETRAX™ EZ SERIES SOFTWARE REFERENCE GUIDE PAYROLL Pay America Export 1 Click “Reports/Exports”. 2 Select “Pay America Format” from Export Specifications drop down. 3 Select Pay Period to be included in Export. 4 Select Employees to be included in Export. Check “Employee by Group in the Selected Payroll Group” or “Individual Employees in the Selected Payroll Group”. 5 Click “Setup Export”1 or “Create Export File”. 1 “Setup” is typically a one-time screen for setup.
TIMETRAX™ EZ SERIES SOFTWARE REFERENCE GUIDE PAYROLL Pay America Export (cont.) 6 Under Delimiter, select “Comma” from drop down. 7 Under Quoted?, select “Yes” or “No”. 8 Under Employee by, select “Name”, “SSN” or “EMP#”. 9 Select Export Type, Payroll or Punches. 10 Select drive and location where export file will be saved. 11 Click “Continue Export and Save Any Changes”. 12 Enter File Name including file extension. 13 Go to location where file is saved and import into software of choice.
TIMETRAX™ EZ SERIES SOFTWARE REFERENCE GUIDE PAYROLL Time Clock Export 1 Click “Reports/Exports”. 2 Select “Time Clock Format” from Export Specifications drop down. 3 Select Pay Period to be included in Export. 4 Select Employees to be included in Export. Check “Employee by Group in the Selected Payroll Group” or “Individual Employees in the Selected Payroll Group”. 5 Click “Setup Export”1 or “Create Export File”. 1 “Setup” is typically a one-time screen for setup.
TIMETRAX™ EZ SERIES SOFTWARE REFERENCE GUIDE PAYROLL Time Clock Export (cont.) 6 Under Delimiter, select “Comma” from drop down. 7 Under Quoted?, select “Yes” or “No”. 8 Under Employee by, select “Name”, “SSN” or “EMP#”. 9 Select Export Type, Payroll or Punches. 10 Select drive and location where export file will be saved. 11 Click “Continue Export and Save Any Changes”. 12 Enter File Name including file extension. 13 Go to location where file is saved and import into software of choice.
TIMETRAX™ EZ SERIES SOFTWARE REFERENCE GUIDE PAYROLL Archive Reports Once payroll record is approved, it is placed in Archive. Archive Reports may be generated from date TimeTrax™ was installed up to and including current date1. Click “Archive Reports”. Choose Employees to include in report. Choose “Employee Group” or “Individual Employees”. Choose dates. Choose “Active Only” or “Active/Inactive”. Choose Report. Click “Create Report”.
TIMETRAX™ EZ SERIES SOFTWARE REFERENCE GUIDE PAYROLL Employee Details “Employee Details”. Click “Add” or “Edit”. ◦◦Click See pg. 14 for more info. pyramidtimesystems.
TIMETRAX™ EZ SERIES SOFTWARE REFERENCE GUIDE USING THE TIME CLOCK EZ Swipe Card Series Swipe card in the swipe channel from top to bottom. If employee card number is successfully read, the time clock terminal will beep and the card number will be displayed briefly on terminal screen. Employee records generated from swipe card punches are stored within the terminal. The terminal stores the last 6,000 punches before download is required.
TIMETRAX™ EZ SERIES SOFTWARE REFERENCE GUIDE USING THE TIME CLOCK EZ Prox Card Series Wave prox badge within two inches of target area. If employee badge number is successfully read, the time clock terminal will beep and the badge number will be displayed briefly on terminal screen. Employee records generated from prox badge punches are stored within the terminal. The terminal stores the last 6,000 punches before download is required.
CONTACT US: For more information, visit pyramidtimesystems.com or call our technical support team at 888.479.7264 ext 1 during regular business hours: 8am-5pm EST, Monday-Friday. Copyright © 2012 Pyramid Time Systems, LLC. All rights reserved.