
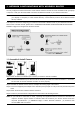
Specifications


9
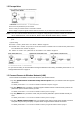
h) Check the LAN status indicator ( ) on the camera, and see if it’s always on.
- If yes, the camera is connected to the wireless network successfully.
- If no, please check if you enter the right password to join the wireless network, and try again. Or, you may
refer to “1.3.3” and try again.
Note: Please also remember to restore the IP setting of your laptop.
Continue to connect your camera to Internet.
If you don’t have iPhone, iPad or Android mobile device, go to “1.4.1 Configure on Laptop / Computer” at page 12.
If you have iPhone, iPad or Android mobile device, go to “1.4.2 Configure on iPhone / iPad” at page 15.
Note: The HTC Android mobile devices do not support this function. Please go to “1.4.1 Configure on
Laptop / Computer” at page 12 to configure your camera to Internet.
From iPhone / iPad
Before starting the setup, make sure:
You know the user name and password to join the wireless network you want to use.
The camera is powered on.
Follow the steps below to wirelessly connect this camera to your wireless router:
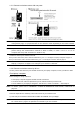
a) On iPhone / iPad, switch off your 3G network in “Settings” “General” "Network”.
b) Go to “Settings” “Wi-Fi”, and select "IP-CAMERA" to join.
Note: The wireless network, “IP-CAMERA”, is generated from the camera itself. If you can’t find it, wait
for a while and try again. No password is needed to join the network.
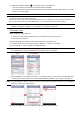
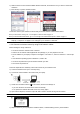
c) Open “EagleEyes”. In the address book, click “+” to add a new device. Then, select “Local Network Search”
to search your network camera. You’ll see the default wireless IP address of your camera, “192.168.2.10”.
Note: If no IP address is found, make sure you’ve connected to the wireless network of “IP-CAMERA”,
and wait a while and search again.
d) Select the address to enter the configuration page, and select “Wireless Setup”.