
Specifications


25
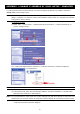
APPENDIX 2 NETWORK CONFIGURATIONS WITH ROUTER / MODEM
If your network environment is “(Router + Modem”, “Wireless Router + Modem”, or “Modem” (or hub + Modem) as
illustrated below, please follow the instructions below to configure the network setting of the camera.
Before starting the setup, make sure:
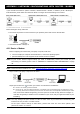
The camera is powered on and connected to your (wireless) router with a RJ-45 network cable.
LAN status indicator is always on.
A2.1 Router + Modem
Before configuring the camera from your laptop / computer, make sure:
You have a laptop or computer with the Windows 7, Vista or XP operating system.
(Recommended) Your router supports UPnP, and this function is enabled.
Note: If your router doesn’t support UPnP, you need to additionally access your router for port
forwarding. For details, please refer to “APPENDIX 5 CONFIGURE PORT FORWARDING” at page
38.
You have downloaded “IPScan.exe” in your laptop / computer.
Note: Please download “IPScan.exe” from www.surveillance-download.com/user/n812.swf.
Step1: Connect your laptop / computer to the router.
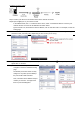
Step2: Open “IPScan.exe” ( ) to search your camera. You will find two IP addresses:
192.168.2.10 - Please ignore this IP address.
192.168.30.155 - This is the address assigned by your wireless router, and the address may vary depending on router
you’re using. Note down the IP address you see, such as 192.168.30.155 in our example below, and also the port number.
Then, select the IP address assigned by your router (such as 192.168.30.155), and click “Configure” to
note down the gateway IP address. It’s the IP address of your router, and you might need it later for port
forwarding.
Note: You may change the port number of “88” to other value if you know 88 is blocked by your
Internet service provider or mobile carrier.
For the port number change to take effect, please also enter the user name (admin) and
password “admin” to confirm.