
Manual

11
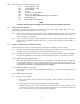
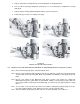
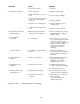
FIGURE V
CUT-AWAY VIEW OF VALVE SECTION
,
METAL HEAD PUMP
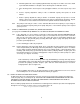
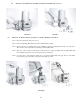
FIGURE VI
VALVE CARTRIDGE REMOVAL
,
METAL HEAD PUMP
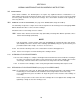
FIGURE VII
VALVE CARTRIDGE REMOVAL
,
PVC HEAD PUMP
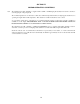
12.0 REPLACING OF VALVE CARTRIDGES (Continued)
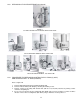
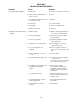
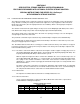
13.0 PROCEDURE FOR REPLACING CONTROL ROD “O” RING (fig. #517)
AND SEALING PLATE “O” RING (FIG.#516).
Refer to Figure VIII
1. Remove Drain Plug (FIG. #510) and drain hydraulic fluid.
2. Remove Indicator Plate (FIG. #520) by removing two holding screws.
3. Remove control rod assembly with Control Rod (FIG. #’s 515, 523,524) attached, by turning counter
clockwise and pulling out.
4. Insert 11/16” Hex Socket onto the Sealing Nut (FIG. #526) and screw out of pump in a counter clockwise
direction. Then, remove Sealing Plate (FIG. #518) using a small brass hook to pull loose.