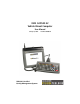
8525 G2/8530 G2 Vehicle-Mount Computer User Manual January 16, 2007 ISO 9001 Certified Quality Management System Part No. 8100083.
© Copyright 2007 by Psion Teklogix Inc., Mississauga, Ontario This document and the information it contains is the property of Psion Teklogix Inc., is issued in strict confidence, and is not to be reproduced or copied, in whole or in part, except for the sole purpose of promoting the sale of Teklogix manufactured goods and services. Furthermore, this document is not to be used as a basis for design, manufacture, or sub-contract, or in any manner detrimental to the interests of Psion Teklogix Inc.
Return-To-Factory Warranty Psion Teklogix provides a return to factory warranty on this product for a period of twelve (12) months in accordance with the Statement of Limited Warranty and Limitation of Liability provided at www.psionteklogix.com/warranty. (If you are not already a member of Teknet and you attempt to view this warranty, you will be asked to register. As a member of Teknet, you’ll have access to helpful information about your Psion Teklogix products at no charge to you.
mium, mercury, hexavalent chromium, and flame retardants PBB and PBDE that may be contained in a product. Only products meeting these high environmental standards may be “placed on the market” in EU member states after July 1, 2006. RoHS Logo Although there is no legal requirement to mark RoHS-compliant products, Psion Teklogix Inc.
TABLE Program License Agreements . . Approvals And Safety Summary . OF CONTENTS . . . . . . . . . . . . . . . . . . . . . . . . . .I . . . . . . . . . . . . . . . . . . . . . . . . VII Chapter 1: Introduction 1.1 1.2 1.3 1.4 About This Manual . . . . . . . . . . . . . . . . . . . Text Conventions . . . . . . . . . . . . . . . . . . . . About The 8525 G2/8530 G2 Vehicle-Mount . . . . . 8525 G2/8530 G2 Features . . . . . . . . . . . . . . . 1.4.1 8525 G2 Vehicle-Mount Computer . . . . . . . 1.4.
Contents 2.10.1 Main Tab . . . . . . . . . . . . . . . . . 2.10.2 Config Tab . . . . . . . . . . . . . . . . 2.10.3 Global Settings Tab . . . . . . . . . . . 2.10.4 Status Tab . . . . . . . . . . . . . . . . 2.10.5 Diags Tab. . . . . . . . . . . . . . . . . 2.11 Resetting The 8525 G2/8530 G2 Vehicle-Mount . . . . . . . . . . . . . . . . . . . . . . . . . . . . . . . . . . . . . . . . . . . . . . . . . . . . . . . . . . . . . . . . . . . . . . . .
Contents 3.11.2 Cleaning The 8525 G2/8530 G2. . . . . . . . . . . . . . . . . . 57 Chapter 4: Working With Windows CE 5.0 4.1 4.2 4.3 4.4 4.5 Navigating In Windows CE And Applications . . . . 4.1.1 Navigating Using A Touchscreen And Stylus. 4.1.2 Navigating Using The Keyboard . . . . . . . Working With Files, Folders And Programs . . . . . The Startup Desktop. . . . . . . . . . . . . . . . . . 4.3.1 The Desktop Icons . . . . . . . . . . . . . . . 4.3.2 The Taskbar . . . . . . . . . . . . . . . . . .
Contents 5.5.11 5.5.12 5.5.13 5.5.14 Input Panel . . . . . . . . . . . . . . . . . . . . . . . . IPv6 Support . . . . . . . . . . . . . . . . . . . . . . . Scanner Properties Setup . . . . . . . . . . . . . . . . . SNMP (Simple Network Management Protocol) Setup . . . . . . . . . . . . . . 134 . 136 . 137 . 157 External Bar Code Readers . . . . . . . . . . . . . . . . . . . . 6.1.1 PowerScan™ Standard, LR and XLR Bar Code Scanners 6.1.2 Entering Data With The Bar Code Reader . . . . . . . . .
Contents B.3 DB-26 Auxiliary Port Pinout . . . . . . . . . . . . . . . . . . . . . . B-2 B.4 External Keyboard–High Density DB-26 (8530 G2 Only) . . . . . . . B-3 Appendix C: USB Setup Application C.1 USB Setup. . . . . . . . . . . . . . . . . . . . . . . . . . . . . . . . C-1 C.1.1 Launching The Application . . . . . . . . . . . . . . . . . . . C-2 C.1.2 Installation Complete Dialog Box. . . . . . . . . . . . . . . .
PROGRAM LICENSE AGREEMENTS Microsoft's End User License Agreement You have acquired a device (“DEVICE”) that includes software licensed by Psion Teklogix Inc. from Microsoft Licensing Inc. or its affiliates (“MS”). Those installed software products of MS origin, as well as associated media, printed materials, and “online” or electronic documentation (“SOFTWARE”) are protected by international intellectual property laws and treaties. The SOFTWARE is licensed, not sold. All rights reserved.
License Agreement • • • • • II REGARDING THE DEVICE OR THE SOFTWARE, THOSE WARRANTIES DO NOT ORIGINATE FROM, AND ARE NOT BINDING ON, MS. Note on Java Support. The SOFTWARE may contain support for programs written in Java.
License Agreement Psion Teklogix Inc. End User License Agreement IMPORTANT - READ CAREFULLY: This License Agreement (“Agreement”) is a legal agreement between you and Psion Teklogix (“we”), the licensor of this software package (“Software”), for your use of the Software only as authorized in this Agreement. By clicking on the “Accept” or other appropriate assent button and/or installing the Software, you agree to be and are hereby bound by the terms and conditions of this Agreement.
License Agreement c. License Registration. You will be required to provide a license ID, unique to each device, for registering your Software license. As part of your software license registration, we will provide you a corresponding license key for each device. d. No Modifications. You may not modify or create any derivative work of the Software or any copy or portion thereof nor may you remove any Software identification, copyright or other notices. e. No Distribution.
License Agreement WHETHER EXPRESS OR IMPLIED, INCLUDING, BUT NOT LIMITED TO, THE IMPLIED WARRANTIES OR CONDITIONS OF MERCHANTABLE QUALITY OR FITNESS FOR A PARTICULAR PURPOSE. WE DO NOT WARRANT OR MAKE ANY REPRESENTATIONS REGARDING THE USE OR THE RESULTS OF THE USE OF THE SOFTWARE IN TERMS OF ITS CORRECTNESS, ACCURACY, RELIABILITY, USE WITH FUTURE PSION TEKLOGIX DEVICES INTRODUCED, OR OTHERWISE.
License Agreement 8. ENDING THIS AGREEMENT We may terminate this Agreement and your license immediately without notice if (a) you fail to comply with any term of this Agreement, or (b) your rights are assigned by you, by operation of law or otherwise. In such event, you must return or destroy all copies and component parts of the Software and documentation, as well as any other Psion Teklogix proprietary information in your possession, within fourteen (14) days of the date of termination.
APPROVALS AND SAFETY SUMMARY CE Marking When used in a residential, commercial or light industrial environment the product and its approved UK and European peripherals fulfil all requirements for CE marking. R&TTE Directive 1999/5/EC This equipment complies with the essential requirements of EU Directive 1999/5/EC (Declaration available: www.psionteklogix.com). Cet équipement est conforme aux principales caractéristiques définies dans la Directive européenne RTTE 1999/5/CE.
Approvals And Safety Summary Dette utstyret er i overensstemmelse med hovedkravene i R&TTE-direktivet (1999/5/EC) fra EU. (Erklæring finnes på: www.psionteklogix.com). Utrustningen uppfyller kraven för EU-direktivet 1999/5/EC om ansluten teleutrustning och ömsesidigt erkännande av utrustningens överensstämmelse (R&TTE). (Förklaringen finns att läsa på: www.psionteklogix.com). Tämä laite vastaa EU:n radio- ja telepäätelaitedirektiivin (EU R&TTE Directive 1999/5/EC) vaatimuksia.
Approvals And Safety Summary If this equipment does cause harmful interference to radio or television reception, which can be determined by turning the equipment off and on, the user is encouraged to try to correct the interference by one of the following measures: • Reorient or relocate the receiving antenna. • Increase the separation between the equipment and receiver. • Connect the equipment into an outlet on a circuit different from that to which the receiver is connected.
Approvals And Safety Summary Emissions Information For Canada This Class B digital apparatus meets all requirements of the Canadian InterferenceCausing Equipment Regulations. When using the 802.11 radio option, to prevent radio interference, this device is intended to be operated indoors and away from windows to provide maximum shielding. Equipment (or its transmit antenna) that is installed outdoors is subject to licensing.
Approvals And Safety Summary CAUTION Use of additional wiring and attachments not recommended or sold by the manufacturer may result in fire, electric shock or personal injury. CAUTION If using an AC adaptor, use only the AC adaptor recommended by manufacturer. CAUTION Do not operate the vehicle-mount computer with a damaged cord or plug. Replace immediately. CAUTION Make sure the cord is positioned so that it is not stepped on, tripped over or otherwise subjected to damage or stress.
1 INTRODUCTION 1.1 1.2 1.3 1.4 About This Manual . . . . . . . . . . . . . . . . . . . Text Conventions . . . . . . . . . . . . . . . . . . . . About The 8525 G2/8530 G2 Vehicle-Mount . . . . . 8525 G2/8530 G2 Features . . . . . . . . . . . . . . . 1.4.1 8525 G2 Vehicle-Mount Computer . . . . . . . . 1.4.2 8530 G2 Vehicle-Mount Computer & Keyboard . . . . . . . . . . . . . . . . . . . . . . . . . . . . . . . . . . . . . . . . . . . . . . . . . . . . . . . . . . . . . .3 .4 .4 .4 .7 .
Chapter 1: Introduction About This Manual 1.1 About This Manual This manual describes how to configure, operate and maintain the Psion Teklogix 8525 G2/8530 G2 vehicle-mount computers. Chapter 1: Introduction provides a basic overview of the 8525 G2 and 8530 G2 vehicle-mounts. Chapter 2: Basic Checkout describes the steps required to get the 8525 G2/8530 G2 ready for operation.
Chapter 1: Introduction Text Conventions 1.2 Text Conventions Note: Notes highlight additional, helpful information. Important: These statements provide particularly important instructions or additional information that is critical to the operation of the equipment. Warning: These statements provide critical information that may prevent physical injury, equipment damage or data loss. 1.
Chapter 1: Introduction 8525 G2/8530 G2 Features - - IBM JVM Standard protocol APIs - Windows sockets (WinCE) • Wireless Communication - IEEE 802.11g, 54Mbps 2.4 GHz CF radio Marvell-88W8300_802.11g_PC_Card (Model #RA2040) - IEEE 802.11g, 54Mbps 2.4 GHz CF radio Summit DC-802.11_SC_CF (Model #RA2041) - External antenna options - Integrated Bluetooth radio 2.
Chapter 1: Introduction 8525 G2/8530 G2 Features - ABC - Qwerty - Azerty - 68-key PC like format - Green EL backlight - Ergonomic design - Dedicated function keys - Epoxy coated elastomeric keys - 8530 G2 includes a Soft Input Panel along with an external keyboard. The keypad layout is shared with the 8525 G2.
Chapter 1: Introduction 8525 G2 Vehicle-Mount Computer - - 2 USB host ports Proprietary Keyboard port for 8530 G2 only • Power Management - Internal power supply 10-90VDC designed for forklift power (pre-regulator no required) - 12.
Chapter 1: Introduction 8530 G2 Vehicle-Mount Computer & Keyboard 1.4.2 8530 G2 Vehicle-Mount Computer & Keyboard Figure 1.
2 BASIC CHECKOUT 2.1 Preparing The 8525 G2/8530 G2 For Operation . . . 2.2 8525 G2/8530 G2 Safety Instructions . . . . . . . . 2.3 8525 G2/8530 G2 Freezer & Outdoor Guidelines . . 2.3.1 Important Operating Instructions . . . . . . . . 2.4 Switching The 8525 G2 On And Off . . . . . . . . . 2.5 Switching The 8530 G2 On And Off . . . . . . . . . 2.6 Calibrating The Touchscreen . . . . . . . . . . . . . 2.7 Configuring Your IEEE 802.11 Radio . . . . . . . . 2.8 Setting Up Marvell-88W8300 802.11g Radios . . . .
Chapter 2: Basic Checkout Preparing The 8525 G2/8530 G2 For Operation 2.1 Preparing The 8525 G2/8530 G2 For Operation Typically, 8525 G2/8530 G2 vehicle-mounts are configured at the factory and arrive ready for use. Although the 8525 G2/8530 G2 is equipped with an internal Compact Flash slot, a PCMCIA slot and SD I/O slot, these slots are not intended for user modification. If a device needs to be changed or added in these slots, contact qualified Psion Teklogix personnel.
Chapter 2: Basic Checkout 8525 G2/8530 G2 Freezer & Outdoor Guidelines 2.3 8525 G2/8530 G2 Freezer & Outdoor Guidelines 8525 G2/8530 G2 vehicle-mounts are sealed against dust and high-pressure water jets to the international standard IP66. 2.3.1 Important Operating Instructions Warning: IT IS CRITICAL that this information be reviewed and that any guidelines applicable to your vehicle-mount be strictly followed.
Chapter 2: Basic Checkout Important Operating Instructions • • • To prevent condensation when a vehicle-mount is moved from a freezer to a warmer environment, it is recommended that the computer power be left on for at least five minutes. When not in use, vehicle-mount freezer units should be stored in temperatures above 0° C (32° F). To prevent keyboard keys from freezing up, the keyboard should be mounted off the horizontal plane.
Chapter 2: Basic Checkout Switching The 8525 G2 On And Off 2.4 Switching The 8525 G2 On And Off • Note: Press the [ENTER/ON] key. If the 8525 G2/8530 G2 is in suspend state, pressing [ENTER/ON] ‘wakes’ the unit from this state. The screen in which you were working before the computer entered suspend state is displayed. To switch off the 8525 G2: • Press the [BLUE] key, and then press the [ENTER/ON] key.
Chapter 2: Basic Checkout Calibrating The Touchscreen 2.6 Calibrating The Touchscreen Before using your 8525 G2/8530 G2, you will need to calibrate the touchscreen. Refer to “Calibrating The Touchscreen” on page 45 for details. 2.7 Configuring Your IEEE 802.11 Radio If your 8525/30 G2 is equipped with a Marvell-88W8300_802.11g_PC_Card (Model # RA2040), follow the steps outlined under the heading “Setting Up Marvell-88W8300 802.11g Radios” beginning on page 15.
Chapter 2: Basic Checkout Setting Up Marvell-88W8300 802.11g Radios To configure the 802.11g radio: 1. Press [BLUE][0], and tap on Settings>Network and Dial-up Connections. Figure 2.1 Network And Dial-Up Connections Note: You can press [CTRL] [ESC] to display the Start Menu. 2. Choose the radio icon to open the Wireless LAN Settings window – in the sample screen below, this is labelled PTXCF838. Figure 2.
Chapter 2: Basic Checkout Setting Up Marvell-88W8300 802.11g Radios 3. Wireless Statistics Tab When you choose the Wireless LAN icon, a Wireless Statistics window is displayed. Figure 2.3 Wireless Statistics This tab lists your radio statistics. Choosing the Zero button resets the statistics of the last four items – Packets IN, Packets OUT, IN errors and OUT errors. • Tap the stylus on the Wireless Information tab. 4.Wireless Information Tab Figure 2.
Chapter 2: Basic Checkout Setting Up Marvell-88W8300 802.11g Radios highlight the network to which you want your 8525 G2/8530 G2 to connect, and tap the Connect button. This tab lists available networks – any access points that are broadcasting an SSID, and it lists preferred networks – networks that you have configured. Since access points are generally secure, they will most likely not be listed here. By default, the 8525 G2/8530 G2 attempts to connect to preferred networks.
Chapter 2: Basic Checkout Setting Up Marvell-88W8300 802.11g Radios If you are using an Ad Hoc network – a network in which 8525 G2/8530 G2s pass data directly to other 8525 G2/8530 G2s without an access point – tap on the checkbox next to ‘This is an ad hoc network’ to enable Ad Hoc. Encryption WEP (Wired-Equivalent Privacy) encryption prevents others from accidentally accessing your network. If you are not using encryption, you can choose Disabled from the dropdown encryption menu.
Chapter 2: Basic Checkout Setting Up Marvell-88W8300 802.11g Radios will need to manually enter a password (Master Key) in the Access Point or Wireless Router and enter the same password in each client device that accesses the wireless network. The manually configured WPA password (Master Key) automatically starts the TKIP data encryption process.
Chapter 2: Basic Checkout Assigning An IP Address EAP Type (Extensible Authentication Protocol): This dropdown menu lists the EAP types available on your system. The items in this dropdown menu will vary depending on your network setup. Keep in mind also that some authentication protocols require that you select a ‘Certificate’. By selecting the Properties button, you will be able to select a Certificate.
Chapter 2: Basic Checkout Name Servers Tab To define a static IP address: • Tap the Configure button. Figure 2.8 Defining An IP Address • • Tap on the radio button next to Specify an IP address. Tap on each field, and type an IP, Subnet Mask and Default Gateway address. Tap on OK to save your information. 2.8.2 Name Servers Tab Note: • • If DHCP is enabled, name server addresses are assigned automatically. In the IP Information tab, tap on the Configure button. (“Figure 2.
Chapter 2: Basic Checkout Advanced Features 2.8.3 Advanced Features To display the Advanced Wireless Settings dialog box: • Tap the Advanced button in the Wireless Information tab. This window lists the available preferred networks. Figure 2.10 Advanced Settings 2.8.3.1 Rearranging Preferred Networks The 8525 G2/8530 G2 attempts to connect with the networks listed in this dialog box in sequence, beginning at the top of the list.
Chapter 2: Basic Checkout Setting Up Summit DC 802.11 SC CF Radios–SCU • Note: Make any necessary changes in the Wireless Properties dialog box, and press [ENTER] to save the changes. You do not need to reset your 8525 G2/8530 G2 after configuring the radio. Summit DC 802.11 SC (Model # RA2041) CF radio 2.9 Setting Up Summit DC 802.11 SC CF Radios–SCU This section describes the Summit Client Utility (SCU). The SCU provides the utilities you will need to configure the Summit 802.
Chapter 2: Basic Checkout Using The SCU To Connect To The WLAN • Tap on the Config tab. Radio Attributes • • • • • Tap on the New button to define a new config (profile). Type a name for your configuration using any alpha-numeric combination to uniquely identify this config. Tap on OK to return to the Config tab. Tap on Commit to save the config name. When a pop-up message indicates that your configuration will be saved, tap on OK.
Chapter 2: Basic Checkout SCU Tabs To configure encryption: • Tap on the Encryption dropdown menu, and choose the appropriate type of encryption – Manual WEP, Auto WEP, WPA PSK, WPA TKIP, WPA2 PSK, WPA2 AES, and CCKM TKIP. If you choose Manual WEP, WPA PSK or WPA2 PSK: • Tap on the WEP/PSK Keys button. For Manual WEP, choose up to four static WEP keys. For PSK, type an ASCII passphrase or hex PSK.
Chapter 2: Basic Checkout Main Tab 2.10.1 Main Tab The Main tab is displayed when you tap on Start>Programs>Summit>SCU. • • • • • Enable/Disable Radio: Enables or disables the radio. This a toggle button; when the radio is enabled, this button reads Disable Radio, and when the radio is disabled, it reads Enable Radio. Active Config: Lists the name(s) of the active configuration profile(s) which are referred to as configs.
Chapter 2: Basic Checkout Config Tab 2.10.2 Config Tab The Config tab allows you to define radio and security settings that are stored in the registry as part of the configuration profile or config. Radio Attributes The config you create and save is listed in the Active Config dropdown menu in the Main tab. You can define up to 20 configs. • Config: Used to choose the config to be viewed or edited.
Chapter 2: Basic Checkout Config Tab Radio Attribute Description Value Default Name assigned to radio & Client Name vehicle-mount into which it is installed. Maximum of 16 characters. None Power Save Power save mode for radio. CAM: Constantly awake. Maximum: Maximum power savings. Fast: Fast power save mode. Fast Tx Power Maximum transmit power. Max: Maximum defined for current regulatory domain. Max Measured in mW: 50,30,10, 1.
Chapter 2: Basic Checkout SCU Security Capabilities Radio Attribute Description Authentication credentials for the selected EAP type. Credentials Refer to “EAP Credentials” on page 32. Encryption • Type of encryption used to protect transmitted data. Value Default User: Username or Domain/Username (up to 64 characters). None Password: up to 64 characters. For PEAP: CA Cert–CA server certificate filename.
Chapter 2: Basic Checkout SCU Security Capabilities Common EAP types include: • EAP-TLS: Uses the same technology as a follow-on to Secure Socket Layer (SSL). It provides strong security, but relies on client certificates for user authentication. • PEAP: Provides secure user authentication by using a TLS tunnel to encrypt EAP traffic. Two different inner methods are used with PEAP: • EAP-MSCHAPV2, resulting in PEAP-MSCHAP: This is appropriate for use against Windows Active Directory and domains.
Chapter 2: Basic Checkout EAP Credentials 2.10.2.2 EAP Credentials Keep the following in mind when defining security settings: • If the credentials specified in the config are incorrect and that config is used, the authentication fails without an error message; you will not be prompted to enter correct credentials. • If the credentials are not specified in the config, when the radio tries to associate using that config, you will be prompted to enter the credentials.
Chapter 2: Basic Checkout Global Settings Tab 2.10.3 Global Settings Tab The Global Settings tab allows you to define radio and security settings that apply to all configs (profiles), along with settings that apply specifically to the SCU. The Global Settings outlined in the table below can be edited in the SCU: Global Setting Description Value Default CCX features Activates three CCX features: AP-assisted roaming, AP-speciOn, Off fied maximum transmit power & radio management.
Chapter 2: Basic Checkout Global Settings Tab Global Setting Description Amount of time in milliseconds Ping Delays ms between successive ping requests. 34 Value Integer from 0 to 7200000. Default 1000 Roam Delta Amount by which second AP’s RSSI must exceed the moving average RSSI for the current AP before the radio will attempt to roam to a second AP.
Chapter 2: Basic Checkout Status Tab 2.10.4 Status Tab The Status tab provides status information including IP address and MAC address for the client radio, IP address and MAC address for the AP, signal strength, channel, transmit power and data rate. 2.10.5 Diags Tab Ping Address Ping Results Use the Diags tab as a troubleshooting tool.
Chapter 2: Basic Checkout Resetting The 8525 G2/8530 G2 Vehicle-Mount • Diagnostics: Attempts to connect or reconnect to an AP, and provides a more detailed dump of data than if you used (Re)connect. The dump includes the radio state, config settings, global settings and BSSID list of APs. The SCU is saved to a file called _sdc_diag.txt in the Windows directory. 2.
3 GETTING TO KNOW THE 8525/30 G2 3.1 Features Of The 8525 G2/8530 G2 . . . . . . . . . . . . 3.2 The Internal Backup Battery . . . . . . . . . . . . . . . 3.3 The Keyboard . . . . . . . . . . . . . . . . . . . . . . . 3.3.1 Modifier Keys . . . . . . . . . . . . . . . . . . . 3.3.1.1 Activating Modifier Keys . . . . . . . . . 3.3.1.2 Locking Modifier Keys . . . . . . . . . . 3.3.2 The Keys . . . . . . . . . . . . . . . . . . . . . . 3.4 Function Keys And Macro Keys . . . . . . . . . . . . . 3.4.
Chapter 3: Getting To Know The 8525/30 G2 3.11.1 Caring For The Touchscreen . . . . . . . . . . . . . . . . . . . . . 56 3.11.2 Cleaning The 8525 G2/8530 G2 . . . . . . . . . . . . . . . . . . .
Chapter 3: Getting To Know The 8525/30 G2 Features Of The 8525 G2/8530 G2 3.1 Features Of The 8525 G2/8530 G2 The 8525 G2 and 8530 G2 vehicle-mounts share the same radio dome with identical features. Inside The Radio Dome - SDIO/MMC Slot – for additional storage memory - PCMCIA slot - supports 2-Type II PCMCIA or 1-Type III PCMCIA card - Compact Flash slot - for 802.11g radios or additional storage memory Radio Dome Figure 3.
Chapter 3: Getting To Know The 8525/30 G2 Features Of The 8525 G2/8530 G2 Tether Port Auxiliary Port RS232 Serial Port Figure 3.2 8525 G2 Ports Keyboard Port Auxiliary Port RS232 Serial Port Figure 3.
Chapter 3: Getting To Know The 8525/30 G2 The Internal Backup Battery Keyboard Port Figure 3.4 8530 G2 Keyboard Port 3.2 The Internal Backup Battery The 8525 G2/8530 G2 vehicle-mount is equipped with an internal battery that will provide backup power to the unit for up to fifteen minutes of normal operation. After 15 minutes, the unit will shut off to preserve the contents of RAM. The backup battery is not user accessible. It must be replaced by authorized Psion Teklogix personnel. 3.
Chapter 3: Getting To Know The 8525/30 G2 Activating Modifier Keys 3.3.1.1 Activating Modifier Keys When a modifier key is pressed once, it is displayed in lowercase letters in the taskbar at the bottom of the 8525 G2/8530 G2 screen. For example, if the [CTRL] key is pressed, ctrl key is displayed at the bottom of the unit screen. Once another key is pressed, the modifier key becomes inactive and disappears from the taskbar. 3.3.1.
Chapter 3: Getting To Know The 8525/30 G2 The Keys The Arrow Keys The Arrow keys move the cursor around the screen in the direction of the arrow – up, down, left and right. The cursor is the flashing box or underline character that indicates where the next character you type will appear. The [INS] Key The [INS] key inserts a character at the cursor position. The [DEL] Key The [DEL] key erases the character at the cursor position.
Chapter 3: Getting To Know The 8525/30 G2 Function Keys And Macro Keys The [PgUp] And [PgDn] Keys The [PgUp] key displays the previous screen of information. The [PgDn] key displays the next screen of information. 3.4 Function Keys And Macro Keys In addition to the standard keyboard functions (see “The Keyboard” on page 41), vehicle-mounts are equipped with function keys and macro keys. 3.4.
Chapter 3: Getting To Know The 8525/30 G2 The Keypad Backlight 8525 G2/8530 G2 vehicle-mounts are equipped with a twelve macro keys that can be programmed to replace frequently used keystrokes, along with the function of executable keys like the [ENTER] key, the [BKSP] key, any function key and arrow key, and so on. Macro Keys [M1] To [M12] These keys are displayed in blue print across the top row of alpha keys and the first two alpha keys in the second row on the keyboard.
Chapter 3: Getting To Know The 8525/30 G2 8525 G2/8530 G2 Indicators • In the Control Panel, choose the Stylus icon to display the Stylus Properties window. Figure 3.5 Stylus Icon • Choose the Calibration tab, and then tap on the Recalibrate button. • Follow the directions on the calibration screen to calibrate the screen. 3.6 8525 G2/8530 G2 Indicators 8525 G2/8530 G2s use LEDs (Light Emitting Diode), onscreen messages and audio tones as indicators.
Chapter 3: Getting To Know The 8525/30 G2 LEDs 3.6.2 LEDs The 8525 G2/8530 G2 is equipped with four tri-coloured LEDs located in the upper-right corner of the keyboard. If you have an 8530 G2 and are using the onscreen, soft keyboard, only the API and Rx/Tx LEDs are available in the taskbar. Important: You should proceed cautiously if a LED is illuminated in red; this generally indicates an abnormal operating condition or an active laser emission. LEDs Figure 3.6 Keyboard LEDs 3.6.2.
Chapter 3: Getting To Know The 8525/30 G2 RX/TX – Radio Traffic LED 3.6.2.2 RX/TX – Radio Traffic LED The upper-left LED on your 8525 G2/8530 G2 flashes either yellow or green to indicate when the radio transmits and receives data. Note: Keep in mind that while the standard 802.11g radio supports the transmit/receive LED, not all radios support this function. Function Radio Transmit Radio Receive 3.6.2.3 Radio Traffic LED Behaviour LED flashes yellow. LED flashes green.
Chapter 3: Getting To Know The 8525/30 G2 Onscreen Indicators The taskbar changes dynamically, and only those icons that are applicable are displayed. For example, if a radio is not installed in your 8525 G2/8530 G2, the radio signal icon is not displayed in the taskbar. Windows Start Button You can display the Start Menu by tapping on the Start button in the taskbar.
Chapter 3: Getting To Know The 8525/30 G2 Onscreen Indicators Link Status The Narrow Band radio displays one of three link state icons. An uppercase ‘LINK’ with a green background indicates the radio is powered on and that the unit is online and locked onto a channel. A lowercase ‘Link’ with a yellow background indicates that the radio is powered on but the 8525 G2/8530 G2 is not online or not locked onto a channel.
Chapter 3: Getting To Know The 8525/30 G2 Audio Indicators Onscreen LEDs (8530 G2 Only) When the 8530 G2 keyboard is removed, two onscreen-LEDs are displayed in the taskbar. The LED to the left acts as the API indicator, and the LED to the right acts as the TX/RX (transmit and receive) indicator. These onscreen LEDs behave in the same way as those on the keyboard, changing colour to indicate different operations.
Chapter 3: Getting To Know The 8525/30 G2 Scanning Techniques The 8525 G2/8530 G2 supports a variety of one dimensional (1D) and two dimensional (2D) laser scanners. “Scanning Techniques” outlines the mechanics of a successful scan. In addition, review “Scan LED Indicators” on page 52 to better understand how to interpret whether or not a bar code has been successfully scanned. Finally, “Troubleshooting” on page 53 provides some helpful suggestions should the scan fail. 3.7.
Chapter 3: Getting To Know The 8525/30 G2 Troubleshooting A bar code icon appears on the screen during a scan. While the scanner beam is active, the onscreen message states – SCANNING. If the scan is successful, the bar code data is displayed on the screen until the scan trigger is released. 3.7.3 Troubleshooting If the scanner is not working, investigate the following: • Is the 8525 G2/8530 G2 on? • Check that the bar code symbology being scanned is enabled for the 8525 G2/8530 G2 you are using.
Chapter 3: Getting To Know The 8525/30 G2 Operating PDF Laser Scanners 3.7.5 Operating PDF Laser Scanners This scanner decodes PDF417 two-dimensional bar codes. • Turn the vehicle-mount on. Wait until the unit has booted up completely. • Aim at the bar code and press the trigger. The beam expands into a rectangle covering the bar code to properly scan it. The scan beam and a warning indicator are visible until a successful decode is achieved or three seconds have elapsed. 3.
Chapter 3: Getting To Know The 8525/30 G2 Monitoring The Network Connection To remove the peripheral: • Grasp the shell of the plug, and pull it back gently to unlock and release the connector. Important: Never attempt to disconnect a peripheral by pulling the connector by the wire. The connector is locked into place and can only be unlocked and removed by pulling back the plug shell. 3.
Chapter 3: Getting To Know The 8525/30 G2 Using Microsoft ActiveSync To Work With Files • • Attach the auxiliary connector to the auxiliary port on the 8525 G2/8530 G2 – the port closest to the vehicle-mount power cable. Attach the USB connector to your PC or laptop. 3.10.1 Using Microsoft ActiveSync To Work With Files Before communication can begin between an 8525 G2/8530 G2 and a PC, ActiveSync® – Microsoft PC connectivity software – must be installed on your PC.
Chapter 3: Getting To Know The 8525/30 G2 Cleaning The 8525 G2/8530 G2 • • benzyl alcohol, and concentrated acids. 3.11.2 Cleaning The 8525 G2/8530 G2 Important: • • • Do not immerse the unit in water. Dampen a soft cloth with mild detergent to wipe the unit clean. Use only mild detergent or soapy water to clean the vehicle-mount unit. Avoid abrasive cleaners, solvents or strong chemicals for cleaning. To clean ink marks from the keypad and touchscreen, use isopropyl alcohol.
4 WORKING WITH WINDOWS CE 5.0 4.1 Navigating In Windows CE And Applications . . . 4.1.1 Navigating Using A Touchscreen And Stylus 4.1.2 Navigating Using The Keyboard . . . . . . . 4.2 Working With Files, Folders And Programs . . . . 4.3 The Startup Desktop . . . . . . . . . . . . . . . . 4.3.1 The Desktop Icons . . . . . . . . . . . . . . 4.3.2 The Taskbar . . . . . . . . . . . . . . . . . . 4.3.2.1 Using The Taskbar . . . . . . . . . . 4.3.2.2 Customizing The Taskbar . . . . . . 4.4 The Start Menu . . . .
Chapter 4: Working With Windows CE 5.0 Navigating In Windows CE And Applications 4.1 Navigating In Windows CE And Applications Graphic user interfaces like Windows CE for portable devices and desktop Windows (2000, XP, etc.) utilize ‘point and click’ navigation. An equivalent keyboard shortcut is also available for every ‘point and click’ action.
Chapter 4: Working With Windows CE 5.0 Working With Files, Folders And Programs Exit & Save [ENTER] Close/Exit & Do Not Save [ESC] Navigate Dialog Boxes [TAB] To move cursor up [SHIFT] [TAB] To display the contents of the next ‘tab’ in a dialog box [CTRL] [TAB] Select Radio Button/Press Button [SPACE] Go to Start Menu [BLUE][0] Table 4.1 Keyboard Navigation Keep in mind that unlike a desktop computer, the 8525 G2/8530 G2 does not support key chording (pressing two keys at the same time).
Chapter 4: Working With Windows CE 5.0 The Desktop Icons • Double-tap on the icon to open a window or, in the case of an application icon, launch an application. 4.3.1 The Desktop Icons The icons displayed in the startup desktop operate in much the same way as those displayed on any standard PC desktop that is running Windows. My Device Choosing this icon displays the contents of your 8525 G2/8530 G2 computer.
Chapter 4: Working With Windows CE 5.0 The Taskbar Remote Desktop Connection This option allows your 8525 G2/8530 G2 to communicate with a remote desktop PC. “Remote Desktop Connection” on page 79 provides a website with step-by-step instructions. 4.3.2 The Taskbar The 8525 G2/8530 G2 is equipped with a taskbar at the bottom of the screen. It displays icons through which you can view the internal battery capacity, the radio signal quality of your unit, and so on.
Chapter 4: Working With Windows CE 5.0 Customizing The Taskbar 4.3.2.2 Customizing The Taskbar To customize the taskbar so that it displays only those icons you require: • From the Start Menu, tap on the Settings>Taskbar and Start Menu. The Taskbar and Start Menu dialog box is displayed. • Note: Tap the stylus on the items you want to activate or deactivate. A check mark indicates active items. The Advanced tab allows you to tap on a Clear button to delete the contents of the Documents folder. 4.
Chapter 4: Working With Windows CE 5.0 The Desktop If you’re using the keyboard: • Use the arrow keys to highlight a menu item, and press [ENTER], or If the menu item has an underlined character: • Type the underlined alpha character. For example, to display the Security dialog box, type the letter ‘s’. 4.4.1 The Desktop Choosing the Desktop option from the Start Menu displays the 8525 G2/ 8530 G2 desktop. 4.4.
Chapter 4: Working With Windows CE 5.0 Changing A Password 4.4.2.1 Note: Changing A Password Keep in mind that this is the same password as that assigned through the Password control panel applet. • To assign a password, choose a security level, and enter the existing password in the Password field. • Tap on the Set Password button. A dialog box labelled Password Properties is displayed. • Type the new password in the Password: text box • In the Confirm Password: text box, retype the new password. 4.4.
Chapter 4: Working With Windows CE 5.0 Programs 4.4.3 Programs • Tap on Programs to display a sub-menu of options. This sub-menu allows you to choose ActiveSync, Demo and Command Prompt, and you can access Internet Explorer, along with installed applications (e.g., Microsoft WordPad), Remote Desktop Connection and Windows Explorer. ActiveSync® ActiveSync is used to connect your 8525 G2/8530 G2 to your PC. Demo The Demo folder contains demo programs available on the 8525 G2/8530 G2.
Chapter 4: Working With Windows CE 5.0 Shortcuts Internet Explorer The 8525 G2/8530 G2 is shipped with the Microsoft Internet Explorer for Windows CE. You can access the Internet Options icon through the Start Menu under Settings>Control Panel or by double-tapping on the desktop icon labelled My Device and then, double-tapping on the Control Panel icon.
Chapter 4: Working With Windows CE 5.0 Shortcuts When System Tray is chosen, you can access the taskbar icons using the arrow keys. • Press the [LEFT] and [RIGHT] arrow keys to highlight the icon in the taskbar about which you’d like more information – a tooltip is displayed as each taskbar icon is highlighted. • To display the Control Panel dialog box associated with the highlighted icon, press [ENTER].
Chapter 4: Working With Windows CE 5.0 Settings 4.4.5 Settings • Tap on Settings to display a sub-menu of options. Control Panel The Control Panel contains applets used to configure hardware, the operating system and the shell. If your 8525 G2/8530 G2 is running with the Psion Teklogix Tekterm application or another application, additional configuration applets may appear in the Control Panel. Network And Dial-Up Connections The Network and Dial-up Connections window allows you to configure an 802.
Chapter 4: Working With Windows CE 5.0 Run 4.4.6 Run Choosing the Run option from the Start Menu displays a dialog box in which you can enter the name of the program, folder or document you want to open or launch. 4.4.7 Shutdown Choosing Shutdown displays a sub-menu of options, including Suspend, Warm Reset and Cold Reset. Note: This menu varies slightly depending on the security level chosen. When the 8525 G2/8530 G2 is set to User level, the Shutdown option is replaced by Suspend.
Chapter 4: Working With Windows CE 5.0 Using A Dialog Box Warm Reset The Warm Reset option resets the 8525 G2/8530 G2, leaving all saved files and (registry) settings intact. Any unsaved data is lost. Cold Reset The Cold Reset option resets the 8525 G2/8530 G2. Any files not stored in permanent memory are lost. However, the registry settings are saved. 4.5 Using A Dialog Box A dialog box (like the samples screens in this section) appears when you need to make selections and enter further information.
Chapter 4: Working With Windows CE 5.0 Using A Dialog Box Note: If you’re using the touchscreen, use the stylus to tap on an element in a dialog box to select or deselect it, display dropdown menus, save your selections, and so on. If you’re using a keyboard, follow the directions below. Dialog boxes contain one or more of the following elements: Tab: A tab separates different elements of a dialog box. Tap on a tab to display the associated information.
5 CONFIGURATION 5.1 5.2 5.3 5.4 5.5 Remote Desktop Connection . . . . . . . . . . . . Pocket PC Compatibility . . . . . . . . . . . . . . The Control Panel . . . . . . . . . . . . . . . . . . Control Panel Icons . . . . . . . . . . . . . . . . . Basic Setup . . . . . . . . . . . . . . . . . . . . . 5.5.1 Display Properties . . . . . . . . . . . . . . 5.5.1.1 Display Background . . . . . . . . . 5.5.1.2 Display Appearance . . . . . . . . . 5.5.1.3 Display Backlight . . . . . . . . . . 5.5.
Chapter 5: Configuration 5.5.8.2 Channel Tab . . . . . . . . . 5.5.8.3 Protocol Tab . . . . . . . . . 5.5.8.4 Power Tab . . . . . . . . . . 5.5.8.5 Radio Tab. . . . . . . . . . . 5.5.9 Bluetooth Setup . . . . . . . . . . . . 5.5.9.1 The Devices Tab . . . . . . . 5.5.9.2 The Server Tab . . . . . . . . 5.5.9.3 Outgoing Tab . . . . . . . . . 5.5.9.4 Active Conn. Tab. . . . . . . 5.5.9.5 Properties Tab . . . . . . . . 5.5.9.6 Bluetooth GPRS Connection. 5.5.10 Total Recall . . . . . . . . . . . . . 5.5.10.
Chapter 5: Configuration 5.5.13.22 Serial Port (COM 2). . . . . . . . . . . . . . 5.5.14 SNMP (Simple Network Management Protocol) Setup 5.5.14.1 Contacts Tab . . . . . . . . . . . . . . . . . . 5.5.14.2 Communities Tab . . . . . . . . . . . . . . . . 5.5.14.3 Trap Destination Tab . . . . . . . . . . . . . . 5.5.14.4 Permitted Hosts Tab . . . . . . . . . . . . . . . . . . . . . . . . . . . . . . . . . . . . . . . . . . . . .155 .157 .158 .159 .160 .
Chapter 5: Configuration Remote Desktop Connection 5.1 Remote Desktop Connection Remote Desktop Connection is an 8525 G2/8530 G2 application used to connect to a Windows Terminal Server so that you can run a “session” on the Server machine, using the 8525 G2/8530 G2 (Windows CE device). Refer to the following website for step-by-step information about setting up this connection: http://www.microsoft.com/WindowsXP/pro/using/howto/gomobile/remotedesktop/default.asp 5.
Chapter 5: Configuration Control Panel Icons The Control Panel folder contains icons used in the setup of your 8525 G2/8530 G2. Figure 5.1 Control Panel 5.4 Control Panel Icons The Windows CE Control Panel provides a group of icons that allow you to customize and adjust settings on your 8525 G2/8530 G2. App Launch Keys Allows you to map keys to applications, so that you can launch those applications from a single key-press.
Chapter 5: Configuration Control Panel Icons Date/Time Allows you to set the current Month, Date, Time and Time Zone on your unit. Dialing Specifies dialing settings, including area code, country code, dial type and the code to disable call waiting. You can store multiple patterns – for example, ‘Work’, ‘Home’, and so on using this dialog box. Display Changes the appearance (window colour scheme) on the unit desktop. This applet can also be used to adjust the backlight level.
Chapter 5: Configuration Control Panel Icons Manage Trigger Allows multiple-scanner triggering, including the ability to configure each of the trigger buttons. You can configure the trigger ID for each trigger button for both single- and double-click, the double-click time and the double-click data. Network And Dial-up Connections Displays a network window from which the 8525 G2/8530 G2 radio can be configured and an existing configuration can be executed. Refer to “Configuring Your IEEE 802.
Chapter 5: Configuration Control Panel Icons RDC Licenses The Terminal Services license server stores all license tokens that have been installed for a group of terminal servers and tracks licenses issued. The Remote Desktop Licenses (RDC) application displays license ‘tokens’ for devices that connect to a Terminal Server. Region & Language Settings Allows you to specify the local language the display text will use along with the format of numbers, currency, time and date for your region.
Chapter 5: Configuration Control Panel Icons Total Recall This is a Psion Teklogix utility developed to maintain applications and setting over cold boots. This utility is based on a backup and restore concept and is extended to incorporate powerful advanced features. TweakIT Settings Allows you to change Advanced System Settings (interface, network, and servers), User System Settings (display font size), and provides the Registry Editor.
Chapter 5: Configuration Basic Setup 5.5 Basic Setup 5.5.1 Display Properties • In the Control Panel, choose the Display icon. Figure 5.2 Display Icon 5.5.1.1 Display Background The Background tab allows you to adjust the 8525 G2/8530 G2 display background. • In the Display Properties dialog box, open the Background tab. This option allows you to change the background colour or add an image.
Chapter 5: Configuration Display Properties 5.5.1.2 • Display Appearance In the Display Properties dialog box, open the Appearance tab. This dialog box allows you to customize the display colour scheme. 5.5.1.3 Display Backlight The backlight is activated for a configurable amount of time when the 8525 G2/8530 G2 is in use (key press, scanner trigger or data received from the host).
Chapter 5: Configuration Keyboard Properties Intensity This parameter is used to adjust the light intensity of the backlight. Sliding the bar to the left lowers the light intensity, and sliding it to the right raises the intensity. Bright For The value chosen from this dropdown menu determines the duration of time that the backlight stays on at the configured intensity when a unit is not in use.
Chapter 5: Configuration Keyboard Properties 5.5.2.1 • Key Repeat In the Keyboard Properties dialog box, open the Repeat tab. Enable Character Repeat Tapping in the checkbox next to this option enables the key behaviour you specify in this dialog box. Repeat Delay The position of the slider determines how long a key must be held down before it begins to autorepeat.
Chapter 5: Configuration Keyboard Properties 5.5.2.2 • Keyboard Backlight In the Keyboard Properties dialog box, open the Backlight tab. Intensity This parameter is used to adjust the light intensity of the 8525 G2/8530 G2 keyboard backlight. Sliding the bar to the left darkens the keyboard backlight intensity, and sliding it to the right lightens the intensity.
Chapter 5: Configuration Keyboard Properties The options in this tab allows you to determine how modifier keys on your 8525 G2/8530 G2 behave. For each modifier key–[ALT], [SHIFT], [CTRL], [ORANGE] and [BLUE]–you have the following options in the drop-down menu: Lock, OneShot, and OneShot/Lock. Note: Keep in mind that checking the taskbar lets you know whether or not these keys are locked on.
Chapter 5: Configuration Keyboard Properties 5.5.2.4 • Keyboard Macro Keys In the Keyboard Properties dialog box, open the Macros tab. A macro has 200 programmable characters (or “positions”). The macro keys can be programmed to replace frequently used keystrokes, along with the function of executable keys including [ENTER], [BKSP] and [DEL] ([BLUE]-[BKSP]), function keys and arrow keys. Recording And Saving A Macro You can program up to 12 macro keys.
Chapter 5: Configuration Keyboard Properties Note: Tap on the ‘Stop Recording’ button at any time to suspend the process. • When you’ve finished recording your macro sequence, press the Stop Recording button, or type the key sequence – [CTRL] [ALT] [ENTER]. A new screen – Verify Macro – displays the macro sequence you created. The Save button is highlighted. • Tap on the Save button. Note: If you want to discard the macro you’ve just created, tap on the ‘Discard’ button.
Chapter 5: Configuration Keyboard Properties All user-defined Unicode mappings are listed in the Unicode Mapping tab in order of virtual key value, and then by order of the shift state. If a Unicode mapping is not listed, the Unicode mapping is mapped to the default Unicode value. Adding And Changing Unicode Values Important: Changes to Unicode mappings are not saved until you exit the Keyboard Properties dialog box. • Tap on the Add/Change button.
Chapter 5: Configuration Keyboard Properties keyboard. A key can be remapped to send a virtual key (e.g. VK_F represents the ‘F’ key; VK_RETURN represents the [ENTER/ON] key, etc.), perform a function (e.g. turn the scanner on, change volume/contrast, etc.) or run a macro. There are three different tables of scancode mappings: the Normal table, the Blue table and the Orange table.
Chapter 5: Configuration Keyboard Properties The Remap Scancode dialog box is displayed. • Note: Type the scan code in hexidecimal in the field labelled Scancode: The Label: field displays the default function of the scancode you are remapping. Virtual Key, Function And Macro The radio buttons along the side of the dialog box allow you to define to what the scan code will be remapped: Virtual Key, Function or Macro.
Chapter 5: Configuration Volume And Sound Properties Removing A Remap To delete a remap: • In the Scancode Remapping tab, highlight the scancode you want to delete, and tap on the Remove button. • Tap on OK. 5.5.3 Volume And Sound Properties Note: • Sounds (wave files) cannot be reproduced on 8525 G2/8530 G2 units. The conditions under which 8525 G2/8530 G2s emit sounds are tailored from within the application installed on your unit. In the Control Panel, choose the Volume & Sounds icon. Figure 5.
Chapter 5: Configuration Power Properties • ward to decrease the beeper volume. Under the heading Enable sounds for, enable the conditions under which you want the 8525 G2/8530 G2 to emit a beep. 5.5.4 Power Properties This icon allows you to define the Suspend state of your unit. It also allows you to define which Card Slots are active and to turn power for the card slots (PCMCIA and SD/MMC) on and off. Power Properties also allows you to enable and disable the built-in Bluetooth radio.
Chapter 5: Configuration Power Properties 5.5.4.2 • Suspend In the Power Properties dialog box, open the Suspend tab. Suspend When the 8525 G2/8530 G2 is idle – not receiving any user input (a key touch, a scan, and so on) or system activity (serial data, an activity initiated by an application, and so on), the value chosen in the Suspend Timeout dropdown menu determines when the unit will go to suspend state (appear to be off).
Chapter 5: Configuration Power Properties Allow Suspend With This tab allows you to specify whether or not your unit will enter suspend state while is operating with an active PPP connection, network interface or active TCP/IP connection. Low Power Warning The sliding scale under this section of the tab allows you to specify the remaining battery capacity at which a warning message is displayed on the vehicle-mount screen – 0% to 20%. 5.5.4.
Chapter 5: Configuration Stylus Properties 5.5.5 Stylus Properties Note: • Touchscreen calibration may not be enabled on your unit. If your screen appears to require recalibration, contact your supervisor. In the Control Panel, choose the Stylus icon. Figure 5.6 Stylus Icon 5.5.5.1 • 100 Setting Double-Tap Sensitivity In the Double-Tap tab, follow the directions to tailor the sensitivity of the stylus when you tap on the touchscreen.
Chapter 5: Configuration Stylus Properties 5.5.5.2 Touchscreen Calibration Touchscreens rarely require recalibration. However, if your touchscreen has never been calibrated or if you find that the stylus pointer is not accurate when you tap on an item, you can use the Calibration tab to recalibrate the touchscreen. • Choose the Calibration tab and then tap on the Recalibrate button. • 5.5.5.3 • Follow the directions in the Calibration tab to recalibrate the screen.
Chapter 5: Configuration Manage Triggers 5.5.6 Manage Triggers This applet allows you to configure how barcode scanners are triggered. You can configure the trigger ID for each trigger button for both single- and double-click, and the double-click time. • In the Control Panel, choose the Manage Triggers icon. Figure 5.7 Manage Triggers Icon The Manage Triggers screen lists any trigger mappings. 5.5.6.
Chapter 5: Configuration Manage Triggers A keyboard key that is used as a trigger source will no longer generate key data, or perform its normal function. For example, if the space button is used as a trigger source, it will not be able to send space characters to applications. Double-Click When a key is pressed and released, then pressed again within the configured time (between 0 to 1000 milliseconds), a double-click occurs. See also “Trigger Type” on page 104.
Chapter 5: Configuration Manage Triggers 5.5.6.2 Add And Edit Trigger Mapping This dialog box is used to add trigger mappings. Source This dropdown list allows you to specify the source of the trigger events, such as a keyboard key [F1], for the Trigger Owner selected. Notes: It is possible to map the same source to different owners—for example, [F1] can be mapped to both the Imager and Non-Decoded Scanner. If so, both devices/operations will occur simultaneously.
Chapter 5: Configuration Certificate Assignment Trigger Owner This identifies the driver or application receiving the trigger presses. Show All By default, inactive owners are not shown. By checking this checkbox, all owners, both active and inactive, are displayed. 5.5.7 Certificate Assignment • In the Control Panel, choose the Certificate icon. Figure 5.8 Certificates Icon This dialog box is used in conjunction with 802.1x authentication to enhance 8525 G2/8530 G2 security.
Chapter 5: Configuration Narrow Band Radio Setup 5.5.8 Narrow Band Radio Setup Note: • Keep in mind that the Narrow Band icon is only visible in the Control Panel when a Narrow Band radio is installed in the unit. In the Control Panel, choose the Narrow Band Radio icon. Figure 5.9 Narrow Band Icon 5.5.8.1 Info Tab In the Narrow Band Radio dialog box, the Info tab displays information about the radio – it cannot be edited.
Chapter 5: Configuration Narrow Band Radio Setup Statistics Screen • Tap on Statistics to display the Protocol Statistics screen. These statistics are updated every second while the dialog box is displayed. The following table provides a brief description of these statistics: Statistic Description cq Channel quality. See the description of the “Channel Switch Speed” parameter in the channel tab for more information on how “cq” affects channel switching (see “Channel Switch Speed” on page 110).
Chapter 5: Configuration Narrow Band Radio Setup pt Number of poll timeouts xe Number of transmitted errors rssi Received Signal Strength Indicator Table 5.1 Protocol Statistics Descriptions Low Level Screen • Tap on the Low Level tab to display the Low Level statistics screen. Table 5.2 defines the elements of the Low Level statistics screen.
Chapter 5: Configuration Narrow Band Radio Setup TxMD Maximum "Tx D" value Rx X Number of extra characters received for last received message (due to delay in host reporting back actual body size) RxMx Maximum "Rx X" value MChg Number of completed mode changes Table 5.2 Low Level Statistics Descriptions Default All Parameters • Tap on the Default all Parameters button to return all registry parameters to default values.
Chapter 5: Configuration Narrow Band Radio Setup Power Up Channel When this parameter is enabled, the 8525 G2/8530 G2 begins communicating on the channel specified in the Channel Number parameter when the unit is powered up. This setting may prevent the migration of 8525 G2/8530 G2s to the same channel due to uneven coverage in some sites. If this parameter is disabled (unchecked), the unit will continue communicating on the same channel that it was on before it was powered off.
Chapter 5: Configuration Narrow Band Radio Setup timeout periods before searching for a new channel. If Channel Switch Speed is set to Fast, the current channel is only monitored for up to 2 time-out periods before channel switching begins. Important: “Fast” switch speed is most effective where coverage areas are largely overlapping. If the coverage areas barely overlap, have dead spots, or if the 8525 G2/8530 G2 frequently operates on the fringe of coverage, this parameter should be set to “Slow”.
Chapter 5: Configuration Narrow Band Radio Setup This feature is used rarely. It is used when the order of channel switching needs to be tightly controlled. The values in the Channel column are completed for you with the enabled channels when this dialog box is opened. For each corresponding enabled channel, the “List” column contains “0,0,0,0,0,0,0,0” values by default. If communication quality falls below 46%, only the channels entered in the Manual Switch Table are considered for channel switching.
Chapter 5: Configuration Narrow Band Radio Setup 5.5.8.3 Protocol Tab Enable Cellular Protocol The value assigned to this parameter must be identical to the value assigned to the corresponding parameter in the Psion Teklogix Network Controller, Wireless Gateway or Base Station. A warm reset of the 8525 G2/8530 G2 is required before this parameter can take effect.
Chapter 5: Configuration Narrow Band Radio Setup Polling The default values for the Polling parameters are dependent on the value assigned to the Modulation / Baud Rate parameter in the Radio tab. Modulation / Baud Rate Sync Delay Window Delay Poll Timeout 4 Level / 19200 17 20 20 4 Level / 9600 17 23 25 2 Level / 9600 17 19 22 2 Level / 4800 25 23 37 Table 5.
Chapter 5: Configuration Narrow Band Radio Setup Late TX Limit The value entered for this parameter (measured in milliseconds) sets the maximum allowable deviation time from the start of a response window during which an 8525 G2/8530 G2 can make a transmission. After this threshold, the transmission will not be attempted and the 8525 G2/8530 G2 will try again at the next opportunity. For example, suppose this parameter is set to 5.
Chapter 5: Configuration Narrow Band Radio Setup Idle Poll Limit Note: The “Idle Poll Limit” parameter is only used when “Enable Power Saving” is enabled. This parameter determines how many transmit opportunities – base station polls with available response windows – must be consecutively skipped before the 8525 G2/8530 G2 places the radio into power-down mode for power saving. The allowable range for this parameter is from 1 to 200. The default value is 10.
Chapter 5: Configuration Narrow Band Radio Setup Data Squelch Data Squelch controls the radio receiver, cutting it off when the signal is too weak for reception of anything but noise. Receive Signal Strength Indicator values below the Data Squelch threshold prevent further processing of the receive signal while higher values allow further processing. The allowable range is 0 to 100 with a default value of 0. In noisy environments, this value can be increased to reject noise.
Chapter 5: Configuration Bluetooth Setup When you tap on this button, a warning box is displayed asking “Copy all the Rx frequencies to the Tx frequencies?” • Tap on Yes to go ahead or No to stop the copy process. Statistics • Tap this button to display communication statistics. Refer to “Statistics Screen” beginning on page 107 for details about this screen. Advanced This button launches the Radio Test Application. 5.5.
Chapter 5: Configuration Bluetooth Setup 5.5.9.1 Note: Scan • The Devices Tab If you intend to configure Bluetooth communication with specific devices (e.g., a scanner or printer), turn on the devices and bring them within 5 metres of the vehicle-mount before proceeding with the discovery process described below. Tap on the Scan button to list available devices. Wait for the 8525 G2/8530 G2 to complete its scan (approximately 20 seconds).
Chapter 5: Configuration Bluetooth Setup The Active column indicates whether any service is activated for that device. When a service is activated, the device is displayed in the list even when it is not detected during the scan. The PIN column indicates whether you have a PIN (password) set for the device. At this point you can either query for services or set the PIN for each device. Once you highlight a device in the list box, both the Services and Set PIN buttons become available.
Chapter 5: Configuration Bluetooth Setup To add a service to the Outgoing port, an active service must first be deactivated. Then you can choose the ‘Outgoing’ option from the Activation menu (highlight a service, right-click or press the [SPACE] bar to display the Activation menu). The Authentication and Encryption options can be changed only before activation. To change these after activation, deactivate the service first, then change the options.
Chapter 5: Configuration Bluetooth Setup 5.5.9.2 The Server Tab The Bluetooth connection is initiated from your 8525 G2/8530 G2 to the remote device – therefore the 8525 G2/8530 G2 is called the ‘client’ and the remote is called the ‘server’. The Servers tab displays the server profiles that can be activated in your 8525 G2/8530 G2. There is currently one server profile available: Serial. • Tap on the checkbox to activate the server, and it will display the associated port name beside the server name.
Chapter 5: Configuration Bluetooth Setup The Outgoing list dialog box displays a list of services marked as ‘Outgoing’. The * column indicates the currently selected service. You can tap on Unselect to reset the current selection, or you can tap on Select to make a selection. The Remove button deletes the service from the outgoing list. The Prompt menu determines the behaviour of the pop-up Selection menu. Choosing Everytime causes the Selection menu to be displayed each time an outgoing port is created.
Chapter 5: Configuration Bluetooth Setup ties dialog box. Click on the Device Name tab to access the menu and change your settings. Then click on OK. Although the name will have changed in the Properties menu in Bluetooth Controls, the radio only reads it on boot-up. For the changes to take effect, you must reset the 8525 G2/8530 G2. 5.5.9.5 Properties Tab The Properties tab displays information about your 8525 G2/8530 G2, and provides some port options.
Chapter 5: Configuration Bluetooth Setup 5.5.9.6 Bluetooth GPRS Connection 1. To connect to the internet using a GPRS phone equipped with a Bluetooth radio, begin by setting up the Bluetooth radio. The setup information is outlined beginning on page 118. Remember to choose the modem with which you want your 8525 G2/8530 G2 to communicate from the Scan Device list. 2. To set up the internet parameters, tap on the Network And Dial-up Connections icon in the Control Panel. Figure 5.
Chapter 5: Configuration Bluetooth Setup 4. In the Make New Connection dialog box, choose Dial-Up Connection. Enter a name for your GPRS network connection.ˆ 5. Tap on Next to display the Modem dialog box. 6. In the dropdown menu labelled Select a modem:, choose the name of the modem with which you want to connect, and then tap on Configure to display the Device Properties dialog box.
Chapter 5: Configuration Bluetooth Setup The 8525 G2/8530 G2 communicates with your phone and retrieves the parameters for the Device Properties dialog box. The 8525 G2/8530 G2 then disconnects. 7. Under the Call Options tab, turn off Cancel the call if not connected within, and press [ENTER] to save your changes. 8. In the Modem dialog box, choose Next to display the Phone Number dialog box. The phone number you enter is network carrier dependent.
Chapter 5: Configuration Bluetooth Setup 9. In the Control Panel, tap on the Dialing icon. Figure 5.12 Dialing Icon 10. The values in the Dialing Properties dialog box need to be edited according to your network carrier specifications. Once you’ve edited this dialog box to reflect your network carrier requirements, press [ENTER] to save your changes. 11. At this point, you’ll need to return to the Control Panel and choose the Network and Dial-up Connections icon.
Chapter 5: Configuration Total Recall 12. In the network connection window, the new network configuration – in this case – GPRS Network – is displayed. Tap on the new icon. Figure 5.13 GPRS Network Connection • An onscreen message indicates the status of your connection – opening, connected, disconnected, error messages, and so on. Once the onscreen message reads Connected, click on Hide and access the internet. 5.5.
Chapter 5: Configuration Total Recall 5.5.10.1 Creating A Backup Profile In the dropdown menu, you can choose from four options: Create Backup Profile, View Selected Profile, Restore Selected Profile and Delete Selected Profile. Keep in mind however that until a profile is created, the only available option is Create Backup Profile. Profile Information This dialog box lists the possible storage destinations for the profile file. • To begin, type a name for the profile in the field labelled Profile Name.
Chapter 5: Configuration Total Recall The image type – OS Version and Registry Type – for the 8525 G2/8530 G2 is displayed at the top of the dialog box. • Tap on the icon to expand the settings for Profile Type and Profile Location. - - • For this device only – creates a backup that is manually restored by the operator. AutoRestore for this device only – creates a profile that automatically restores itself following a cold boot.
Chapter 5: Configuration Total Recall Add Files By default, All Files: is selected so that all installed or copied files, database entries, and the Registry will be saved. You can, however, limit the backup to database, and/or the registry only. The Select Files option allows choose to limit the backup By Individual File, or you can choose to define which files will be backed up By File Type.
Chapter 5: Configuration Total Recall View Selections Depending on what you have selected for inclusion in your profile, you can view a list of the selected files, databases and/or registry. • Tap on Next to perform the operation. Performing The Backup • Tap on Backup to start the process and create a profile. 5.5.10.2 Restoring A Profile To manually restore a profile: • Tap on the Total Recall icon. • Choose Restore Selected Profile from the dropdown menu.
Chapter 5: Configuration Input Panel 5.5.11 Input Panel The 8530 G2 is equipped with at Soft Input Panel (SIP). Figure 5.15 Input Panel Icon On the 8530 G2 only, when a keyboard is not connected to the unit, tapping on the Input Panel button displays a soft input panel (soft keyboard) that can be customized using the Input Panel dialog box. Input Panel Button Icon Important: 134 If the Input Panel Button icon is not visible in the taskbar, from the ‘Start’ menu, tap on Settings>Taskbar and Start Menu.
Chapter 5: Configuration Input Panel • Tap on the Input Panel Button icon in the taskbar to display the soft input panel on the 8530 G2 screen. Keep in mind that the soft keyboard is not displayed when a physical keyboard is attached to the vehicle-mount. Soft Keyboard API And Rx/Tx LEDs Input Icon The soft keyboard operates just like a standard keyboard except that rather than pressing a key, you tap on letters, numbers, modifier keys, etc. on the 8530 G2 screen.
Chapter 5: Configuration IPv6 Support Note: You can also display this dialog box by double-tapping on the Input icon in the far-right corner of the taskbar. Keyboard Size and Type The options under Keyboard Size and Keyboard Type allow you to alter the size of the keyboard keys and to choose the keyboard layout of the soft keyboard. Keyboard Position Tapping in the checkbox next to Docked locks the soft keyboard in place on the screen.
Chapter 5: Configuration Scanner Properties Setup • Tap on the checkbox next to Enable IPv6 Network Support to enable this internet protocol. 5.5.13 Scanner Properties Setup The Teklogix Scanners icon in the Control Panel provides dialog boxes in which you can tailor bar code options and choose the bar codes your scanner will recognize. Figure 5.17 Teklogix Scanners Icon 5.5.13.
Chapter 5: Configuration Scanner Properties Setup The symbologies listed in the Barcodes tab change to reflect the scanner you choose and the bar codes it supports. Keep in mind that the items listed in the Barcodes tab are used to configure external, non-decoded scanners only. Decoded scanners cannot be configured using the symbologies listed under this tab. See “Decoded Scanners” below for information about these scanners. 5.5.13.
Chapter 5: Configuration Scanner Properties Setup If you’re using the keyboard: • Highlight the bar code you want to work with, and press the [RIGHT] arrow key to display the sub-menu. • Use the [UP] and [DOWN] arrow keys to highlight a parameter. • To change a parameter value, press [SPACE] or the [RIGHT] arrow key. If a field requires text entry, a text box is displayed in which you can enter the appropriate value. 5.5.13.
Chapter 5: Configuration Scanner Properties Setup Security This parameter controls the tolerance for decoding edge-to-edge bar codes (Code 93, Code 128, UPC/EAN). Lower values have a lower tolerance for misreads, but they also increase the time it takes to decode the bar code. The default value of 30 is generally a good compromise setting. 5.5.13.5 Code 39 Settings Enabled Set this parameter to on to enable Code 39 or ‘off’ to disable it.
Chapter 5: Configuration Scanner Properties Setup Mod Checks Tapping on this option displays a list of options. None If you choose None, a check is not executed. Mod 43 Check If this parameter is enabled (set to on), the Mod 43 check digit is calculated. Mod 10 Check If this parameter is enabled (set to on), the Mod 10 check digit is calculated. Field Size/Chars Field Size The field size is the length of the field after the first character is stripped and the prefix and suffix characters are added.
Chapter 5: Configuration Scanner Properties Setup Suffix Char Note: The appended character is treated as any other keyboard character. For example, if [BKSP] is pressed, the usual action for that key is performed. If your unit is operating with the Psion Teklogix ANSI emulation application, the 8525 G2/8530 G2 transmits the escape sequence associated with the function immediately after the bar code data. This character, if non-zero, is added after a successfully decoded bar code.
Chapter 5: Configuration Scanner Properties Setup Variations When using Code 128, you can choose the variation or type of bar code variation the scanner will recognize. The options available are: Standard, UCC and EAN/UCC. These options are described below. Choosing Variations displays a window from which you can choose one of these options. Standard Choose Standard if Code 128 is desired. UCC 128 UCC 128 is a variation of Code 128.
Chapter 5: Configuration Scanner Properties Setup Include Check If this parameter is enabled (set to on), the check digit is included with the decoded bar code data. Addendum Important: Before “Addendum” can take effect, the “Short Code” parameter in the Options menu (see page 139) must be enabled (set to ‘on). An addendum is a separate bar code, supplementary to the main bar code. Choosing this option displays a window from which you can select one of three options.
Chapter 5: Configuration Scanner Properties Setup Suffix Char This character, if non-zero, is added after a successfully decoded bar code. Choosing this option displays a window in which you can assign a character. When this window is displayed, press the key you want to insert. The ASCII/Unicode key value of the keypress is displayed. Pressing the [ESC] key in this dialog box resets the data to zero.
Chapter 5: Configuration Scanner Properties Setup Addendum Important: Before “Addendum” can take effect, the “Short Code” parameter in the Options menu (see page 139) must be enabled (set to ‘ON’). Refer to “Addendum” on page 144. Prefix/Suffix Chars See “Prefix/Suffix Chars” on page 144. 5.5.13.9 UPC A Settings Enabled Set this parameter to on to enable UPC A or off to disable it.
Chapter 5: Configuration Scanner Properties Setup Convert to UPC-A Setting this parameter to on results in a non-standard decoding that returns 12 digits from the 6 digit UPC E bar code. Include Number Sys If this parameter is enabled (set to on), the number system digit is included with the decoded bar code data. Include Check When enabled (set to on), the check digit is included with the decoded bar code data.
Chapter 5: Configuration Scanner Properties Setup 5.5.13.12 Code 93 Enabled Set this parameter to on to enable Code 93 or off to disable it. Field Size/Chars Refer to the description beginning on page 141 for details. 5.5.13.13 Code 11 Enabled Set this parameter to on to enable Code 11 or off to disable it. Include Check If Include Check is enabled (set to on), the check digit is included with the decoded bar code data.
Chapter 5: Configuration Scanner Properties Setup 5.5.13.14 Interleaved 2 of 5 Enabled Set this parameter to on to enable Interleaved 2 of 5 or off to disable it. Mod 10 Check If this parameter is enabled (set to on), the Mod 10 check digit is calculated. This calculation is the same as the Code 39 Mod 10 check digit. ITF Check If this parameter is enabled (set to on), the ITF-14/16 Mod10 check digit is calculated.
Chapter 5: Configuration Scanner Properties Setup 5.5.13.16 Discrete 2 of 5 Enabled Set this parameter to on to enable Discrete 2 of 5 or off to disable it. Mod 10 Check If this parameter is enabled (set to on), the Mod 10 check digit is calculated. This calculation is the same as the Code 39 Mod 10 check digit. ITF Check If this parameter is enabled (set to on), the ITF-14/16 Mod10 check digit is calculated.
Chapter 5: Configuration Scanner Properties Setup Field Size/Chars Refer to the description beginning on page 141 for details. 5.5.13.18 Bar Code Options Tab This tab allows you to tailor the double-click parameters and the display options associated with your scanner. Double Click Click Time (msec) This parameter controls the maximum gap time (in milliseconds) for a double-click. If the time between the first and second clicks of the scanner trigger is within this time, it is considered a double-click.
Chapter 5: Configuration Scanner Properties Setup Display Scan Result When this parameter is enabled, the type of bar code and the result of the scan appear on the screen. Note that this information is only displayed after a successful decode and is visible only while the scanner trigger is pressed. When the trigger is released, this information is cleared from the screen. Scan Indicator When this parameter is enabled, the laser warning logo appears on the display whenever the scanner is activated.
Chapter 5: Configuration Scanner Properties Setup 5.5.13.19 Translations Tab • In the Translation tab, choose the Add button. Input This value is compared with the decoded bar code reading. If there is a match, the Output string is translated into the decoded bar code. Output If there is a match between the decoded bar code and the corresponding Input string, the decoded bar code will be translated into the Output string.
Chapter 5: Configuration Scanner Properties Setup 5.5.13.20 Ports Tab While you cannot configure external decoded scanners, you can configure communications with a serial decoded scanner using the options in this tab 5.5.13.21 Tether Port (COM 1) Baud Double-tapping on this parameter displays a pop-up window in which you can choose an appropriate baud rate. Data Bits This parameter determines the number of bits for the data going through this port.
Chapter 5: Configuration Scanner Properties Setup Parity This parameter determines the type of parity checking used on the data going through the tether port. Double-tapping on this option displays a pop-up window in which you can choose the appropriate Parity. Stop Bits This parameter specifies the number of stop bits – 1, 1.5 or 2 – used for asynchronous communication. 5.5.13.
Chapter 5: Configuration Scanner Properties Setup Power Double-tapping on this parameter displays and dialog box in which you can choose from a number options – you can disable (turn off) this port, or you can assign 5V or 12V power to the port. Baud Double-tapping on this parameter displays a pop-up window in which you can choose an appropriate baud rate. Data Bits This parameter determines the number of bits for the data going through this port.
Chapter 5: Configuration SNMP (Simple Network Management Protocol) Setup Parity This parameter determines the type of parity checking used on the data going through the tether port. Double-tapping on this option displays a pop-up window in which you can choose the appropriate Parity. Stop Bits This parameter specifies the number of stop bits – 1, 1.5 or 2 – used for asynchronous communication. 5.5.
Chapter 5: Configuration SNMP (Simple Network Management Protocol) Setup All Psion Teklogix products support the TEKLOGIX-GENERIC-MIB – a MIB that defines some common features across Teklogix products. All devices also support MIB-II, a management information base that defines the common features of TCP/IP networks. The SNMP Agent software embedded in the 8525 G2/8530 G2 product supports SNMPv1 (RFC 1157). • In the Control Panel, choose the SNMP icon. Figure 5.18 SNMP Icon The SNMP dialog box is displayed.
Chapter 5: Configuration SNMP (Simple Network Management Protocol) Setup 5.5.14.2 Communities Tab The Communities tab provides a means of limiting access to SNMP managed devices to those SNMP Managers with matching “community names”, as specified by RFC 1157. Enable SNMP Enabling Enable SNMP allows the device to respond to SNMP queries and to send Traps. After enabling this option and rebooting the device, the SNMP Agent will automatically start up.
Chapter 5: Configuration SNMP (Simple Network Management Protocol) Setup Modifying A Community Setting To modify an existing community: • Highlight the community you want to alter. • Tap on Change. A Modify Community dialog box is displayed, listing the community you highlighted. • Edit the Name and/or Rights, and press [ENTER] to save your changes. Removing An Existing Community • Highlight the community you want to remove in the Communities tab and then tap on the Remove button.
Chapter 5: Configuration SNMP (Simple Network Management Protocol) Setup Enabling Authentication TRAPS Enabling Enable Authentication TRAPS allows authorization traps to be sent when a failure is detected (e.g., an SNMP message received with a bad community name). Adding A Destination To add a new destination: • Tap on the Add button. • Type a destination in the text box provided, and press [ENTER].
Chapter 5: Configuration SNMP (Simple Network Management Protocol) Setup Removing A Trap Destination To remove a trap destination: • In the Trap Destination tab, highlight the destination you want to delete. • Tap on the Remove button. A Delete Confirmation screen is displayed. • To remove a destination, tap on Yes, or If you decide not to remove the destination, tap on No. 5.5.14.
Chapter 5: Configuration SNMP (Simple Network Management Protocol) Setup Changing A Host To change an existing host IP address: • Highlight the IP address you want to alter in the Permitted Hosts tab, and then tap on the Change button. A dialog box like the one displayed when you add a host is displayed. • Make the necessary changes, and press [ENTER].
PERIPHERAL DEVICES & ACCESSORIES 6.1 External Bar Code Readers . . . . . . . . . . . . . . . . . . . . 6.1.1 PowerScan™ Standard, LR and XLR Bar Code Scanners . 6.1.2 Entering Data With The Bar Code Reader . . . . . . . . . 6.2 Bluetooth Peripherals . . . . . . . . . . . . . . . . . . . . . . . 6.3 8525 G2/8530 G2 Mounting Accessories. . . . . . . . . . . . . 6.3.1 8525 G2/8530 G2 Mounting Recommendations . . . . . . 6.3.2 Installing The Cradle And Cradle Mounting Plate . . . . . 6.3.
Chapter 6: Peripheral Devices & Accessories External Bar Code Readers 6.1 External Bar Code Readers 6.1.1 PowerScan™ Standard, LR and XLR Bar Code Scanners The 8525 G2/8530 G2 supports Psion Teklogix’ PowerScan™ industrial bar code scanner with standard, long range and extra long range options. To connect this scanner to the 8525 G2/8530 G2, attach the device to the tether port. Review your “PowerScan Programing Guide (PSC)” before you begin. 6.1.
Chapter 6: Peripheral Devices & Accessories 8525 G2/8530 G2 Mounting Accessories 6.3 8525 G2/8530 G2 Mounting Accessories Note: Because the 8530 G2 has a detachable keyboard, keyboard mounting equipment is available for this model. The 8525 G2 and the 8530 G2 are secured using the same mounting equipment. There are two mounting options: • Quick-Release Mount, includes two adaptor plates, quick release and cradle mount (along with necessary hardware) – Kit PN 1008424 • RAM Mount 6.3.
Chapter 6: Peripheral Devices & Accessories Installing The Cradle And Cradle Mounting Plate 6.3.2 Installing The Cradle And Cradle Mounting Plate Mounting Kit PN 1008424 Adaptor Plate PN 1008444 Adaptor Plate Cradle Mounting Plate and Quick Release PN 1080363 and PN 17529 Figure 6.1 Quick Release Mount Installed First, the 8525 G2/8530 G2 must be attached to the cradle (Figure 6.2 on page 169). To do this: • Place the terminal in the cradle so that the ports face away from the quick release fasteners.
Chapter 6: Peripheral Devices & Accessories Installing The Cradle And Cradle Mounting Plate Installing The Cradle Mounting Plate Next, the cradle mounting plate must be attached to the vehicle. The cradle mounting plate shown in Figure 6.3 holds the 8525 G2/8530 G2 and cradle in place. • Screw the cradle mounting plate onto the vehicle using the four 1/4" holes. Note: The bolts used for all installations are SAE 1/4-20. Post Fro nt 25.4 cm10.0 in. Tab Guides Ba ck cm 13 in. 5 Figure 6.
Chapter 6: Peripheral Devices & Accessories Installing The MT34XX RAM Mounting Kit 6.3.3 Installing The MT34XX RAM Mounting Kit Warning: Failure to install the mount correctly or any attempt to modify the mount may result in serious injury or damage to property. Contact Psion Teklogix Technical Support or your Psion Teklogix representative if you have problems installing this mount.
Chapter 6: Peripheral Devices & Accessories Installation tion, the mount may slowly ‘settle’. Occasional readjustment and tightening of the handscrew may be required. Psion Teklogix offers a tightening tool (PN 9000594) which can be used to minimize settling (see Figure 6.5). Figure 6.5 The platform on which you secure the vehicle-mount must be strong enough to support 25 kg. Never attach the mount to a plastic dash or a wooden platform without the appropriate backing plate and bracing.
Chapter 6: Peripheral Devices & Accessories Installation Figure 6.6 3. Securing the RAM Base to the local platform and attach RAM Standard Arm: Use the supplied bolt hole pattern to drill the required holes in the local platform. Hole diameters must not exceed 10mm [13/32 inches]. Hardware (F, L, M and N) for securing RAM Bases (E or J) to the local platform are recommended sizes. If replacement hardware is required, it should be consistent with these diameters.
Chapter 6: Peripheral Devices & Accessories Installation 4. For the RAM Vesa Base, in four places, insert screw (M) through the RAM Vesa Base (E), the local platform and the washer (F). Affix with nut (N). Torque to 26 in-lbs. Secure RAM Standard Arm (H) by inserting RAM Balls in to both ends of arm sockets. Figure 6.
Chapter 6: Peripheral Devices & Accessories Installation 5. For the RAM Circular Base, in four places, insert screw (L) through the RAM Circular Base (J), the local platform and the washer (F). Affix with nut (N). Torque to 26 in-lbs. Secure RAM Standard Arm (H) by inserting RAM Balls in to both ends of sockets. Figure 6.
Chapter 6: Peripheral Devices & Accessories Positioning The Vehicle-Mount 6.3.3.3 Positioning The Vehicle-Mount Position the vehicle-mount into an angle that best corresponds to RAM hardware used (see Figure 6.9) and tighten by hand until secure. Mount orientations shown in Figure 6.9 are considered the preferred configurations for the Circular Base to platform and Vesa Base to platform. Figure 6.9 Circular Base and Vesa Base Mount Orientations 6.3.3.
Chapter 6: Peripheral Devices & Accessories 8530 G2 Keyboard Mounting Options Legend Item Psion Teklogix Part Number Description J RAM Circular Base 9001804 L Screw M8 x 25 Flat Head 9004522 M Screw M8 x 25 Pan Head 9004518 N Nut M8 x 1.25 9008801 6.3.4 8530 G2 Keyboard Mounting Options Because the 8530 G2 vehicle-mount is equipped with an external keyboard, a number of keyboard mounting options are available. 6.3.4.
Chapter 6: Peripheral Devices & Accessories Keyboard RAM Mount 6.3.4.2 Keyboard RAM Mount RAM Mount Kit PN 1008447 Vesa Plate PN 9001934 4 inch RAM Mount PN 9001932 RAM Ball End PN 9001804 You can install two vesa plates or one each of a vesa plate and a RAM ball end to the RAM mount. With the keyboard RAM ball end or vesa plate(s) installed on the RAM mount: • Attach the RAM mount to a standard cradle (PN 1008442) using the hardware included with your kit.
Chapter 6: Peripheral Devices & Accessories 8525 G2/8530 G2 Installation In High Voltage Vehicles • • Note: Keep the cables away from control pedals and other moving parts that may pull on the cables or interfere with the operation of the vehicle. Leave enough slack on the cables so that the computer can be removed easily for maintenance. Make sure the cables run inside the roll cage of the vehicle. 6.3.
Chapter 6: Peripheral Devices & Accessories Wiring Vehicle Power To The 8525 G2/8530 G2 6.3.8 Wiring Vehicle Power To The 8525 G2/8530 G2 Warning: The 8525 G2/8530 G2 accepts DC power sources between 10V and 90VDC nominal. Applying a voltage above 90VDC or reversing polarity may result in permanent damage to the 8525 G2/8530 G2 and will void the product warranty. A 1.8 meter (6 ft.) extension power cable (PN 13985-302 std or –301 display off) is supplied with your 8525 G2/8530 G2.
7 SPECIFICATIONS 7.1 7.2 7.3 7.4 7.5 8525 G2/8530 G2 Vehicle-Mount Specifications . Radio Specifications . . . . . . . . . . . . . . . Bar Code Scanning . . . . . . . . . . . . . . . . External Scanners . . . . . . . . . . . . . . . . . Internal Lithium-Ion Battery . . . . . . . . . . . . . . . . . . . . . . . . . . . . . . . . . . . . . . . . . . . . . . . . . . . . . . . . . . . . . . . . . . . . . . . .183 .184 .185 .186 .
Chapter 7: Specifications 8525 G2/8530 G2 Vehicle-Mount Specifications Note: Performance specifications are nominal and subject to change without notice. 7.1 8525 G2/8530 G2 Vehicle-Mount Specifications Size • • 8525 G2:298mm W x 117mm D x 294mm L (11 3/4" x 4 5/8" x 11 1/2") 8530 G2:Terminal – 298mm W x 117mm D x 294mm L (11 3/4" x 4 5/8" x 11 1/2") Keyboard – 292mm W x 38mm D x 127mm L (11 1/2" x 1 1/2" x 5") Weight Approximately 4.3 kg (9.5 lbs) 8530 G2 keyboard: approximately 0.
Chapter 7: Specifications Radio Specifications 7.2 Radio Specifications Marvell 802.11g Direct Sequence Spread Spectrum (Model Number RA2040) Form Factor Antenna Port Transmit Power Frequency Range Channels RX Sensitivity Data Rates Compact Flash Single U.FL jack, no diversity 20mW 2.400 - 2.4835GHz 1 to 11 for USA, Canada 1-13 for EU countries (8% FER, 1024 bytes packet) = -89dBm @ 1Mbps, -87dBm @ 11Mbps, -83dBm @ 6Mbps, -72dBm @ 54Mbps 6, 9, 12, 18, 24, 36, 48 & 54Mbps Summit 802.
Chapter 7: Specifications Bar Code Scanning RA1001A - Narrow Band Radio Psion Teklogix Proprietary Narrowband Modulation (2/4 level FSK) Type III PC Card Form Factor Transmit Power 1W or 0.5W Frequency Range 403-422MHz, 419-435MHz, 435-451MHz, 450-470MHz, 464-480MHz, 480-496MHz, 496-512MHz Rx Sensitivity < -110dBm @ 19.2kbps (4 level FSK) Data Rates 4800bps, 9600bps, 19.2kbps Bluetooth Radio Embedded (USB interface) Bluetooth Version 1.
Chapter 7: Specifications External Scanners 7.4 External Scanners Supported Types Interface Decoded and Non-Decoded 5V or 12V. (Refer to “Power” on page 156 for details.) Via tether port. 7.5 Internal Lithium-Ion Battery Not user accessible. Technology 186 12.
APPENDIX A SUPPORT SERVICES AND WORLDWIDE OFFICES Psion Teklogix provides a complete range of product support services to its customers worldwide. These services include technical support and product repairs. A.1 Technical Support For technical support in North America: Call Toll free: +1 800 387 8898 Option 3 or Direct Dial: +1 905 813 9900 Ext. 1999 Option 3 For technical support in EMEA (Europe, Middle East and Africa), please contact the local office listed in the website below: http://www.
Appendix A: Support Services And Worldwide Offices Worldwide Offices A.3 Worldwide Offices COMPANY HEADQUARTERS Psion Teklogix Inc. 2100 Meadowvale Boulevard Mississauga Ontario Canada L5N 7J9 Tel: Fax: Email: +1 905 813 9900 +1 905 812 6300 salescdn@psion.com CANADIAN SERVICE CENTRE Psion Teklogix Inc. 7170 West Credit Ave., Unit #1 Mississauga, Ontario Canada L5N 7J9 Tel: +1 800 387 8898 Option 2 - or Direct: + 1 905 813 9900 Ext. 1999 Option 2 Fax: + 1 905 812 6304 Web: www.psionteklogix.
Appendix A: Support Services And Worldwide Offices Worldwide Offices INTERNATIONAL SUBSIDIARIES (see also www.psionteklogix.com) Psion Teklogix S.A. La Duranne 135 Rue Rene Descartes BP 421000 13591 Aix-En-Provence Cedex 3; France Tel: Fax: E-mail: +33 4 42 90 88 09 +33 4 42 90 88 88 tekeuro@psion.
APPENDIX B PORT PINOUTS B.1 Tether Port Pinout The tether port connector incorporates multiplexed undecoded scanner, decoded scanner, RS232 serial, and USB interfaces. In order for it to operate, a special wiring scheme is needed. If you need to create cables for the tether port, contact Psion Teklogix and request an instruction sheet for tether port termination. Important: Do not attempt to interface with the tether connector without direction from a qualified Psion Teklogix technician.
Appendix B: Port Pinouts DB-26 Auxiliary Port Pinout B.3 DB-26 Auxiliary Port Pinout Pin Number B-2 Signal Name Signal Type Notes 1 EXT_5V_SW Power 5 VDC @ 0.5 A maximum. 2 EXT_5V_SW Power 5 VDC (Tied to pin 1). 3 N/C Not used. 4 N/C Not used. 5 N/C Not used.
Appendix B: Port Pinouts External Keyboard–High Density DB-26 (8530 G2 Only) Pin Number 23 Signal Name Signal Type Notes N/C Not used. 24 PCON PROGRAM Grounding this pin, together with removing & re-asserting power to the terminal puts the PCON in programming mode. 25 N/C 26 5V POWER 3V3 Not Used. Power B.
Appendix B: Port Pinouts External Keyboard–High Density DB-26 (8530 G2 Only) Signal # B-4 Function Signal Type Notes 18 No connect Not used 19 System Power 15V Heater Power 20 System Power 15V Heater Power 21 No connect 22 Ground Power 23 Ground Power 24 No Connect 25 Keyboard Detect IN 3V3 Loop-back signal to detect keyboard installed 26 Keyboard Detect Out 3V3 Loop-back signal to detect keyboard installed Not used Not used Psion Teklogix 8525 G2/8530 G2 Vehicle-Mount
APPENDIX C USB SETUP APPLICATION C.1 USB Setup The USB Setup application is used to update a Windows PC so that it can connect to a Psion Teklogix 8525 G2/8530 G2. To download the USB Setup application, go to: www.psionteklogix.com/downloads This will take you to the Teknet home page. • Login with your Teknet Username and Password. (If you’re not already a member of Teknet, you can register for free at this home page so that you can access the USB Setup application.
Appendix C: USB Setup Application Launching The Application C.1.1 Launching The Application Before running the USB Setup application: 1. Unplug the 8525 G2/8530 G2 from your PC, and exit all running applications. 2. Double-click on the USB Setup executable in the directory you copied it to. Welcome Dialog Box If you check the “Install as a generic device” checkbox, the Hardware Manager on your PC will not prompt you to install every new device you connect to your PC.
Appendix C: USB Setup Application Installation Complete Dialog Box In some cases, you may see an additional dialog: Usually, this dialog is shown when more than one version of ActiveSync is installed. You can either select the correct inf file for the USB Setup program to work with, or you can cancel the installation, and uninstall the extra copies of ActiveSync. C.1.2 Installation Complete Dialog Box This dialog box indicates the success or failure of the installation. 4.
Appendix C: USB Setup Application Installation Complete Dialog Box If you need to view the log file, tap on View Log. Once the USB Setup program is exited, you can connect the vehicle-mount to your PC using a USB cable, and turn the unit on. If the USB Setup process was successful, the “Found new hardware” wizard may start. If this occurs, choose the recommended defaults. ActiveSync will detect your 8525 G2/ 8530 G2.
INDEX A accessories bar code readers, connecting 167 Active Conn Tab 123 ActiveSync ASync profile 120 Addendum 144, 146, 147 Ad Hoc network 18 Advanced (wireless connection) 23 Advanced button (Radio tab) 118 AIAG AIAG Strip 140 AIAG Strip 140 aiming dot, duration of 139 ALT Key 43 ANSI transmitting data 142, 145 appearance (display colour scheme) 86 appending to bar codes characters 142, 145 approvals 8525 G2 183 8530 G2 183 arrow keys moving the cursor 43 ASCII Full Ascii 140 audio indicators description
Index BKSP Key 43 BLUE Key 42 Bluetooth, enabling 99 Bluetooth radio changing device name 124 device service profiles 120 ISM band 118 PINs for devices 121 radio configuration 118–124 Bluetooth setup 118 GPRS setup 125 peripherals 167 Bootloader (Shutdown menu) 72 Bright For (backlight) 87 BSP, Bluetooth Controls 124 C cable diagrams B-1 cables installing in vehicle 178 calibrating (touchscreen) 45, 101 card slot power 99 card slots (Devices), enabling power to 99 Cellular Radio Address 113 CH, Bluetooth
Index Double Click 151 Double-Click, Manage Triggers menu 103 Double-Tap (stylus settings) 100 DSSS, 802.
Index keyboard backlight 45 keyboard keys 41 ALT 43 arrow keys 43 BKSP 43 BLUE key 42 CTRL 43 DEL 43 END 43 ESC 43 Function keys 44 HOME 43, 44 INS 43 macro keys 44, 91 modifiers 41 navigating using the keyboard 61 one shot mode 89 ORANGE key 42 SHIFT 42 SPACE 43 TAB 43 Keyboard Properties 87, 89 backlight 89 one shot mode 89 Key Index, assigning 20 Key Repeat tab 88 L LANAccessUsingPPP service, Bluetooth 120 Late TX Limit (Polling) 115 LED charge 47 functions 47 receive 48 scan 48 transmit 48 Location 15
Index Output 153 P Parity 155, 157 PDF scanner, operating 54 PIN, Bluetooth Controls 120 pinouts B-1 PINs, Bluetooth devices 121 pocket PC compatibility 79 Polling 114 polling values, testing 115 Poll Timeout (Polling) 114 port pinouts B-1 Port Prefix, Bluetooth Controls 124 Power (Serial Port) 156 power icon, external DC 50 Power Management Properties 97 devices (card slots) 99 suspend, power saving 98 Power Off Time 116 Power Tab (Narrow Band radio) 115 Power Up Channel 110 power up 8525 G2 14 power up
Index appending characters 142, 145 Bad Scan Beep 152 check digit 144, 147, 148, 149, 150 Click Data 151 Click Time 151 country code 143 decoded 138 decoded (external) Serial Port 155 Display 152 Dot Time 139 Double Click 151 Good Scan Beep 152 Input (translate) 153 LED Indicators 52 non-decoded 138 number system digit 146, 147 Options Tab 151 Output (translate) 153 PDF scanner, operating 54 Ports Tether Port 154 prefix character 141, 144 removing characters 142, 145 Scan Indicator 152 Scan Log File 152 Sca
Index Communities 159 Contact 158 Contacts 158 Enable SNMP 159 Location 158 Name 159 Rights 159 Soft Input Panel (SIP) 81 soft keyboard 134 Soft Scan Timeout 152 SPACE Key 43 specifications battery 186 8525 G2 183 8530 G2 183 Standard (Code 128) 143 Start Menu 65 cycle tasks 70 desktop 66 programs 68 Run 72 Security 66 Settings 71 Shutdown 72 system tray 69 task manager 70 Statistics button (Radio tab) 118 Statistics screen (Narrow Band radio) 107 Stop Bits 155, 157 Strip Leading 142, 145 Strip Start/Stop C
Index UPC A 146 UPC E 146 USB Setup Application C-1 launching C-2 User security level 66 V Variations (Code 128) 143 vehicle installation cables 178 Verify 139 W warm reset 36 Warm Reset (Shutdown menu) 73 warranty iv WEP (Wired-Equivalent Privacy) encryption 19 Wi-Fi Protected Access Pre-Shared Key (network authentication) 19 Wi-Fi Protected Access-WPA (network authentication) 19 Window Delay (Polling) 114 Windows® Start Menu See Start Menu 65 Windows CE dialogue box 73 files, folders, & programs, work