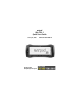
netpad Win CE 4.1 Quick Start Guide January 28, 2003 ISO 9001 Certified Quality Management System P/N A6122 0014 0001.
© Copyright 2003 by Psion Teklogix Inc., Mississauga, Ontario This document and the information it contains is the property of Psion Teklogix Inc., is issued in strict confidence, and is not to be reproduced or copied, in whole or in part, except for the sole purpose of promoting the sale of Psion Teklogix manufactured goods and services. Furthermore, this document is not to be used as a basis for design, manufacture, or sub-contract, or in any manner detrimental to the interests of Psion Teklogix Inc.
Return-To-Factory Warranty Psion Teklogix warrants a return-to-factory warranty for a period of one year. In some regions, the warranty exceeds this period. Please contact your local Psion Teklogix office for details. For a list of offices, see “Worldwide Offices” on page 44. The warranty on Psion Teklogix manufactured equipment does not extend to any product that has been tampered with, altered, or repaired by any person other than an employee of an authorized Psion Teklogix service organization.
Table Of Contents Approvals And Safety Summary . . . . . . . . . . . . . . . . . . . . . . . 3 1. Introduction . . . . . . . . . . . . . . . . . . . . . . . . . . . . . . . . . . . . . . 15 1.1 Applications Installed On The netpad . . . . . . . . . . . . . 15 1.1.1 About ActiveSync . . . . . . . . . . . . . . . . . . . . . . . 15 1.2 Caring For The netpad . . . . . . . . . . . . . . . . . . . . . . . . . 16 1.3 Additional Programs And Third Party Applications . . 19 2. Getting Started . . . . . . . . . . .
2.8.5 Using Menus. . . . . . . . . . . . . . . . . . . . . . . . . . . . 38 2.8.6 Using Dialogues . . . . . . . . . . . . . . . . . . . . . . . . . 39 2.8.7 Copying Information Between Programs . . . . . . 40 3. The netpad Docking Station . . . . . . . . . . . . . . . . . . . . . . . . . 41 3.1 Using The Docking Station . . . . . . . . . . . . . . . . . . . . . 41 3.2 Communications Settings . . . . . . . . . . . . . . . . . . . . . . . 42 4. Support Services And Worldwide Offices. . . . . . . . . . . . . .
Approvals And Safety Summary CE Declaration Of Conformity Product: netpad 1000 Series with Serial Docking Station Application of Council Directives: EMC Directive: 89/336/EEC Low Voltage Directive: 73/23/EEC Conformity Declared to Standards: EN 55022: 1998; Class B; EN 55024: 1998; EN 61000-4-2; ±4kV CD; ±8kV AD EN 61000-4-3; 3V/m, 80-1000 MHz, 900 MHz EN 61000-4-4; ±1kV Power lines EN 61000-4-5; ±2kV Common; ±1kV Differential mode EN 61000-4-6; 3VRMS, 150 kHz-80 MHz EN 61000-4-11; AC Mains Ports EN 61000
CE Declaration Of Conformity Product: netpad 3000 Series with Serial Docking Station Application of Council Directives: EMC Directive: 89/336/EEC Low Voltage Directive: 73/23/EEC Conformity Declared to Standards: EN 55022: 1998; Class B; EN 55024: 1998; EN 61000-4-2; ±4kV CD; ±8kV AD EN 61000-4-3; 3V/m, 80-1000 MHz, 900 MHz EN 61000-4-4; ±1kV Power lines EN 61000-4-5; ±2kV Common; ±1kV Differential mode EN 61000-4-6; 3VRMS, 150 kHz-80 MHz EN 61000-4-11; AC Mains Ports EN 61000-3-2; EN 61000-3-3 EN 60950:
FCC Information For The USA FCC Declaration Of Conformity (DoC) Applicant’s Name & Address: US Representative’s Name & Address: PSION TEKLOGIX INC. 2100 Meadowvale Blvd. Mississauga, Ontario, Canada L5N 7J9 Tel.: (905) 813-9900 Psion Teklogix Corp. 1810 Airport Exchange Blvd., Suite 500 Erlanger, Kentucky, 41018, USA Tel.: (859) 371-6006 Equipment Type / Environment: Computing Devices for Home and Office Use Trade Name / Model No.
CE Marking When used in a residential, commercial or light industrial environment the product and its approved UK and European peripherals fulfill all requirements for CE marking. R&TTE Directive 1999/5/EC This equipment complies with the essential requirements of EU Directive 1999/5/EC (Declaration available: www.psionteklogix.com). Cet équipement est conforme aux principales caractéristiques définies dans la Directive européenne RTTE 1999/5/CE. (Déclaration disponible sur le site: www.psionteklogix.com).
Deze apparatuur voldoet aan de noodzakelijke vereisten van EUrichtlijn betreffende radioapparatuur en telecommunicatie-eindapparatuur 199/5/EG. (verklaring beschikbaar: www.psionteklogix.com). Dette udstyr opfylder de Væsentlige krav i EU's direktiv 1999/5/EC om Radio- og teleterminaludstyr. (Erklæring findes på: www.psionteklogix.com). Dette utstyret er i overensstemmelse med hovedkravene i R&TTEdirektivet (1999/5/EC) fra EU. (Erklæring finnes på: www.psionteklogix.com).
FCC Information To The User Radio And Television Interference This equipment radiates radio frequency energy and if not used properly—that is, in strict accordance with the instructions in this manual—may cause interference to radio communications and television reception. It has been tested and found to comply with the limits for a Class B digital device pursuant to part 15 of the FCC Rules. Operation is subject to the following two conditions: 1. This device may not cause harmful interference, and 2.
Identify and Resolve Radio-TV Interference Problems”. This booklet is available from the US Government Printing Office, Washington, DC 20402 - Stock No 004-000-00345-4. Radio Frequency Emissions Do not use in aircraft or hospitals. Some equipment in hospitals and aircraft are not shielded from radio frequency energy. Do not use the netpad onboard aircraft, or in hospitals, without first obtaining permission. Do not use near pacemakers.
Important Safety Instructions This equipment was tested for FCC compliance under conditions that included the use of shielded cables and connectors between it and the peripherals. It is important that you use shielded cable and connectors to reduce the possibility of causing radio and television interference. Shielded cables, suitable for the netpad, can be obtained from an authorised Psion Teklogix dealer.
Integrated Scanner Safety For your own safety, it is critical that you comply with the warnings described in “The Scanner” on page 34. Battery Safety Precautions CAUTION! Danger of explosion if a netpad battery is incorrectly handled, charged, disposed of or replaced. Replace only with the same or equivalent type recommended by the manufacturer. Dispose of used batteries according to the instructions described in “Lithium-Ion Battery Safety Precautions”, below.
BATTERIES ARE CONSIDERED HAZARDOUS WASTE. Used batteries must be disposed of in accordance with the manufacturer’s instructions, taken to an appropriate local battery recycling facility, or returned to one of the following Psion Teklogix offices for proper disposal. Teklogix Inc. 2100 Meadowvale Blvd. Mississauga, Ontario Canada L5N 7J9 Teklogix Corp. 1810 Airport Exchange Blvd. Suite 500 Erlanger, Kentucky USA 41018 Teklogix S.A. Parc Club Du Golf-Bat 1.
• Do not short-circuit the battery by directly connecting any of the exposed terminals with metal objects such as wire. Do not transport or store the battery together with metal objects such as necklaces, hair pins, etc. • Do not use or leave the battery near a heat source such as a fire or heater. • Do not immerse the battery in water. • When charging, use the battery charger specifically designed for the battery.
• If a battery should leak, do not allow the contents to come into contact with your skin or your eyes. If it does, wash immediately with plenty of cold water and seek medical advice. • Do not store the battery in extremely high temperatures (e.g., a vehicle, strong direct sunlight, etc.). This may cause the battery to overheat or ignite, and it may also reduce the performance and service life of the battery. • Do not use in areas where static electricity is greater than what the manufacturer guarantees.
1. Introduction This guide provides information on the operation and features of the Psion Teklogix netpad. For additional information, refer to the netpad Win CE User Manual, the online help, or the documentation supplied with the application you are using. 1.1 Applications Installed On The netpad The netpad is capable of running a wide variety of applications but the ones available on your particular netpad depend on the purpose for which the netpad is provided.
automatically converted to the appropriate file format at the same time. • Synchronize e-mail and your address book on the netpad with the PC to keep them in step with each other. • Back up your netpad files to the PC, then restore them from the PC to the netpad again, if needed. For detailed information, please refer to the documentation supplied with Microsoft Active Sync or the netpad Win CE User Manual. 1.
Backup Battery The netpad has a rechargeable backup battery designed to retain data while the main battery pack is charging or changed over. The backup battery is trickle charged from the main battery pack and has a limited lifespan. To maximize the life of the backup battery, avoid excessive discharging and recharging of the backup battery by keeping the netpad battery pack fully charged.
for scanner variants. Use of the netpad outside of these temperature limits may reduce its life. Avoid exposing the netpad to sudden changes in temperature, since such exposure may result in damage. Important: As a safety precaution, charging the netpad battery should be limited to the temperature range: -20°C to +60°C (-4°F to 140°F); and -20°C to +55°C (-4°F to 131°F) for scanner variants. Outside of these limits, the safety circuits of the netpad battery pack will not allow the battery to charge.
Magnetic Fields And Static Electricity The magnet of the netpad speaker may corrupt data stored on magnetic media. Do not keep the netpad next to credit cards or other magnetic media. Avoid exposing the netpad to strong magnetic fields or static electricity. Such exposure may cause loss of data or result in damage to the netpad. Service Do not attempt to dismantle the netpad. There are no user-serviceable parts inside, and any attempt to dismantle the netpad will invalidate the warranty. 1.
Figure 2.1 netpad Front Figure 2.2 Back Of netpad 20 Psion Teklogix netpad Win CE 4.
2.2 Preparing The netpad For Use 2.2.1 Fitting The Antenna Before using netpad units fitted with either the GPRS or 802.11 radio, the antenna must be installed. The antenna should be installed as shown in Figure 2.3 below. To install the antenna turn it counter clockwise; to remove the antenna turn it clockwise. Figure 2.3 Antenna Insertion And Removal Psion Teklogix netpad Win CE 4.
2.2.2 Use Of The Soft Belt Holster Figure 2.4 Insertion Of netpad In Holster Important: The netpad and holster have been tested to ensure compliance with the latest FCC RF exposure guidelines. For continued compliance when using the netpad and holster combination, the face shown should be fitted against the body! The user must not modify the holster in any way. Figure 2.5 Holster Position On Body 22 Psion Teklogix netpad Win CE 4.
2.2.3 Power Management The netpad is powered by a Lithium Ion rechargeable battery pack, which under optimal operating conditions will provide power for a full shift. The netpad will warn you when the main battery charge is low. Note: How long your batteries last will depend upon how you use your netpad. The netpad will use considerably more battery power when you are recording sounds, have the brightness turned up, are using files stored on a multimedia card, or are using Infrared.
Charging The netpad Battery Pack To charge the battery, attach the battery pack to the netpad and place the complete netpad in a netpad docking station (for instructions, please refer to page 41), or place the battery in one of the optional battery chargers. The standard (850 mAH) netpad battery will normally be fully charged within 2 to 2.5 hours (3 hours for a 1400 mAH battery pack). How Do I Check The Battery Power? To check the battery power, open the Battery icon from the Control Panel.
Important: Always switch off the netpad before removing the main battery. Never remove the battery from the netpad while it is in the docking station. Never use a netpad without a battery in the docking station. Prolonging Battery Life When your netpad is switched off, it is on “standby” and will continue to use a small amount of battery power.
The backup battery is not user replaceable. If the backup battery requires replacement, the netpad must be returned to a Psion Teklogix approved service centre. Important: If both the batteries run out of power you will lose all your information on the internal disk. 2.2.4 Multimedia Cards Multimedia cards (MMCs) are non-volatile memory cards, which fit into a dedicated slot in the netpad and can be used to store application software and/or data.
2.2.5 Installing And Removing The SIM Card A netpad fitted with a GSM/GPRS radio requires a Subscriber Identity Module (SIM) card installed in order for the netpad to access the GSM network. The SIM card fits into a dedicated slot in the netpad. The SIM card slot is located behind the Card Slot door on the righthand side of the netpad; and is located below the Multimedia card (MMC) slot (see Figure 2.8). Orientation of netpad (screen side up) MMC SIM Card Card Slot Door Figure 2.
Inserting The SIM Card Warning: To prevent damage to the SIM card, ensure that the netpad is switched off and the battery removed before inserting the SIM card. • Remove the battery pack from the netpad. • Open the card slot door located on the side of the unit by sliding the retaining latch. • Push the SIM card into place until it is fully inserted. Note the orientation of the card, shown in Figure 2.9, with the notch of the card on the left, trailing side. Close the door.
Removing The SIM Card Warning: To prevent damage to the SIM card, ensure that the netpad is switched off and the battery removed before removing the SIM card. • Open the card slot door and grasp the card on the cross-hatch area (see Figure 2.10), using the special removal tool supplied, a pair of tweezers, or long-nosed pliers. Pull the card out carefully. Cross-hatched Area of SIM Card (grip here with pliers) Orientation of netpad (screen side down) MMC Figure 2.
2.3 Turning On And Off To switch on: press the On/Off button on the top. Note: If the serial cable is connected to the PC and the netpad, the netpad will automatically switch on when ActiveSync on the PC is searching for a connection. To switch off: press the On/Off button on the top. Press and hold to suspend the netpad. You can switch off at any time. You do not have to save your information first, as it is automatically saved for you.
2.4 Finding And Using The Stylus The stylus is located in a holder at the right. To remove it, slide the stylus out of the top of the netpad. To replace it, push it back in. Tap lightly on the screen using the stylus. You can use your fingers to tap on the screen, though it is best to use the stylus to avoid fingerprints or smudges on the screen. Do not tap the screen with any object that has a sharp tip or you may damage the screen. Don’t use any type of ink pen, as the ink may be impossible to remove.
2.5 The Screen, Command Icons, And Toolbar The netpad screen has a column of permanent “command icons” on the right-hand side. Some of these are user-configurable via the Soft Keypad Settings icon in the Control Panel. From top to bottom, the defaults for these soft keys are: Start Menu: This icon is user-definable.Left-clicking displays the Control Panel. Right-clicking displays the command shell. Backlight control: Left-clicking displays the Brightness/Contrast control panel. Right-clicking is inactive.
2.6 How To Reset The netpad If you find that you cannot exit a program normally, right-click on the taskbar and select Task Manager from the context menu. Select the task that appears to be unresponsive and click on the End Task button. If this does not work, or if your netpad appears to have “locked up”, you can always perform a “soft reset”. This should restart your netpad while preserving most of your information.
changes to open files will be lost. Your other files on the internal disk will almost always be safe. It is possible (although unlikely) that performing a soft reset after a program failure may cause the netpad to lose the information on the internal disk; it could even prevent the reset from working at all. If this happens, you will have to perform a “hard reset”. Important: A hard reset resets the netpad completely, and all information on the Internal disk will be lost. To perform a hard reset: 1.
application’s operating instructions. The scanning beam should be energized until a successful decode is achieved or three seconds have elapsed. Scanner Window Figure 2.12 Scanner Location Warning: For your own safety, it is critical that you comply with the following warnings: 1. Do not look into the scanner window. 2. This product contains a laser scanner that emits less than 1.2 mW average radiant power at a wavelength of 650 nm. This product complies with 21 CFR 1040.10, 1040.
2.8 First Steps When you first switch on the netpad, you will see the Calibration screen. You must calibrate successfully to continue. After calibration, you will see the Time/Date control panel. Input the correct time, date, and time zone information. Click the OK button in Time/Date control panel to close and save your changes. You will then see the Windows Desktop. 2.8.1 Navigating Between Files And Folders • Double-click on a folder icon to open that folder. Click on the X icon to close it.
2.8.3 Programs And Files To create a new file: open the program, select the New command on the File menu and type in the name for the new file (see “Entering Information”, below). The file will now be created. You can start entering your information. It is a good idea to keep related files together in a folder, to make the files easier to find later. 2.8.4 Entering Information You can enter information and complete tasks using the stylus or the on-screen keyboard.
To display and set the keyboard preferences, go to the Control Panel and open the Input Panel icon. Clicking on the Options button will let you set such preferences as button size and special gestures for use with the keyboard. Note: The on-screen keyboard is the netpad’s default keyboard. It is possible that your netpad may have more than one keyboard, if you have third-party software installed. To choose which keyboard to use, go to the Control Panel and click on the Input Panel icon.
2.8.6 Using Dialogues A “dialogue” appears when you need to make selections and enter further information. You can move between dialogue items by tapping on them, or using the up and down arrow keys. Dialogues contain one or more of the following elements: Textbox: where you just type in your information. When you tap in the textbox, you will need to open the on-screen keyboard to enter text. Dropdown: where you select from a number of options.
screen by holding the stylus on the dialogue title bar and dragging it across the screen. Tabs in dialogue page Checkbox Dropdown Dialogue Buttons Dialogues usually include standard buttons such as Ok and X. Some buttons have a standard keypress equivalent: • Usually, you can tap the OK button or press the Enter key if you want to save information and remove the dialogue. • Tap the Cancel button, the X button, or press the Esc key if you want to close the dialogue without saving the information.
type of object, you will be unable to Paste. Trying to copy a file from Windows Explorer into a Wordpad document will not work because Wordpad will keep the Paste option greyed out until it detects that text is ready to be pasted. 3. The netpad Docking Station This section describes the netpad docking station. The docking station is used as a convenient “drop-in” holder for the netpad, supplying power and communications through the docking station connector. 3.
To insert the netpad into the docking station, align the two devices, and press down on the netpad until the connection is made. To eject, press down on the release button at the top of the docking station. The netpad will be pushed up and out of the docking station. While the netpad is in the docking station, the communications port on the netpad can still be used. The docking station communications port is available for convenience. You can rotate the orientation of the docking station on its stand.
4. Support Services And Worldwide Offices Psion Teklogix provides a complete range of product support services to its customers worldwide. These services include technical support and product repairs. 4.1 Technical Support Technical Support for the netpad is provided via e-mail through the Partner Program website. To reach the website, go to www.psionteklogix.com and click on the Partner Program link, which takes you to the Partner Program page.
4.3 Worldwide Offices COMPANY HEADQUARTERS AND CANADIAN SERVICE CENTRE NORTH AMERICAN HEADQUARTERS AND U.S. SERVICE CENTRE Psion Teklogix Inc. 2100 Meadowvale Boulevard Mississauga Ontario Canada L5N 7J9 Tel: +1 905 813 9900 Fax: +1 905 812 6300 E-mail: salescdn@psion.com Psion Teklogix Corp. 1810 Airport Exchange Boulevard Suite 500 Erlanger, Kentucky USA 41018 Tel: +1 859 371 6006 Fax: +1 859 371 6422 E-mail: salesusa@psion.
Psion Teklogix Finland Metsänneidonkuja 8 02130 Espoo Finland Tel: +358 9 4307 8390 Fax: +358 9 4307 8395 E-mail: tekeuro@psion.com Psion Teklogix Danmark Vesterballevej 4-6 7000 Fredericia Danmark Tel: +45 76 24 0133 Fax: +45 75 94 4679 E-mail: tedk@psion.com Psion Teklogix Italia S.r.I Via Galilei, 47 20092 Cinisello Balsamo Milan, Italy Tel: +39 2 6604 5410 Fax: +39 2 6604 5412 E-mail: tkxitalia@psion.com Psion Teklogix Inc.
Psion Teklogix España, S.L. Cityparc Ronda de Dalt Ctra. Hospitalet 147-149 Edificio Atenas 2° 3ª 08940 Cornellà de Llobregat (Barcelona) España Tel: +34 9 3475 0220 Fax: +34 9 3475 0230 E-mail: teklogix@apdo.com Psion Teklogix Systems India Pvt. Ltd. M-74, 1st Floor, “M” Block Market Greater Kailash-Il New Delhi - 110048 India Tel: +91 11 26219257 Fax: +91 11 26219076 E-mail: tekind@psion.